Introduction
This document explains the steps for performing the Recovery process for recovering a FILE IQ Appliance. In a recovery scenario, the total time to recover a FILE IQ Appliance can be reduced to approximately 15 minutes.
To recover your FILE IQ Appliance, you follow the simple steps of downloading the virtual machine again from the Nasuni account Web site, installing the product, and then completing the recovery process.
There are a number of reasons for performing a recovery of a FILE IQ Appliance, including:
Changing virtual machine platforms (Nutanix AHV, Google Cloud, Microsoft Hyper-V, VMware, Microsoft Azure, Amazon EC2).
Virtual machine hardware refresh.
Human error.
Hardware and software failures.
True disaster.
The Recovery feature is available for all licensed FILE IQ appliances. However, recovery might not be possible for the following reasons:
You have not downloaded the encryption key, or don’t remember the key password
You have not escrowed the encryption key, or do not remember the escrow passphrase
You are attempting to recover to a version of the File IQ appliance that is different from the version of the previous File IQ appliance. Usually, recovery is possible from version n to version n or from version n to version n+1, but version chokepoints or large system changes might require you to first recover to the exact same version of the File IQ appliance, then to update to the other version.
We recommend that you consult your Nasuni technical account manager before attempting the recovery of a File IQ appliance.
Note: Because recovery of FILE IQ appliances is only provided for NEA 10.0 and later, it is not possible to recover a FILE IQ based on the 9.14 or 9.15 NEA releases. The supported recovery configuration is NEA 10.0 to NEA 10.0.
Before recovering the FILE IQ Appliance
Here are some considerations before performing the recovery procedure.
Warning: Do not attempt to restore from a virtual machine snapshot or backup.
Tip: Check the File IQ Status page in the File IQ UI in order to check for configuration backup availability.
Important: To perform a recovery procedure, a backup key must have been generated or uploaded.
Important: Internet connectivity (HTTPS port 443) to the new destination FILE IQ Appliance is a prerequisite for setting up the FILE IQ Appliance, or to update software during the installation.
For details about ports and firewalls, see Firewall and Port Requirements.
Note: Downloading and executing the installation program for the virtual appliance is contingent upon the virtual platform you are using.
Tip: The following state settings, if configured, ARE NOT retained after the Recovery procedure. You should record your settings so that you can reconfigure these settings after the Recovery procedure.
Network Configuration.
Directory Services must be reconfigured.
Any volume secured by Directory Services.
A new Disaster Recovery key and passphrase must be configured.
Automatic Software Updates.
Time Zone and NTP Time Server settings.
All volumes must be re-shared Read-Only with the new FILE IQ appliance.
After the recovery reboot is complete, the FILE IQ database disk will need to be re-added, and the FILE IQ service must be re-enabled in the FILE IQ config page in the NOC.
The contents of the File IQ database are not restored. Therefore, all dashboards in Grafana are initially empty, such as after a clean installation of a new FILE IQ appliance.
Tip: The following state settings, if configured, ARE retained after the Recovery procedure.
FILE IQ appliance name, as visible in the NOC.
Volumes; however, see above about Directory Services and Read-Only access.
Connected volumes.
Snap and sync schedules (which should be disabled for all volumes on the FILE IQ appliance).
All FILE IQ configuration data, including Grafana viewer password and user theme.
Any NEA sending their events to the old FILE IQ appliance should automatically send events to the new appliance when it is discovered. However, there could be a loss of events until all NEAs are notified of the new FILE IQ appliance and download its encryption key. This is typically performed every two hours.
Preparing the original source FILE IQ Appliance (if available)
If the original source FILE IQ Appliance is running and accessible, prepare the original source FILE IQ Appliance by following these steps:
Verify that the original source FILE IQ Appliance is installed and properly configured on your network.
Verify that there is an available backup by going to the FILE IQ Status page.
Verify that a backup key has been generated or uploaded.
For the volumes that have "custom" Remote Access permissions configured, perform the recovery procedure first. Then, after the recovery procedure completes, set the custom Remote Access permissions to Read-Only for the volumes associated with the newly recovered appliance.
If the FILE IQ Appliance is under the control of the Nasuni Management Console (NMC), you can change the Remote Access permissions by clicking Remote Access on the Volumes page.
If the FILE IQ Appliance is not under the control of the Nasuni Management Console (NMC), you can change the Remote Access permissions by selecting the volume and clicking the Remote Access setting.Remove the original source Nasuni Edge Appliance from control of the Nasuni Management Console (NMC) by following these steps:
Click Services, then select Nasuni Management Console from the list. The Nasuni Management Console page appears.
From the “NMC Management is” drop-down list, click disabled.
Click Save.
Obtain the Serial Number and Authorization Code for the original source FILE IQ Appliance. You use these in step 8 on page 10.
Important: Authorization codes (also called “Auth codes”) are intended for a single use, and are not permanent. Authorization codes change if the associated serial number is used successfully, if the authorization code is refreshed via the NMC (Account Status --> Serial Numbers, then click Refresh), and if the authorization code is regenerated via the NOC
(visit https://account.nasuni.com/account/serial_numbers/, then click show, then click regen).Perform a shutdown of the original source FILE IQ Appliance, by following this procedure:
Click Power on the navigation bar at the top of the page. The Shutdown dialog box appears.
Enter a Username (case-sensitive) and Password (case-sensitive) that has permission to perform this operation.
Select “Shutdown immediately”. This shuts down the FILE IQ Appliance at once, with no preliminary operations.
Click Shutdown.
The message “The system is shutting down. Click here to cancel the shutdown.” appears at the top of the Home page.
To stop the shutdown, click the hyperlink marked “here”. You have 60 seconds to cancel the shutdown.
The message “Shutdown cancelled at user request.” appears at the top of the Home page.
The shutdown stops.If you do not stop the shutdown, after 60 seconds, the FILE IQ Appliance shuts down and the FILE IQ Appliance user interface is no longer accessible.
This completes the preparation of the FILE IQ Appliance for recovery.
Recovering the FILE IQ Appliance
The first step in recovering is to download and install the FILE IQ Appliance software on the new destination FILE IQ Appliance.
To download the FILE IQ Appliance software from the Nasuni Web site:
If you have not already done so, obtain the Serial Number and Authorization Code for the original source FILE IQ Appliance on the FILE IQ Serial Numbers page. You use these in step 8 on page 10.
There are several ways to obtain the Serial Number and Authorization Code:- If you have the credentials to log in to your Nasuni.com account, you can obtain the Serial Number and Authorization Code for the original source FILE IQ Appliance on the FILE IQ Serial Numbers page.
- Otherwise, if you do not have these credentials, obtain the Serial Number and Authorization Code for the original source FILE IQ Appliance from the person who has the credentials.
Important: Authorization codes (also called “Auth codes”) are intended for a single use, and are not permanent. Authorization codes change if the associated serial number is used successfully, if the authorization code is refreshed via the NMC (Account Status --> Serial Numbers, then click Refresh), and if the authorization code is regenerated via the NOC
(visit https://account.nasuni.com/account/serial_numbers/?app=fda, then click show, then click regen).Log in to your Nasuni account Web site (https://account.nasuni.com/) and click Downloads. The Downloads page appears.
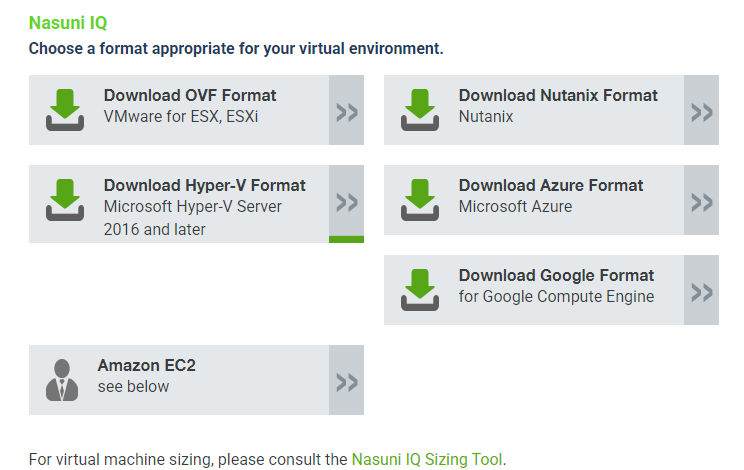
Select the appropriate format for your virtual environment from the following choices.
From the drop-down list, select an available release for the FILE IQ Appliance. The list of available releases can change.
AMAZON EC2: Scroll down to the “Appliance AMIs on EC2” area, and follow the instructions to continue installation using appliance AMIs.AZURE FORMAT: Select an available version and download the .zip file appropriate for Microsoft Azure environments.
GOOGLE CLOUD FORMAT: Select an available version and download the .tar.gz file appropriate for Google Cloud environments.
HYPER-V FORMAT: Select an available version and download the .zip file appropriate for Microsoft Hyper-V environments.
NUTANIX FORMAT: Select an available version and download the .qcow2 file appropriate for Nutanix AHV environments.
OVF FORMAT: Select an available version and download the .zip file appropriate for VMware ESXi 7.0 and above environments.
Important: When performing a recovery procedure, unsupported update paths are blocked. If so, the error message displayed during the procedure might incorrectly state that you are attempting to update to an older version. To avoid this issue, before beginning the recovery process, deploy a FILE IQ version that corresponds to the major version of the source appliance.
Note: You can perform the Recovery process to the same version of the software that you were running, or to a newer version than you were running, but not to an older version.
Note: If you already have the software installation file, you do not have to download it again. However, the software installation file must not be older than the version you are recovering.
Save the FILE IQ Appliance software file to a location on your local drive.
The amount of time to download the FILE IQ Appliance software file depends on your Internet connection. The file is approximately 900 MB in size.Extract the contents of the FILE IQ Appliance software file.
Launch the FILE IQ Appliance installation program for your platform.
Follow the setup wizard. After you have configured your network using the setup wizard, open the specific URL to continue. The “Enter your serial number and authorization code” wizard page appears.
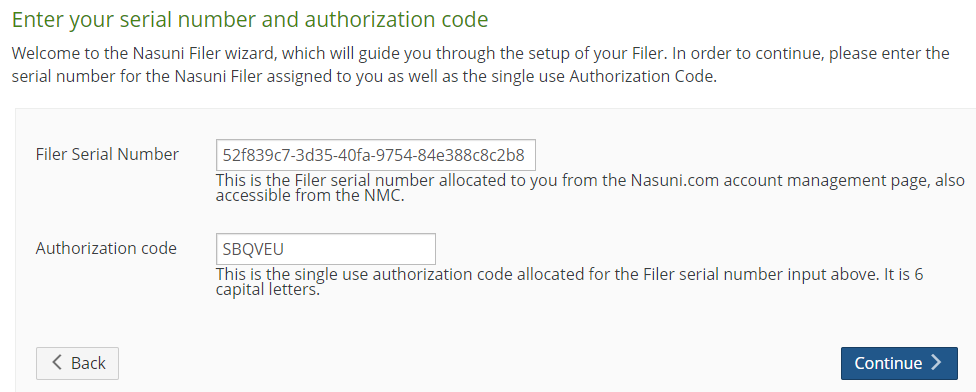
Enter the FILE IQ Serial Number and Authorization code for this FILE IQ Appliance, found on the FILE IQ Serial Numbers page.
To recover a prior installation, such as during recovery, choose the FILE IQ Appliance Serial Number of the prior installation. Click Continue to proceed.Important: Authorization codes (also called “Auth codes”) are intended for a single use, and are not permanent. Authorization codes change if the associated serial number is used successfully, if the authorization code is refreshed via the NMC (Account Status --> Serial Numbers, then click Refresh), and if the authorization code is regenerated via the NOC
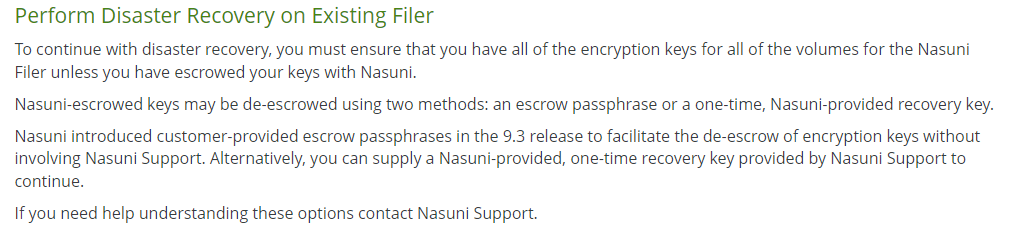
(visit https://account.nasuni.com/account/serial_numbers/?app=fda, then click show, then click regen).The “Perform Disaster Recovery on existing Filer” page appears.
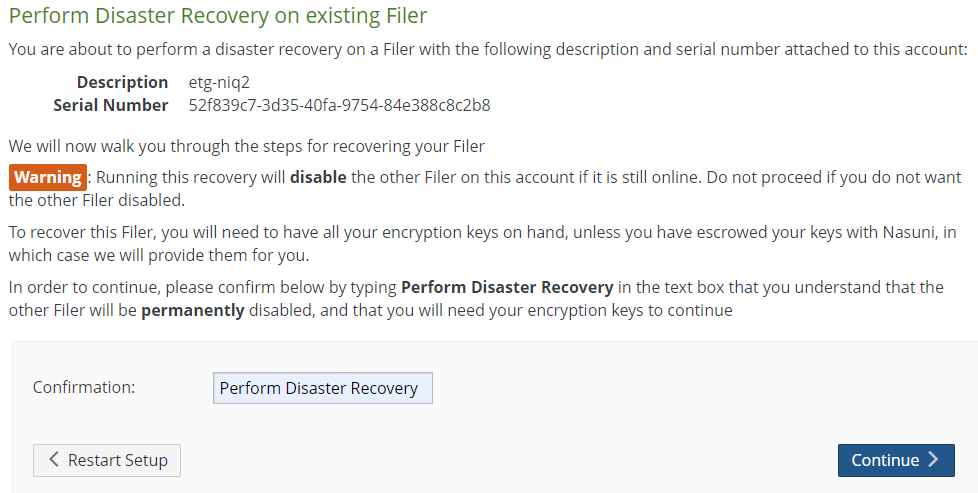
Enter “Perform Disaster Recovery” (without the quotation marks) in the Confirmation text box, then click Continue to proceed.
Note: After performing this step, the original source FILE IQ Appliance is decommissioned.
If there is a more recent version than the version that you are attempting to install, the Software Update page appears.
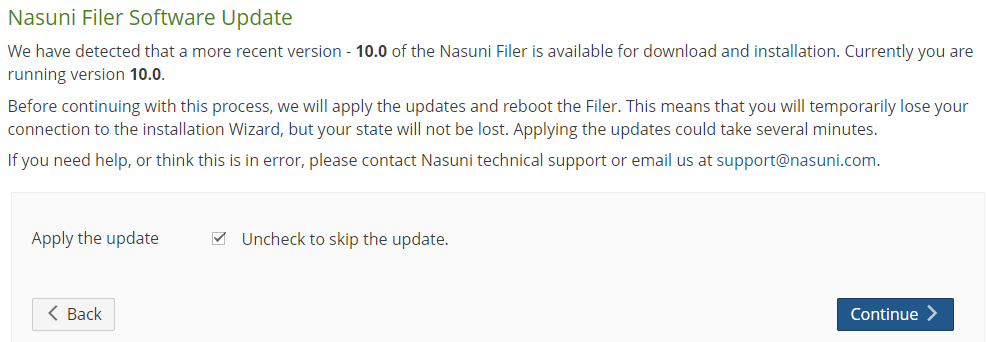
To apply the suggested update, select “Apply the update” and click Continue. The update is installed.
Otherwise, make sure that “Apply the update” is not selected, and click Continue.If you selected “Apply the update”, the Applying Updates page appears.
.png)
The update is installed.
Tip: The Web-based display might update several times during the installation of the update. Because some Web browsers cache the display, we recommend clearing the browser cache.
After the update and reboot are complete, you are directed to the next step of the wizard.
Alternatively, you can click the link “here” to proceed to the next step and wait for the reboot to finish.The second “Perform Disaster Recovery on existing Filer” page appears.
If you escrowed any of your encryption keys (including the backup key) with Nasuni, and you intend to use your escrow passphrase to de-escrow your escrowed encryption keys, perform the following steps:
Select “Yes - Escrow Passphrase” from the drop-down list.
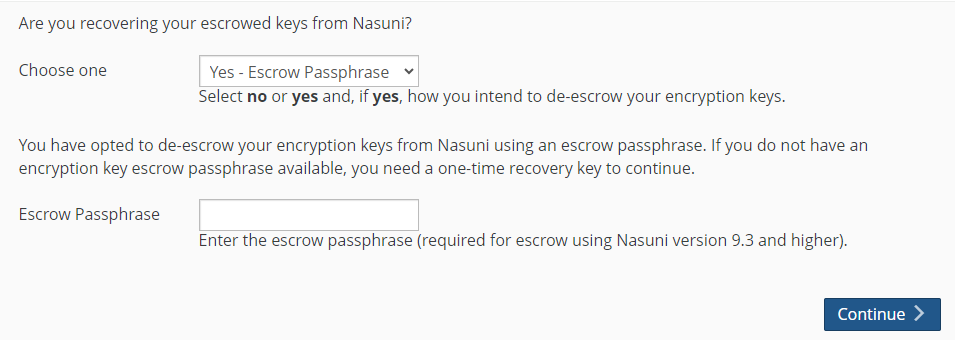
Tip: You can select Yes even if you also have non-escrowed encryption keys, which you would then provide separately.
The Escrow Passphrase pane becomes available.
.png)
If you do not have an encryption key escrow passphrase available, skip to the next step a.
Alternatively, if you set an encryption key escrow passphrase and you have the escrow passphrase, enter the escrow passphrase.Click Continue.
Important: If you have previously escrowed your encryption keys with Nasuni, and you use these escrowed encryption keys as part of the recovery process, you MUST re-escrow those encryption keys with Nasuni if you want those encryption keys to continue to be escrowed with Nasuni. After the recovery is complete, the FILE IQ Appliance treats all encryption keys as if they were not created by this FILE IQ Appliance.
Continue with step 15.
If you escrowed any of your encryption keys (including the backup key) with Nasuni, and you intend to have Nasuni de-escrow your escrowed encryption keys, perform the following steps:
a. Select “Yes - Recovery Key” from the drop-down list.
.png)
Tip: You can select Yes even if you also have non-escrowed encryption keys, which you would then provide separately.b. The Recovery Key pane becomes available.
.png)
c. Contact Nasuni Support to verify your identity and obtain your one-time-use recovery key. Then enter the Recovery Key.
d. Click Continue.
Important: If you have previously escrowed your encryption keys with Nasuni, and you use these escrowed encryption keys as part of the recovery process, you MUST re-escrow those encryption keys with Nasuni if you want those encryption keys to continue to be escrowed with Nasuni. After the recovery is complete, the FILE IQ Appliance treats all encryption keys as if they were not created by this FILE IQ Appliance.
f. Continue with step 15.
Otherwise, select No from the drop-down list, then click Continue.

This means that either:
You do not have any encryption keys escrowed with Nasuni at all.
Or you do have encryption keys escrowed with Nasuni, but you intend to provide your escrowed encryption keys yourself.
If you selected No, the Upload Encryption Keys page appears.
.png)
Click Choose File to navigate to your encryption key file. This should be an encryption key file for an encryption key that you have used before. Do not use this step to upload new encryption keys. This encryption key file is a .pgp file.
Caution: The maximum length of a file name is 255 bytes. In addition, the length of a path, including the file name, must be less than 4,000 bytes. Since the UTF-8 representation of characters from some character sets can occupy several bytes, the maximum number of characters that a file path or a file name might contain can vary. If a particular client has other limits, the smaller of the two limits applies.
Enter the Key Passphrase, if necessary, then click Upload Key(s).
The selected encryption keys are uploaded. (For security reasons, encryption keys that you upload cannot be downloaded from the system.)All uploaded encryption keys must be at least 2048 bits long.
Note: If an uploaded encryption key has an associated passphrase, that passphrase is removed from the encryption key when it is uploaded. The FILE IQ Appliance does not need the passphrase in order to use the encryption key. However, if you do not escrow this encryption key, and if you ever perform a recovery procedure on the FILE IQ Appliance, you must provide that passphrase when you upload that encryption key during the recovery procedure.
If several encryption key files are necessary, the Upload Encryption Keys page could appear several times. These encryption key files should be for encryption keys that you have used before. Do not use this step to upload new encryption keys.
The “Ready to perform disaster recovery!” page appears.

Click Continue.
The “Disaster Recovery of your File IQ Appliance” page appears.
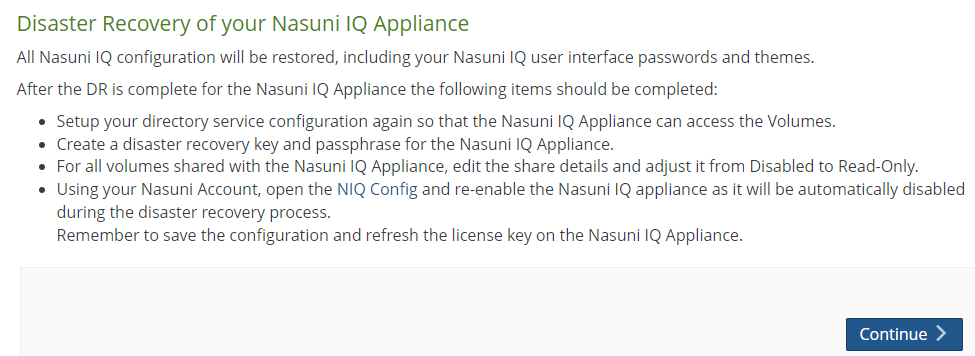
This lists the tasks that you must perform after the recovery of the FILE IQ Appliance.
Click Continue.
Recovery of the FILE IQ Appliance begins.After recovery, the Filer Recovery Complete page appears.
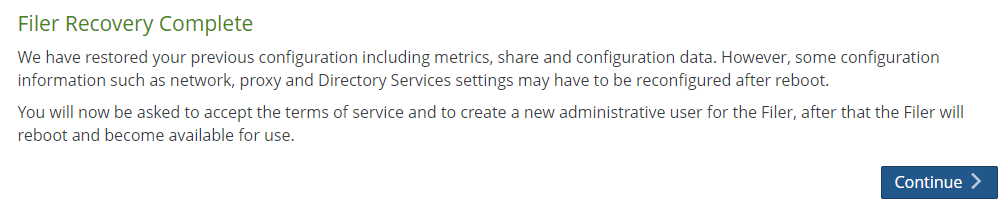
Click Continue. The “Terms of Service and License Agreement” page appears.
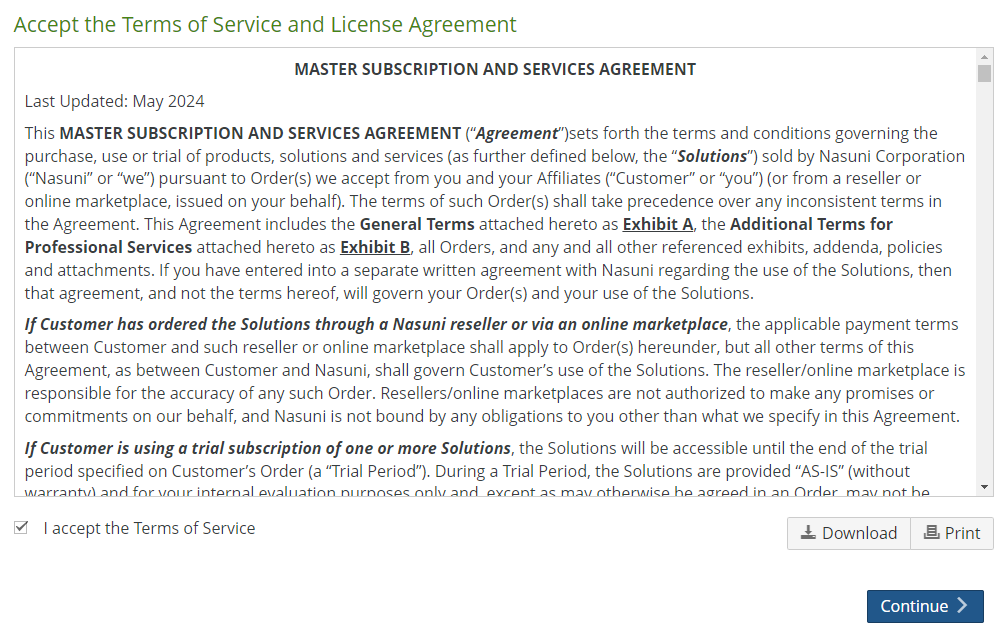
You can print or download a copy of the Terms of Service and License Agreement by clicking the appropriate icon.
Select I accept the Terms of Service, then click Continue.
The “Enter a username and password for Administration of this Filer” page appears.
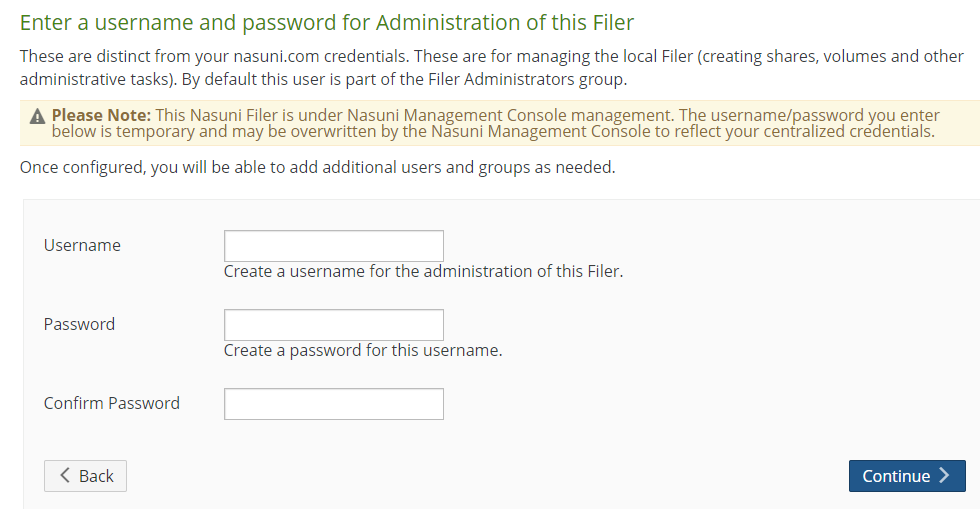
Set up an administrator for the FILE IQ Appliance by creating a Username (case- sensitive) and a Password (case-sensitive). An indicator of password strength appears. Although password strength is not enforced, you should use strong passwords. The newly defined user is automatically a member of the Filer Administrators permission group for this FILE IQ Appliance.
Note: If the appliance is managed by the NMC, the entered username and password might be overwritten by credentials from the NMC.
Click Continue.
The recovery and restoration process is complete. The Configuration Complete page appears.

You can reboot the FILE IQ Appliance, or click the link “here” to proceed directly to the Login page.
Note: When a reboot is requested, a notification is logged that the reboot was requested and by whom the reboot was requested.
The FILE IQ Appliance becomes available in a few moments. The Login page appears.
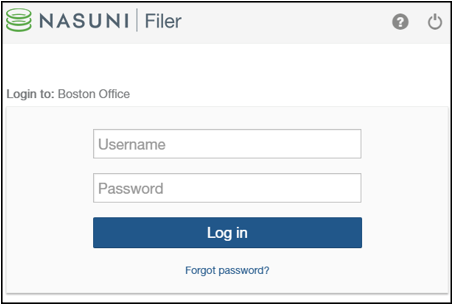
Log in to the FILE IQ Appliance with your Username (case-sensitive) and Password (case-sensitive). Click Log in.
Important: If the previous FILE IQ Appliance was in Active Directory mode, you must re-join Active Directory to maintain ACL support. Similarly, if the previous FILE IQ Appliance was in LDAP, you must re-join LDAP.
With the new instance of the FILE IQ Appliance running, you have regained access to your volumes and data. You can access volumes and data using the CIFS shares, NFS exports, or FTP directories that you created. Folders and files are available.
Tip: If this FILE IQ Appliance previously accessed a volume with custom permissions for Remote Access, you must explicitly set those permissions for this FILE IQ Appliance.
Important: If you have previously escrowed your encryption keys with Nasuni, and you used these escrowed encryption keys as part of the recovery process, you MUST re- escrow those encryption keys with Nasuni if you want those encryption keys to continue to be escrowed with Nasuni. After the recovery is complete, the FILE IQ Appliance treats all encryption keys as if they were not created by this FILE IQ Appliance.
Tip: A best practice for FILE IQ Appliances is to join an Active Directory or LDAP domain as soon as recovery is complete. If the previous FILE IQ Appliance was in Active Directory or LDAP mode, re-join Active Directory or LDAP by clicking ‘Save Settings’.
Tip: The following state settings, if configured, ARE NOT retained after the Recovery procedure. You should reconfigure these settings after the Recovery procedure.
Network Configuration.
Directory Services must be reconfigured.
Any volume secured by Directory Services.
A new Disaster Recovery key and passphrase must be configured.
Automatic Software Updates.
Time Zone and NTP Time Server settings.
All volumes must be re-shared Read-Only with the new FILE IQ appliance.
After the recovery reboot is complete, the FILE IQ database disk will need to be re-added, and the FILE IQ service must be re-enabled in the FILE IQ config page in the NOC.
All dashboards in Grafana are initially empty, such as after a clean installation of a new FILE IQ appliance.
Tip: The following state settings, if configured, ARE retained after the Recovery procedure.
FILE IQ appliance name, as visible in the NOC.
Volumes; however, see above about Directory Services and Read-Only access.
Connected volumes.
Snap and sync schedules (which should be disabled for all volumes on the FILE IQ appliance).
All FILE IQ configuration data, including Grafana viewer password and user theme.
Any NEA sending their events to the old FILE IQ appliance should automatically send events to the new appliance when it is discovered. However, there could be a loss of events until all NEAs are notified of the new FILE IQ appliance and download its encryption key. This is typically performed every two hours.
This concludes the FILE IQ recovery wizard. Additional steps are in the next section.
Final steps required for File IQ appliances
The following steps are required in order to finalize the File IQ recovery process. These steps are described in more detail in each File IQ Installation guide.
Platform | Installation guide |
Amazon EC2 | |
Microsoft Azure | |
Microsoft Hyper-V | |
Nutanix AHV | |
VMware ESXi |
To finalize the recovery, perform the following steps:
Add the FILE IQDB Disk to the recovered FILE IQ Appliance.
Connect the Nasuni Volumes to the recovered FILE IQ Appliance.
Volumes should automatically reconnect as part of the recovery process. However, you should double check the following points:If you have not already done so, re-join the recovered File IQ appliance to your directory service, if needed.
Ensure that all volumes are shared with the recovered File IQ appliance with custom Read-Only access, because this is not preserved by the recovery process.
Ensure that all volumes have Snap and Sync schedules disabled for the recovered File IQ appliance. If volumes were previously configured correctly, this is restored as part of the recovery process.
Disable Quality of Service (QoS) for the recovered File IQ appliance.
Enable File IQ in the FILE IQ Config page in the NOC (https://account.nasuni.com/account/manage_FILE IQ_config/).
Force the Configuration to be applied on the recovered FILE IQ Appliance, by refreshing the FILE IQ license on the NMC.
If not already done as part of the previous section:
Configure a new Disaster Recovery key and passphrase and download it.
Configure Automatic Software Updates.
Configure Time Zone and NTP Time Server settings.
Navigate to the File IQ Status page in the UI in the FILE IQ Appliance and verify that all checks are successful.
Note that some checks take some time to pass.
Checks related to the File IQ event queue may take a few minutes to pass.
Nasuni audit events received only clear when NEAs discover the new File IQ appliance and start sending events to it with the correct encryption key. This can take up to two hours or so, and only happens when there is usage on the NEA from an end user of the NEA.
Verify connectivity to Grafana by using the viewer account with your previous password.
The viewer password is backed up and is restored as part of the recovery process.
Note that, because the File IQ database is not restored, all reports are initially empty.
Events start flowing from all NEAs previously connected to the old FILE IQ appliance within two hours. You can use the Event Inspector to monitor events in real time.
Audit Event aggregation happens every two hours. Therefore, you might have to wait for up to two hours before seeing events in other Activity and Audit Events dashboards. You can use the Service Support dashboard to track Audit Events Aggregation History.
Shared volumes are scanned consecutively in the background. Depending on the number and size of your volumes, the initial scan might take several hours or days. Volumes start appearing in the various Metadata reports as their corresponding scan completes. You can use the Service Support dashboard to track volume scan progress. Volumes that are connected after the first Metadata scan starts only begin to be processed in the next 24-hour cycle.