Overview
This guide explains how to connect Azure AI Search to Nasuni Data Service (NDS) for Azure so you can index file content and metadata stored in Nasuni volumes. It focuses on NDS-specific configuration (endpoints, sample JSON, and index-schema guidance) while pointing you to Microsoft documentation for general Azure AI Search concepts (Data Sources, Indexers, Skillsets).
For general Azure AI Search concepts such as creating Data Sources, Indexers, and Skillsets, refer to Microsoft’s official documentation.
Prerequisites
Before beginning, ensure you have the following:
An NDS for Azure deployment connected to one or more Nasuni volumes, and the connection information.
An Azure AI Search service in your Azure subscription.
Familiarity with key Azure AI Search components (Data Source, Indexer, Indexes, and so forth).
Cost Awareness
Important: Indexing large datasets can incur significant Azure charges. Scope your first index to a small folder or test volume until you understand cost drivers.
Refer to Nasuni’s Azure AI Search Cost Awareness Tips for additional information and best practices.
Configure the Connection
1 - Collect Inputs
Parameter | Description | Example |
|---|---|---|
<your-data-source-name> | A unique name for the data source | |
<your-nds-connection-string> | Your NDS connection string, including the SAS token. |
|
<your-nds-container> | The container name (Nasuni Volume GUID) to access. |
|
<your-container-query> (optional) | Sub-directory within the container/volume to index. |
|
2 - Create the Data Source
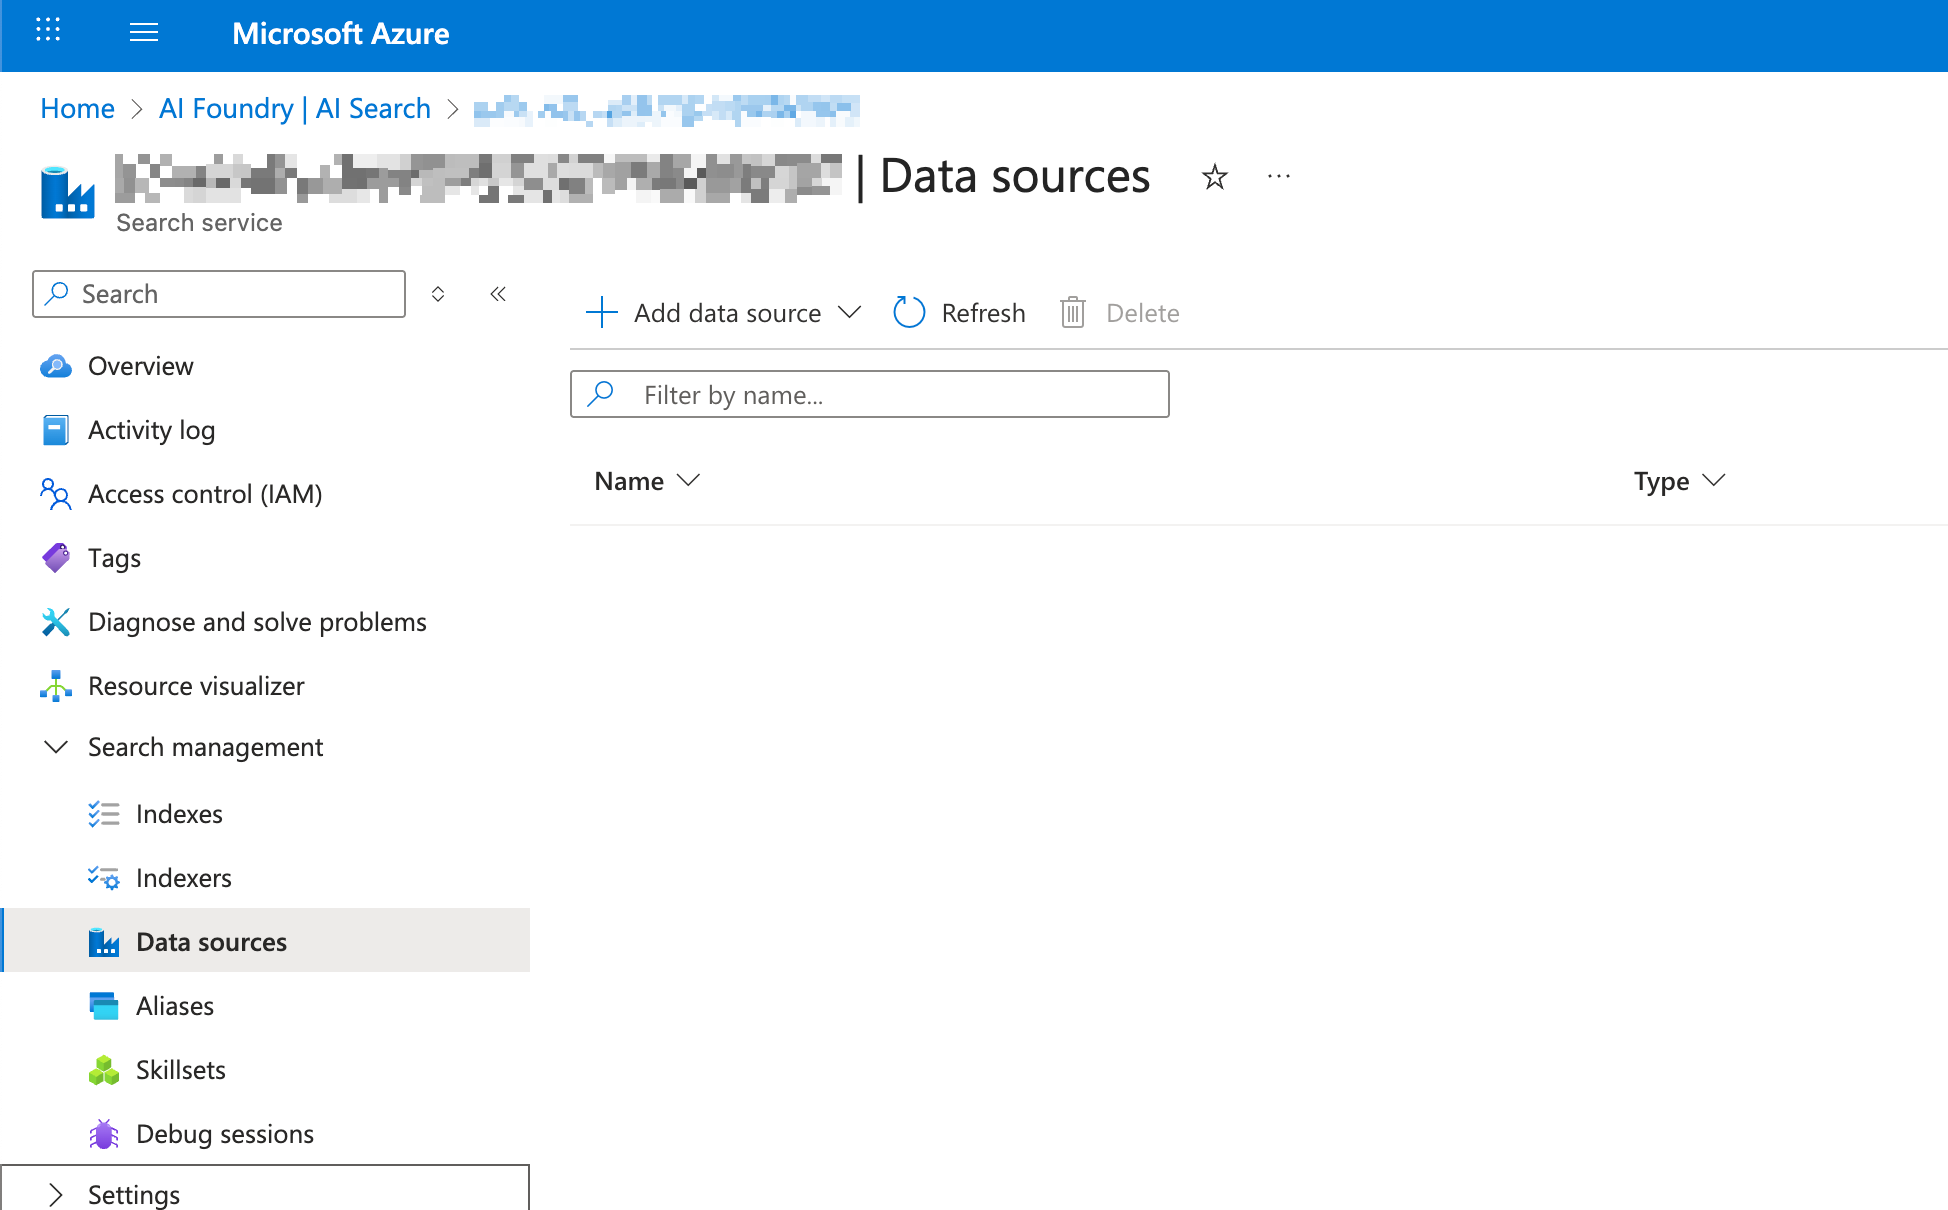
In the Azure Portal, navigate to your Search Service and open the Data Sources section.

Click Add data source > Add data source (JSON).
Paste the JSON below, replacing placeholders with your values.
{
"name": "<your-data-source-name>",
"type": "azureblob",
"credentials": {
"connectionString": "<your-nds-connection-string>"
},
"container": {
"name": "<your-nds-container>",
"query": "<your-container-query>"
}
}
Example:
{
"name": "nasuni-nds-connection",
"type": "azureblob",
"credentials": {
"connectionString": "BlobEndpoint=https://nds.uniquevalue.azurecontainerapps.io;SharedAccessSignature=sv=2025-05-05&ss=b&srt=s&st=2025-06-19T20%3A59%3A09Z&se=2030-12-31T05%3A00%3A00Z&sp=rl&sig=D4fyxagfi4Q6wnPrXEmBc5Umo%3D;"
},
"container": {
"name": "5753b527-103c-4671-8f70-aee172b54-4",
"query": "Accounting/North America/"
}
}
Click Create to finish.
3 (Optional) - Define a Skillset for AI Enrichment
Azure AI Search Skillsets allow you to enrich your indexed data by applying AI capabilities. This includes key phrase extraction, entity recognition, image analysis, and language detection. The enrichment occurs before data is written to the index.
If you want to extend your indexing pipeline with these capabilities, you can create a Skillset after defining your Data Source.
Skillsets rely on other Azure services (such as Azure Cognitive Services) and may require additional configuration, permissions, and Azure costs. This section provides a starting point with a sample JSON template to help you explore this functionality.
Note: While we’re providing this example as a helpful guide, we recommend consulting Microsoft’s documentation and your Azure team for detailed configuration of Skillsets to match your specific use case.
Here’s an example Skillset definition that uses built-in AI skills for text enrichment:
{
  "name": "nds-skillset",
  "description": "Extract key phrases and detect language for NDS data",
  "skills": [
    {
      "@odata.type": "#Microsoft.Skills.Text.KeyPhraseExtractionSkill",
      "name": "key-phrases",
      "description": "Extract key phrases from content",
      "context": "/document",
      "inputs": [
        {
          "name": "text",
          "source": "/document/content"
        }
      ],
      "outputs": [
        {
          "name": "keyPhrases",
          "targetName": "keyPhrases"
        }
      ]
    },
    {
      "@odata.type": "#Microsoft.Skills.Text.LanguageDetectionSkill",
      "name": "language-detection",
      "description": "Detect language of the content",
      "context": "/document",
      "inputs": [
        {
          "name": "text",
          "source": "/document/content"
        }
      ],
      "outputs": [
        {
          "name": "languageName",
          "targetName": "language"
        }
      ]
    }
  ]
}
To use a Skillset:
Define it in Azure AI Search (via the portal or JSON API).
Reference the Skillset name in your Indexer configuration.
Review Microsoft’s documentation for additional skill types and guidance on integrating with Cognitive Services:
4 - Create the Index
Navigate to Indexes, and click Add index > Add index.
Define your index schema by specifying fields. We recommend starting with the following fields:
Field name | Type | Retrievable | Filterable Facetable | Searchable | Description |
|---|---|---|---|---|---|
id 🔑 | String | Yes | No | No | Unique identifier for each document. |
content | String | Yes | No | Yes | The text extracted from file content. |
metadata_storage_name | String | Yes | No | Yes | Name of the file with its file type extension. |
metadata_storage_path | String | Yes | No | Yes | The complete path to the indexed file in URL format, beginning with your NDS endpoint. |
.png)
Additional fields can be added based on your indexing needs. Refer to the Azure documentation for additional details about content metadata properties. If you connect to your NDS endpoint using a tool like Azure Storage Explorer, you can view the metadata of a file to see the metadata presented by NDS that is available for indexing.
Click Create.
5 - Create the Indexer
Navigate to Indexers, and click Add indexer > Add indexer.
Name the indexer, and select the Datasource and Index you previously created. Click Save.
The indexer automatically begins an initial run.
6 - Validate the Index
Allow the initial Indexer run to complete.

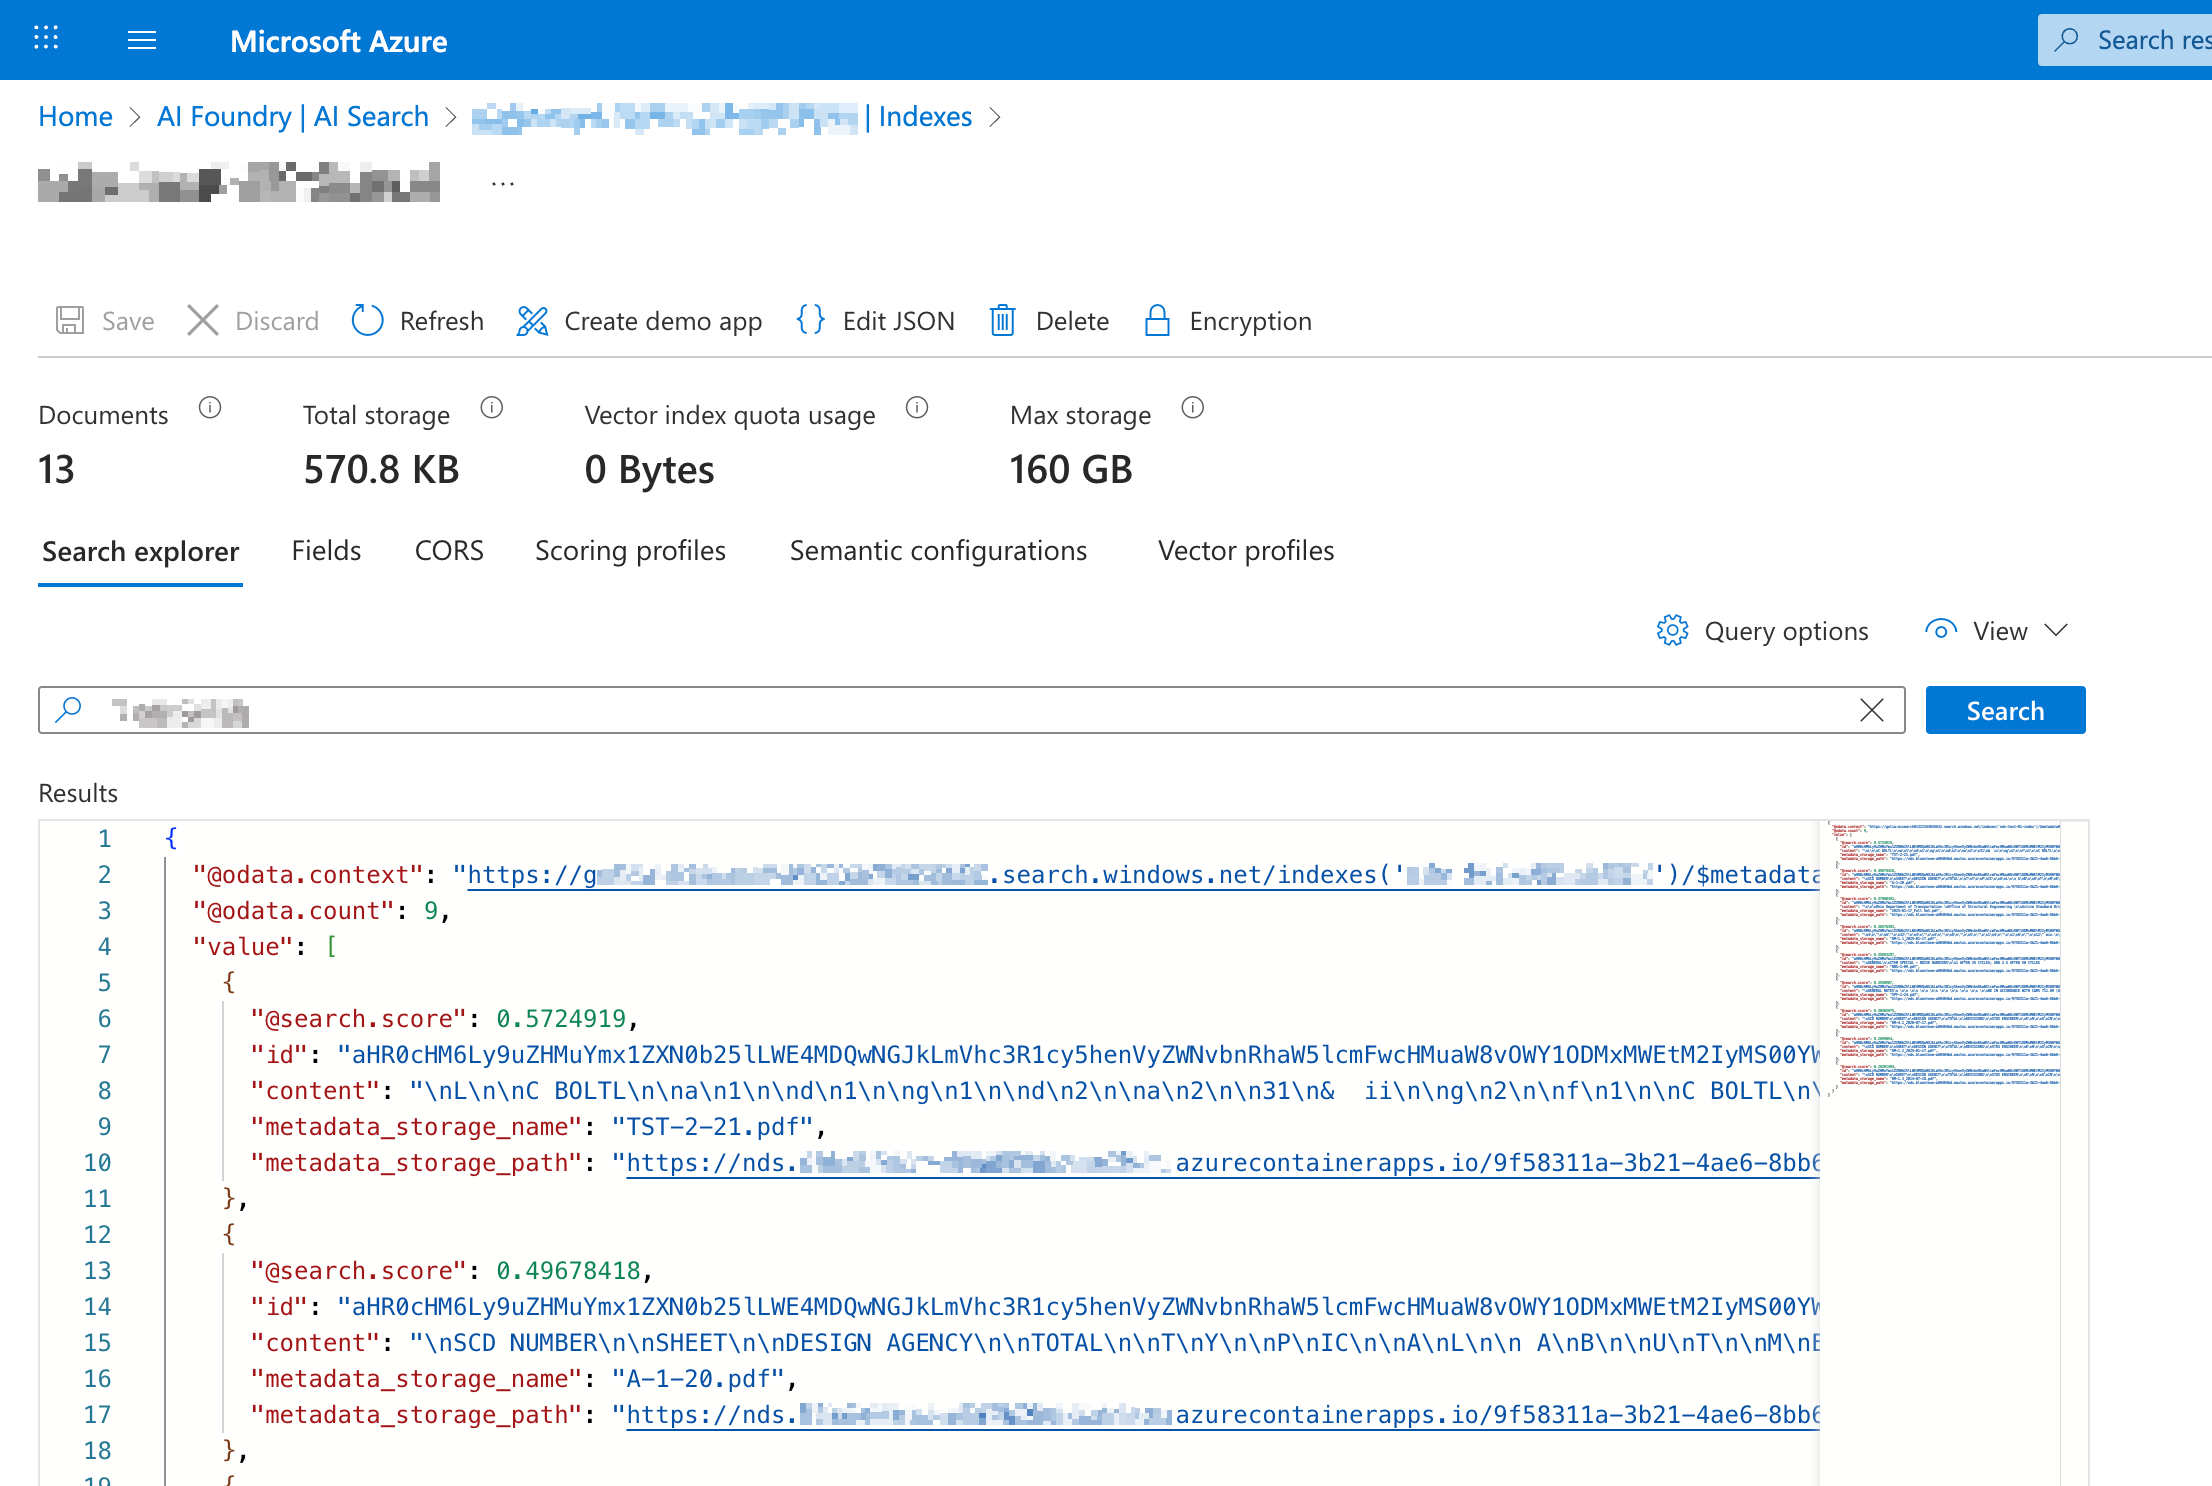
Navigate to Indexes and select your index. Search for a known phrase or file name to confirm documents were ingested successfully (for example, a phrase from a document that has been indexed).
