How to Set Up an AWS Application Load Balancer
Setting up an Application Load Balancer (ALB) in AWS requires certain prerequisites and a series of steps to ensure proper configuration. Follow this guide to set up your ALB efficiently.
Prerequisites
NEA should already be deployed in AWS EC2.
NEA should join NMC.
A certificate should already be created.
Access to DNS to set up the FQDN.
Full access to Amazon EC2.
Configuring the Load Balancer
To set up the load balancer, follow these steps:
Log in to the AWS Console.
Navigate to the EC2 section.
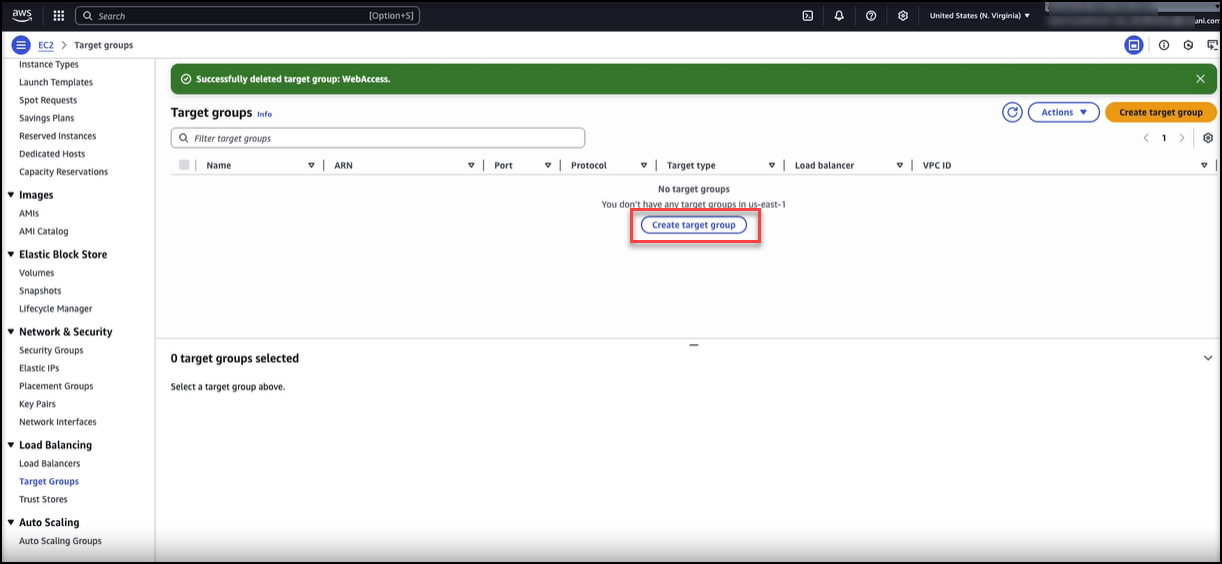
From the left-side menu, navigate to Load Balancing and click Target Groups.
Click Create target group.
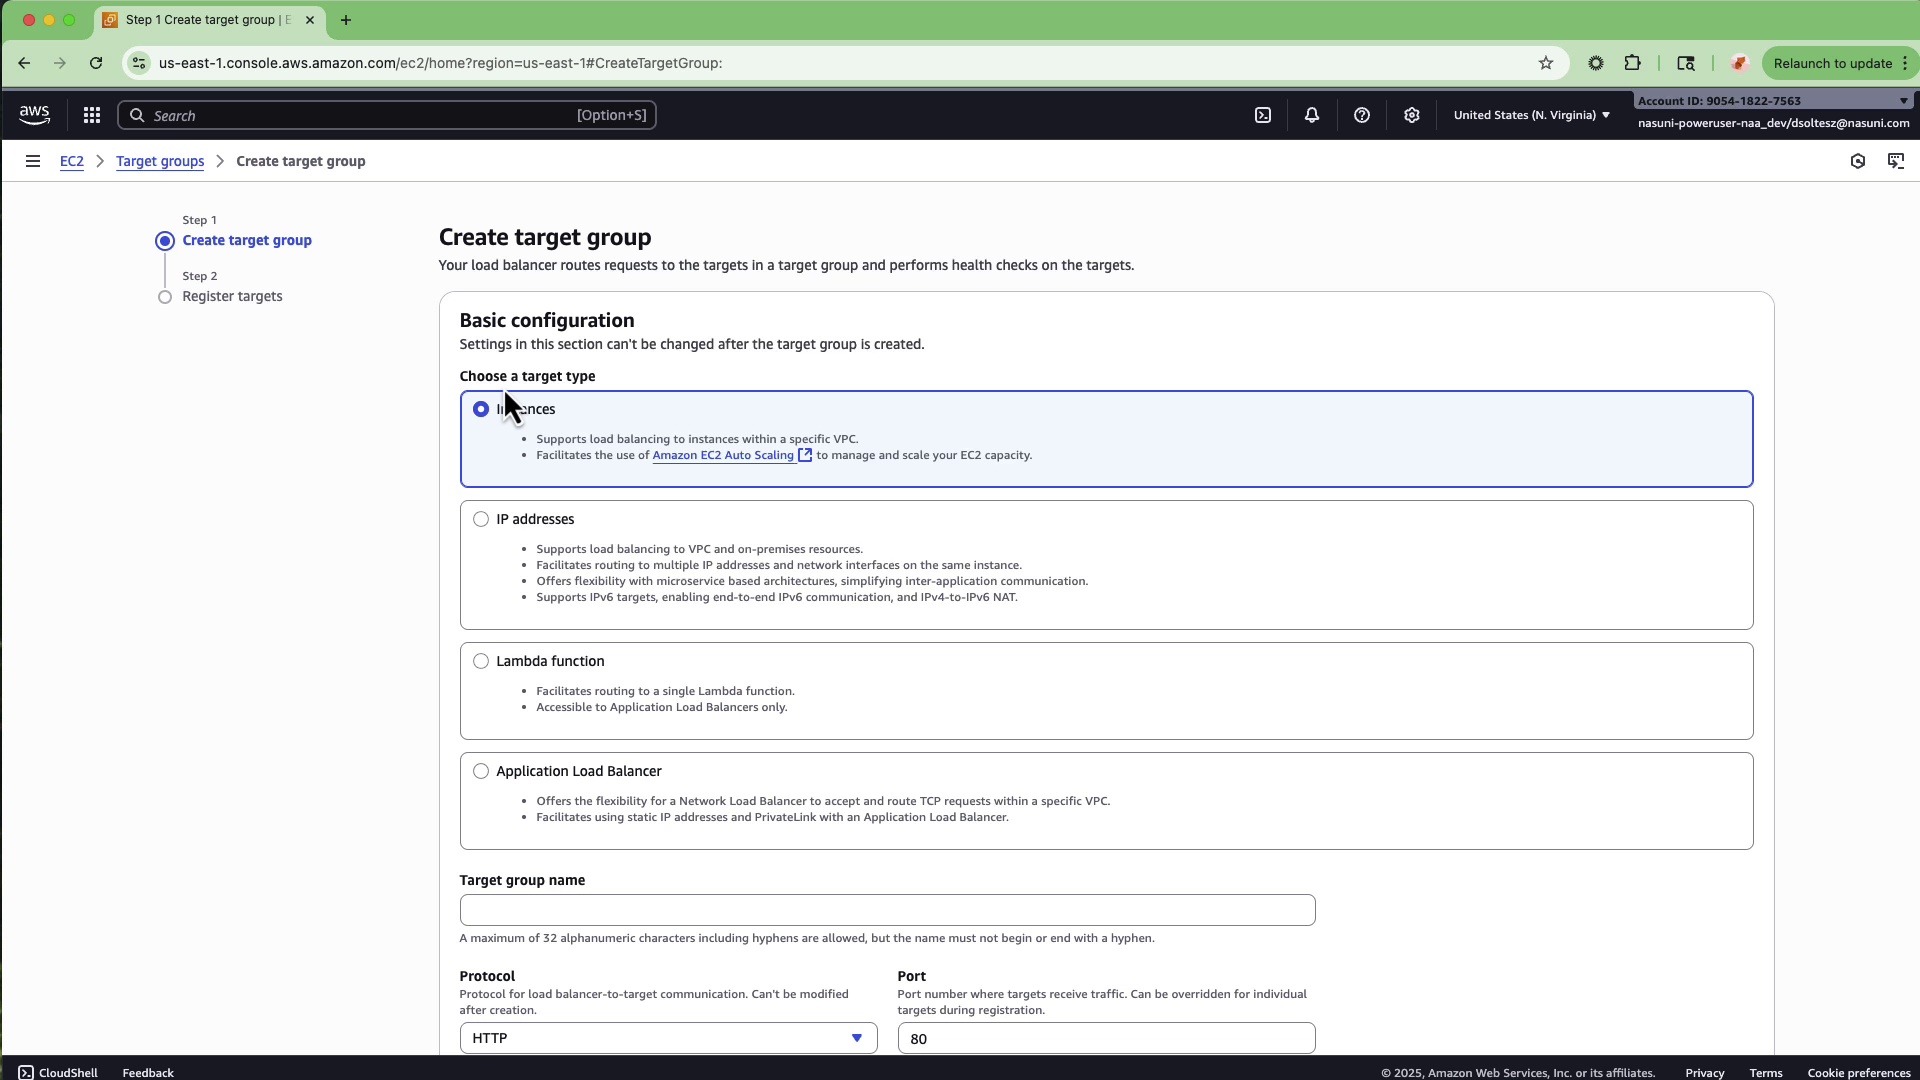
Under Create target group, click the Instances radio button.
Enter a Target group name.
Click the Protocol drop-down and select HTTPS.
In the Port field, enter “443“.
Under IP address type, click the IPv4 radio button.
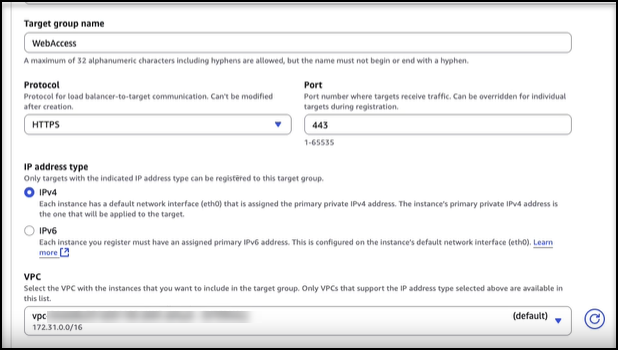
Click the VPC drop-down and choose the VPC that the instance is currently running in.
Under Protocol version, click the HTTP1 radio button.
Under Health check protocol, select HTTPS.
In the Health check path, enter “/fs/auth/login“.
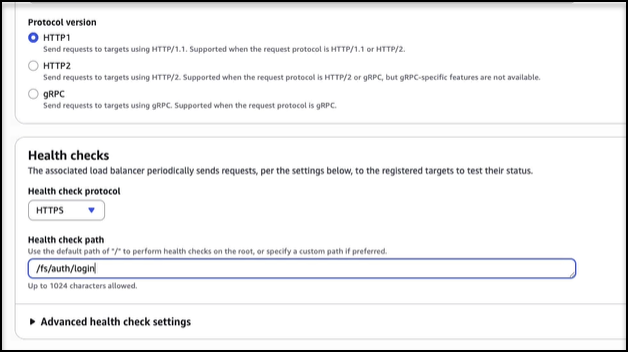
Click Next.
On the Register Targets page, select the Nasuni Edge Appliance that is running Web Access.
Click Include as pending below.
Scroll to the bottom of the page and click Create target group.
From the left-side menu, navigate to Load Balancing and click Load Balancers.
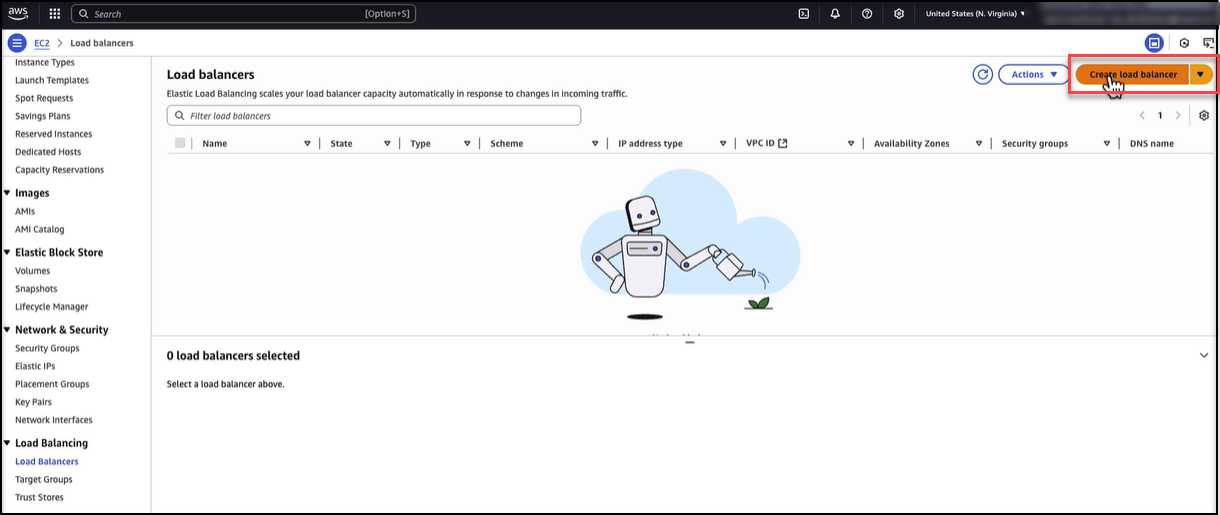
Under Application Load Balancer, click Create.
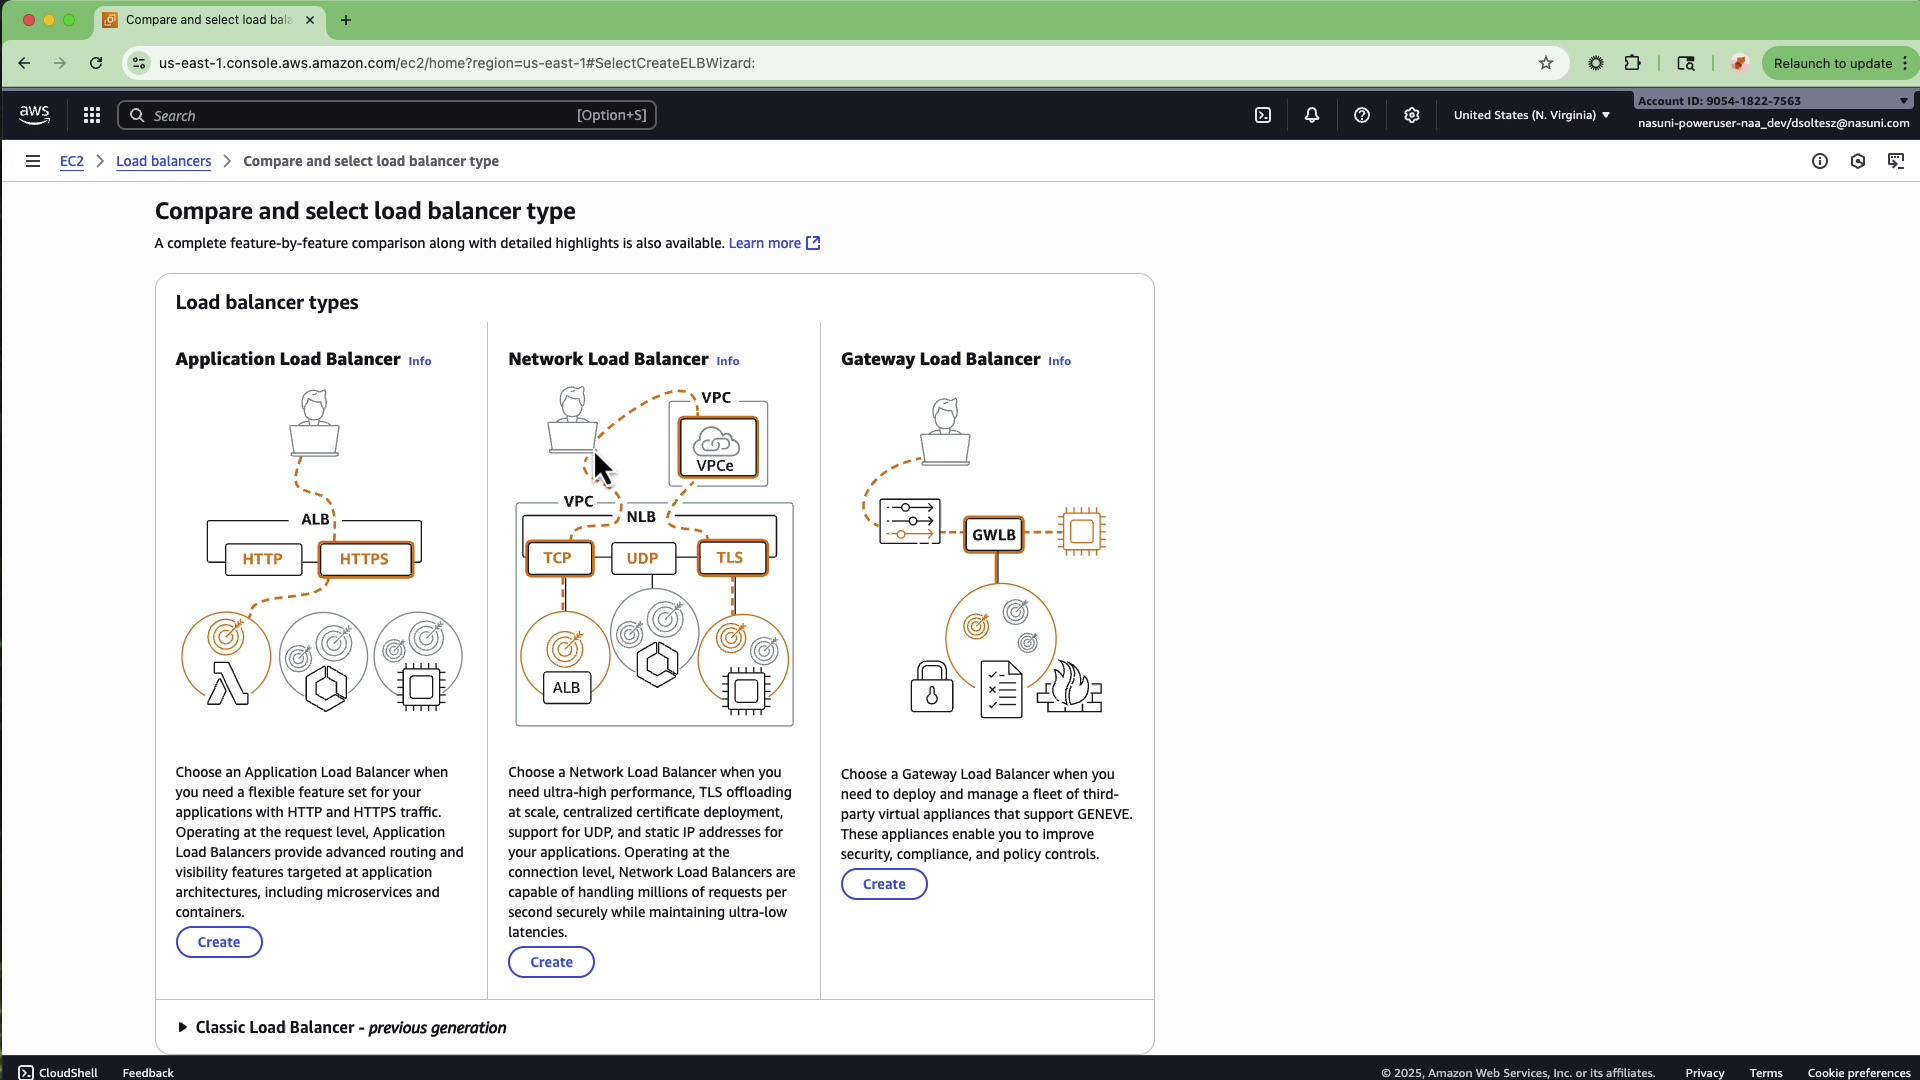
Enter a Load balancer name.
Under Scheme, choose Internet-facing.
Under Load balancer IP address type, click IPv4.
Click the VPC drop-down and select the VPC with internal access.
Under Availability zones and subnets, choose at least two subnets.
Using the Security groups drop-down, choose a security group that has access to HTTP and HTTPS.
Under Listeners and routing, navigate to the Protocol field and select HTTPS from the drop-down.
In the Port field, enter “443“.
Under Routing action, choose the Forward to target groups option.
Use the Target group drop-down to select the previously created Web Access target group.
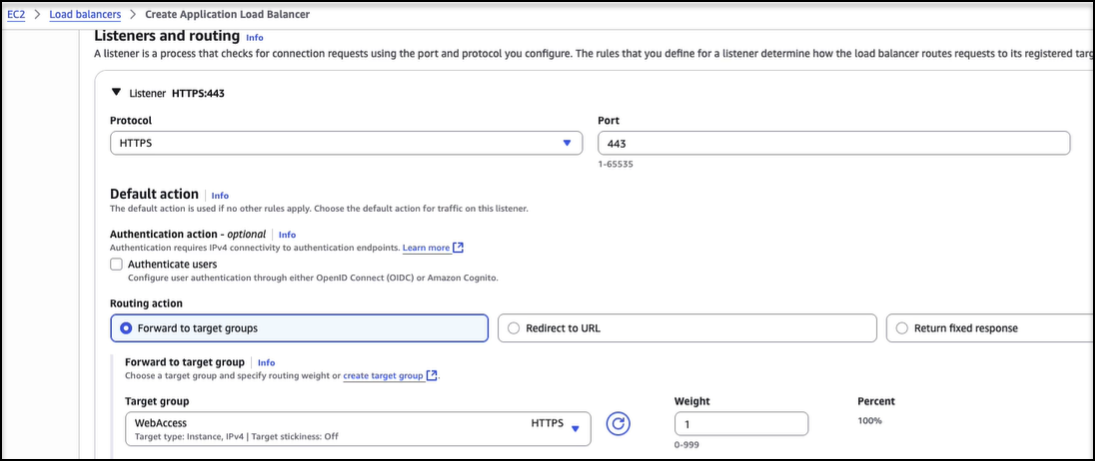
Scroll down to Secure listener settings, click the Policy name drop-down, and select the latest TLS policy.
Under Default SSL/TLS server certificate, choose to have AWS create a certificate or import a certificate.
If importing a certificate, enter the Certificate private key, Certificate body, and Certificate chain.
Note: Do not check the Mutual authentication (mTLS) checkbox.
Click Create load balancer.
(Optional) To automatically redirect HTTP traffic to HTTPS, follow these steps:
Click Add listener.
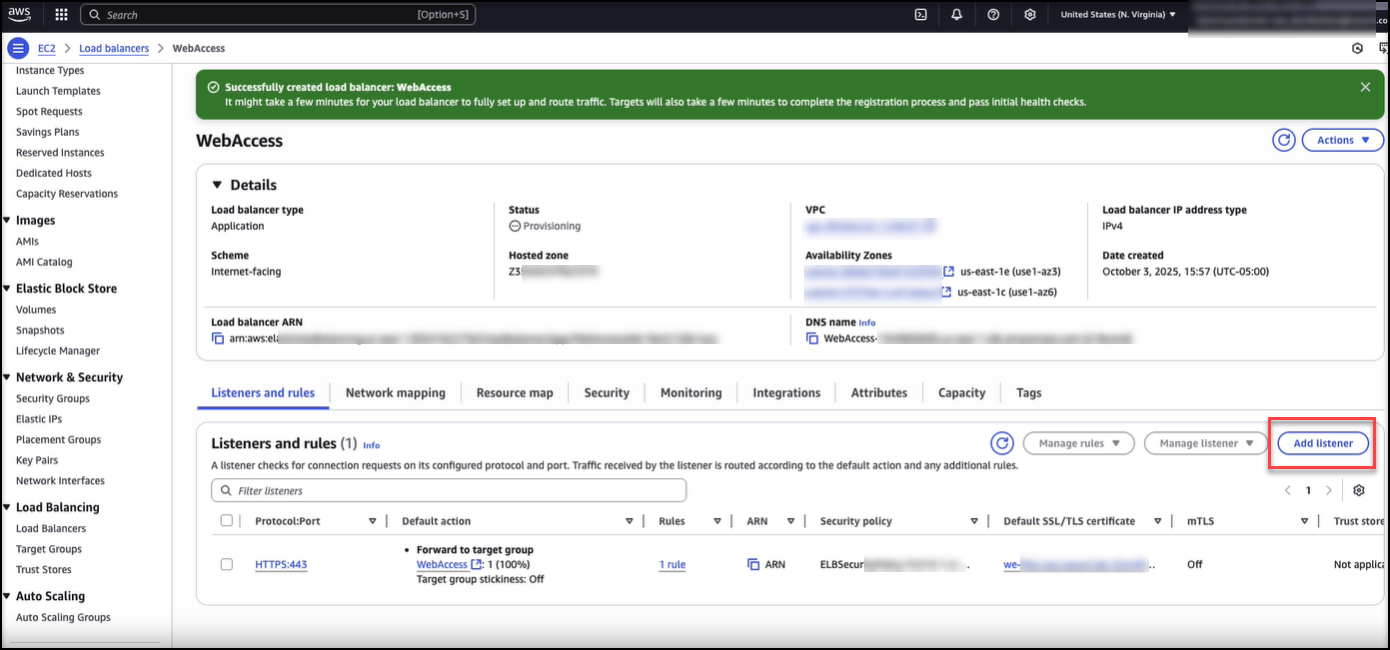
From the Protocol drop-down, select HTTP.
From the Port drop-down, select 80.
Under the Routing action, click the Redirect to URL option.
Under Redirect to URL, click Full URL.
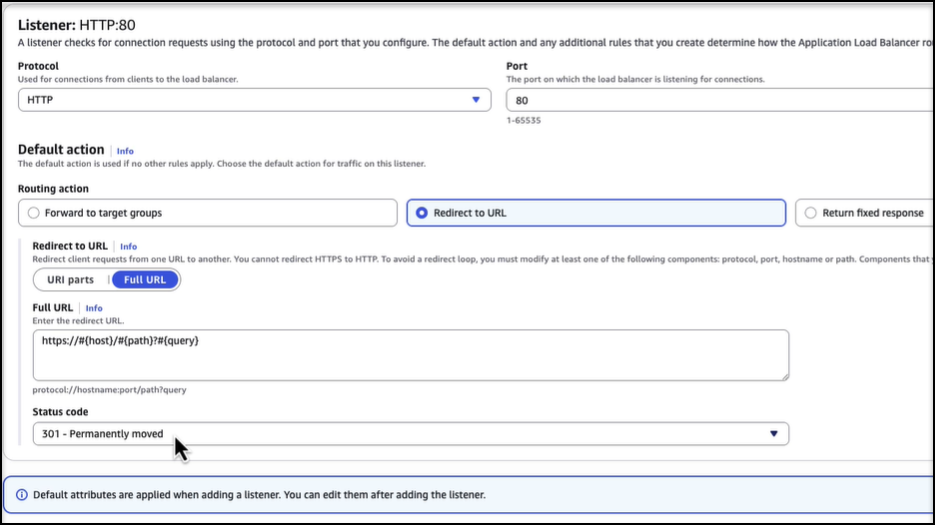
Click Add listener.
From the left-side menu, under Load Balancing, click Target Groups.
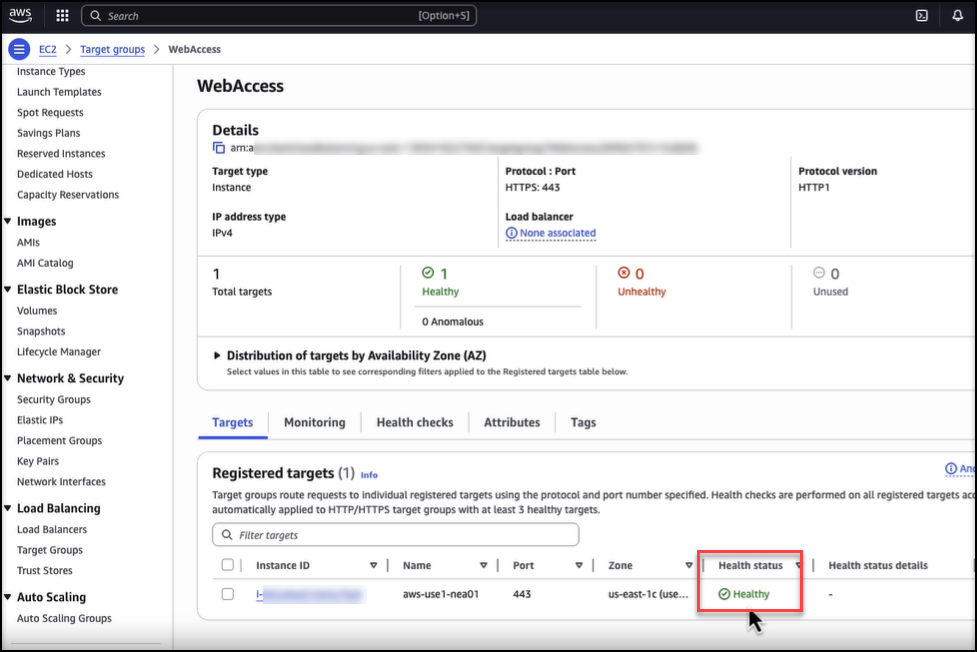
Select WebAccess.
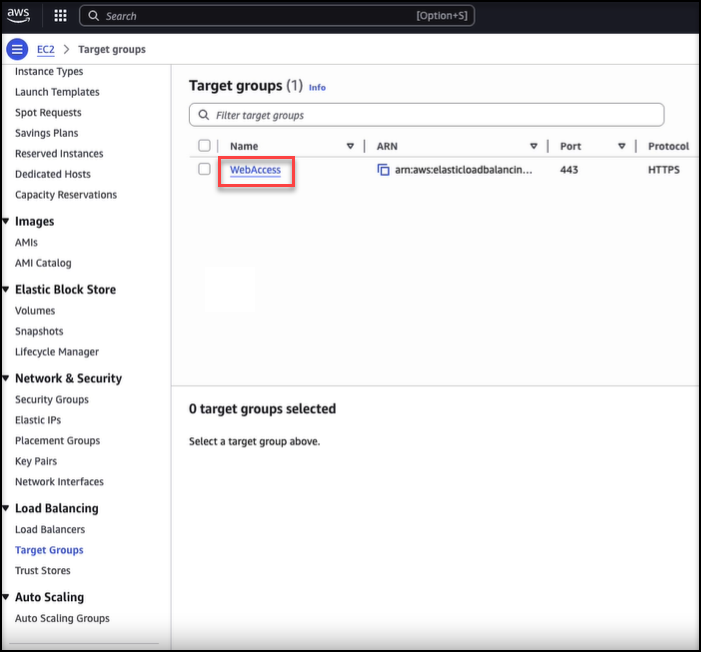
Confirm that the target group's Health status displays “Healthy”.
