Introduction
Nasuni has built federated single sign-on authentication (SSO) into the Nasuni Orchestration Center (NOC). Your NOC account is at account.nasuni.com.
SSO for NOC incorporates support for external Identity Providers. This can help you to meet your organization's requirements for security and multi-factor authentication (MFA).
This also allows multiple people within your organization to access the NOC using their own individual credentials.
Logging in to the NOC
To log in to the NOC, go to account.nasuni.com. The login page appears.
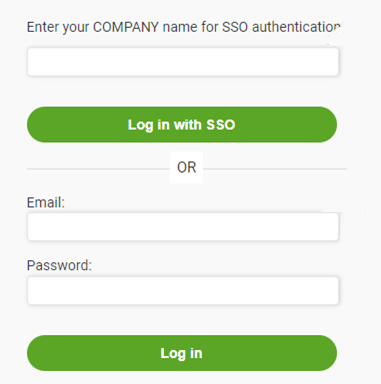
There are two methods of logging in to the NOC.
To log in with Email+Password:
Enter your Nasuni-registered Email and Password.
Click Log in.
To log in with SSO:
Enter the Company name established for your organization for NOC SSO.
For example, an Acme employee would use “Acme”. This name is not case-sensitive.Click “Log in with SSO”.
You are redirected to your SSO Identity Provider to authenticate if you haven’t already done so recently.
As a convenience to not have to enter the Company name with every login, the Company name can be embedded into a bookmarked URL. For example: https://account.nasuni.com/account/login/?name=Acme.
If login succeeds, the account.nasuni.com page appears, offering software downloads, serial numbers, and so forth.
If login fails, an error message appears indicating a problem with the login.
When your NOC account is initially created by Nasuni, only the Email+Password login method is available. However, you can enable either or both methods.
Considerations
Consider the following aspects of SSO for NOC:
The NOC uses OAuth 2.0-based SSO for Authorization, and OpenID Connect (OIDC) for Authentication.
Specifically, you can connect your Nasuni account to the following Identity Providers:
Azure AD
Okta
To set up SSO for NOC, you must have Admin access to your Identity Provider.
You must establish a unique company “name” that any user from your company should use when prompted by NOC SSO login to initiate redirection to your company’s IdP.
You can test the configuration while still logged in to verify that it is operational.
Until you specifically disable your email+password NOC credentials, that login method is still available, that is, setting up SSO does not automatically disable email+password logins. After SSO is set up, you have the choice of disabling or limiting the capabilities of email+password logins through Roles, or leaving that login method as is.
Configuring SSO for NOC using Okta
To configure SSO for NOC using Okta, follow these steps:
In Okta, create an App for the NOC with the following parameters:
Sign-in method: OIDC – OpenID ConnectApplication type: Web Application
Login initiated by: Either Okta or App
Sign-in redirect URI: https://account.nasuni.com/account/accounts/okta/login/callback/
Initiate login URI: https://account.nasuni.com/account/login/?name=name_from_step_4
Assign the users or groups that can log into the NOC.
If using group/roles, set an appropriate Groups claim expression and a claim for an ID Token with Userinfo / id_token request.
Log in to account.nasuni.com.
Select SSO Setup from the Profile drop-down menu.
Enter the Company name for SSO authentication that uniquely identifies your organization. The name is not case-sensitive.
From the SSO Provider drop-down list, select Okta.
Enter the Client ID from the Okta NOC app.
Enter the Client Secret from the Okta NOC app.
Enter the Okta domain (typically yourcompany.okta.com) in the Key details field.
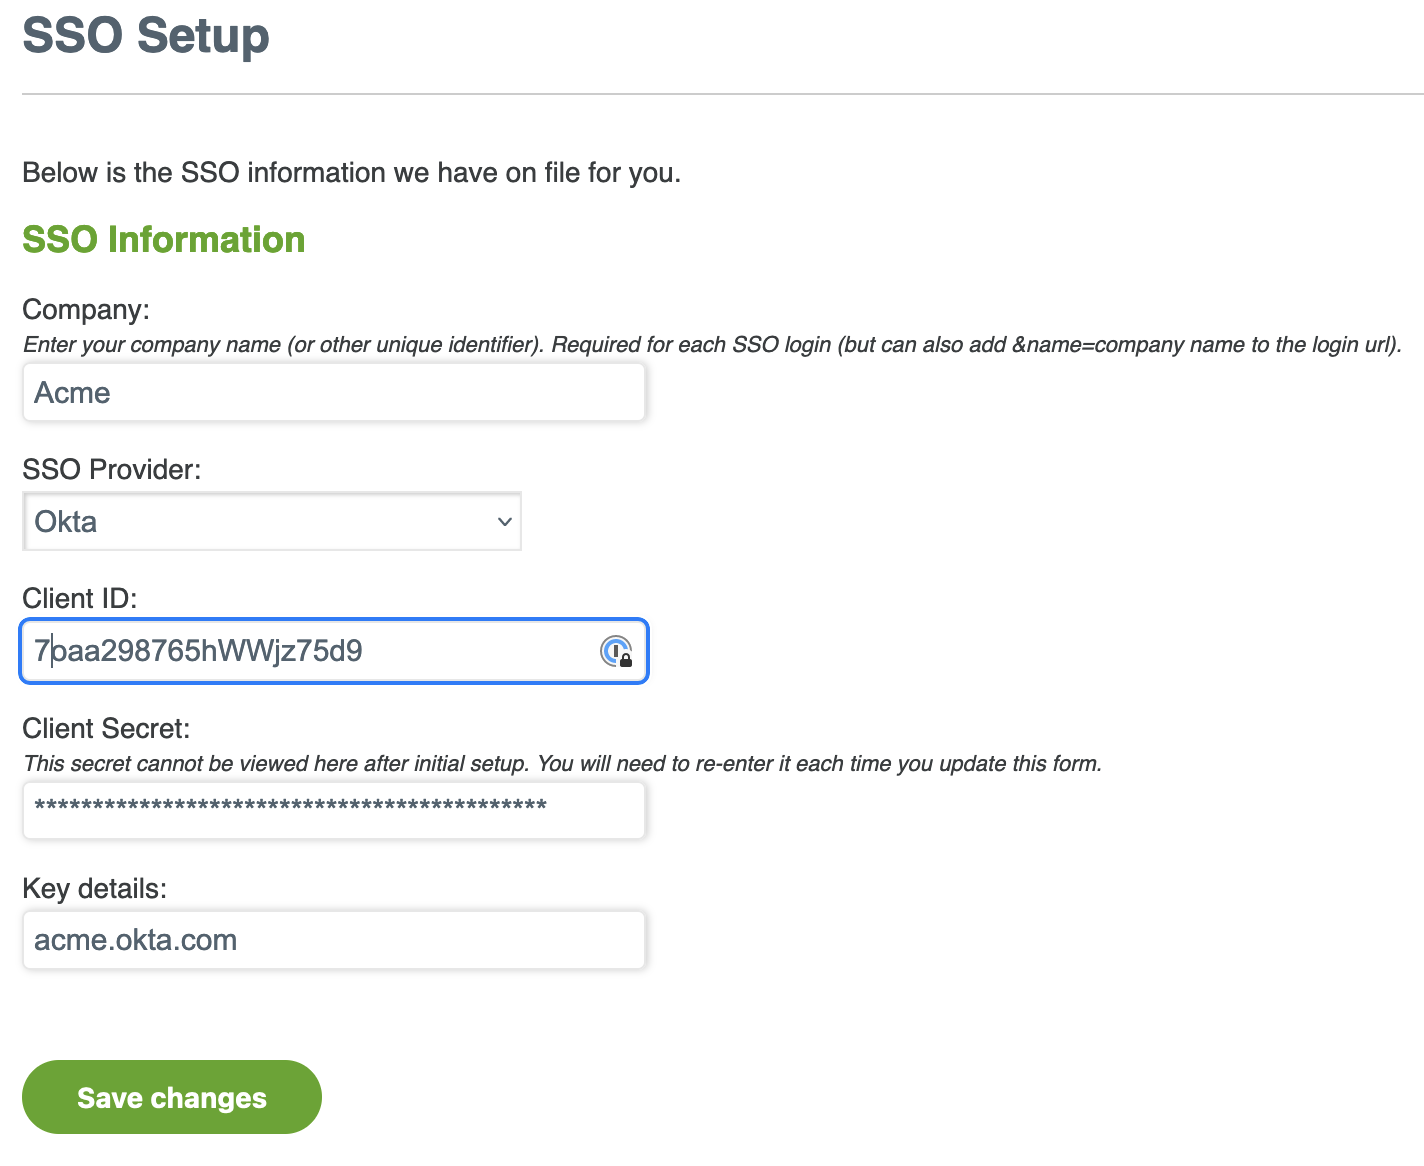
Click Save changes.
Click Verify Setup.
A test is run to attempt to communicate with your Identity Provider to confirm your settings.
If successful, a message says, “Your SSO setup is successfully configured for login”.
If the SSO setup is unsuccessful, an error message indicates the issue, such as, “Error retrieving access token”.
Configuring SSO for NOC using Azure AD
To configure SSO for NOC using Azure AD, follow these steps:
In Azure AD, create an app for the NOC with the following parameters:
Web type Redirect URI: https://account.nasuni.com/account/accounts/microsoft/login/callback/
Assign the users or groups that can log into the NOC.
To create this app, follow these steps:
a. Log in to portal.azure.com.
b. In the Azure portal, on the left navigation panel, click Microsoft Entra ID.
c. On the left navigation panel, click App registrations.
d. In the App registrations panel, click New registration.
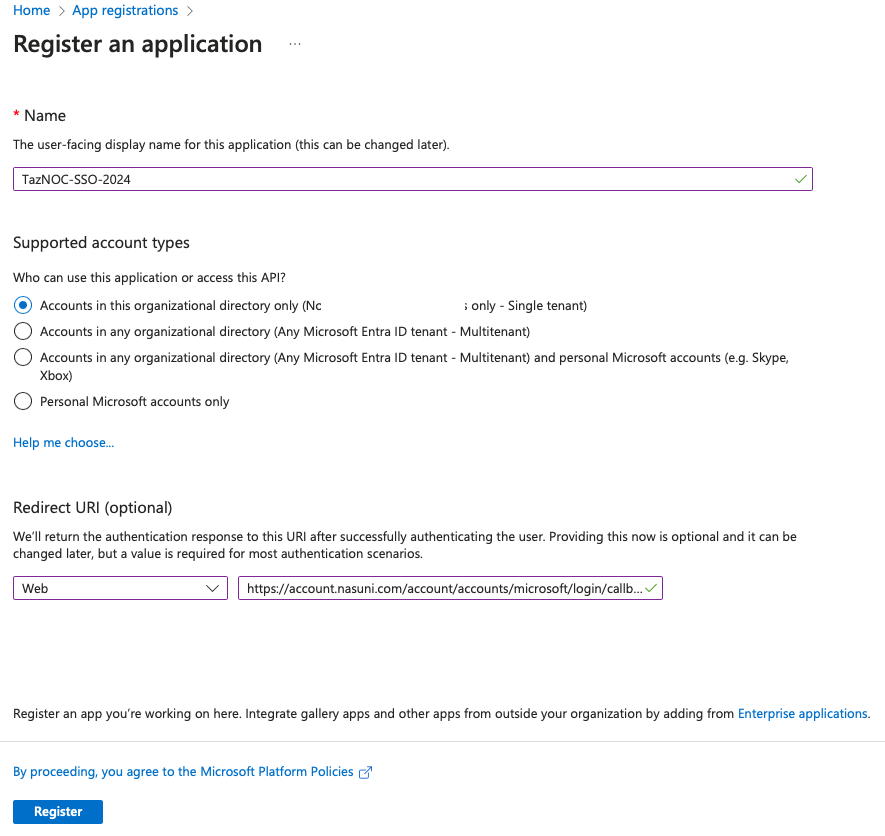
e. On the Register an application panel, enter the following information:
Name: This is a user-facing display name for this app. You might include information such as “NOC”, “SSO”, the company, the department, or the date.
Users of your app might see the display name when they use the app.
You can change the display name at any time.Supported account types: Select “Accounts in this organizational directory only”.
Redirect URI (optional): Use the redirect URI from above: https://account.nasuni.com/account/accounts/microsoft/login/callback/.
f. Click Register.
This completes the initial app registration.
g. When the registration finishes, the Azure portal displays the app registration’s Overview pane. 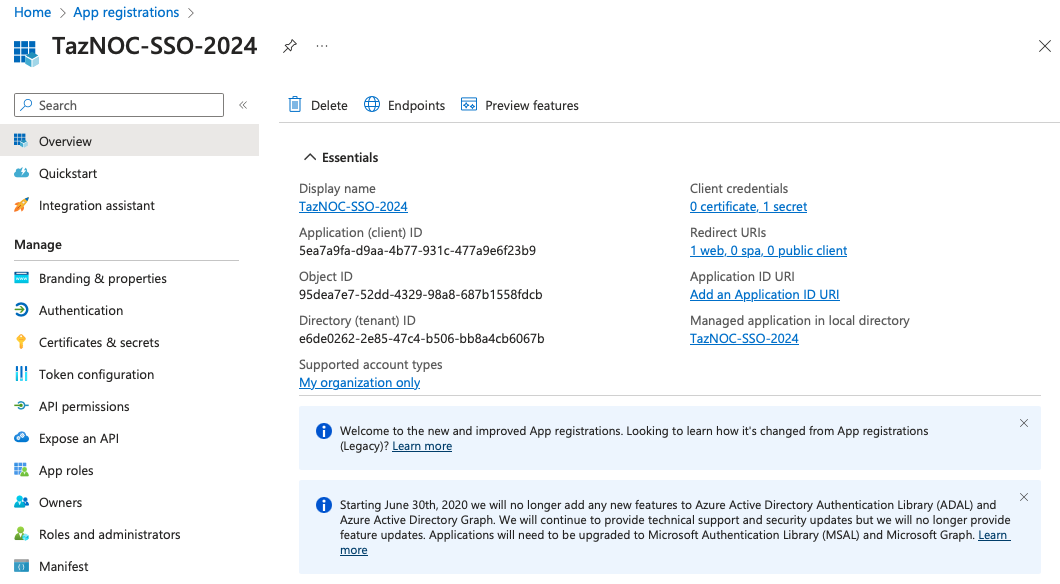
h. Copy the Application (client) ID. You use this in step 7 on page 9.
i. Copy the Directory (tenant) ID. You use this in step 9 on page 9.
j. In the left column, click Certificates & secrets. The Certificates & secrets page appears.
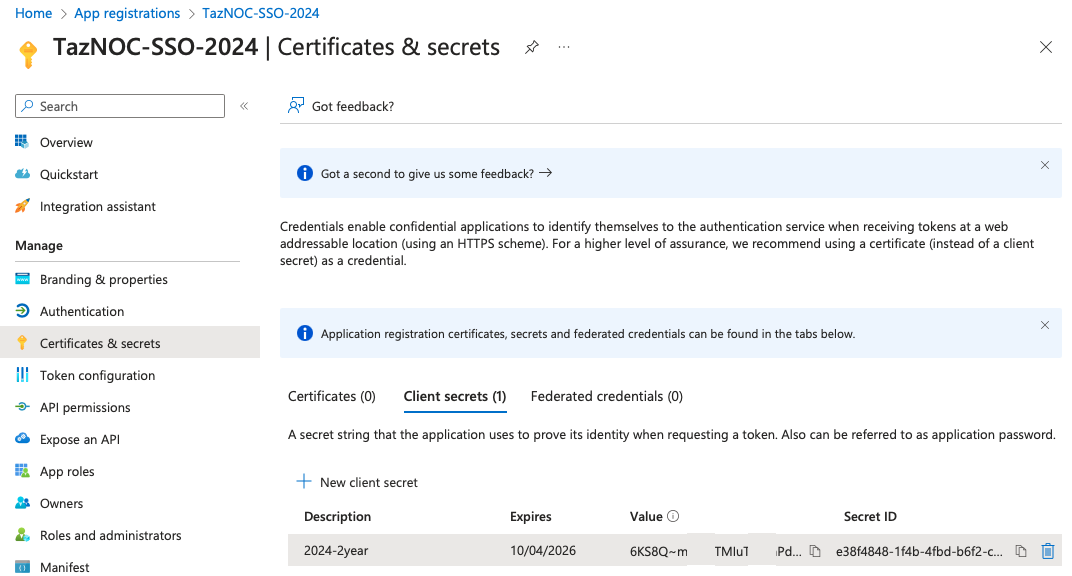
k. Click New Client Secret.
1. Enter a Description for this secret, such as “NOC SSO secret 2024”.
From the Expires drop-down list, select when the secret expires, such as 24 months.
Click Add.
The new secret is created and appears in the list of Client secrets.
l. From the list of Client secrets, copy the Value. This is the Secret that you use in step 8 on page 9.
m. In the left column, click API Permissions. The API Permissions page appears.
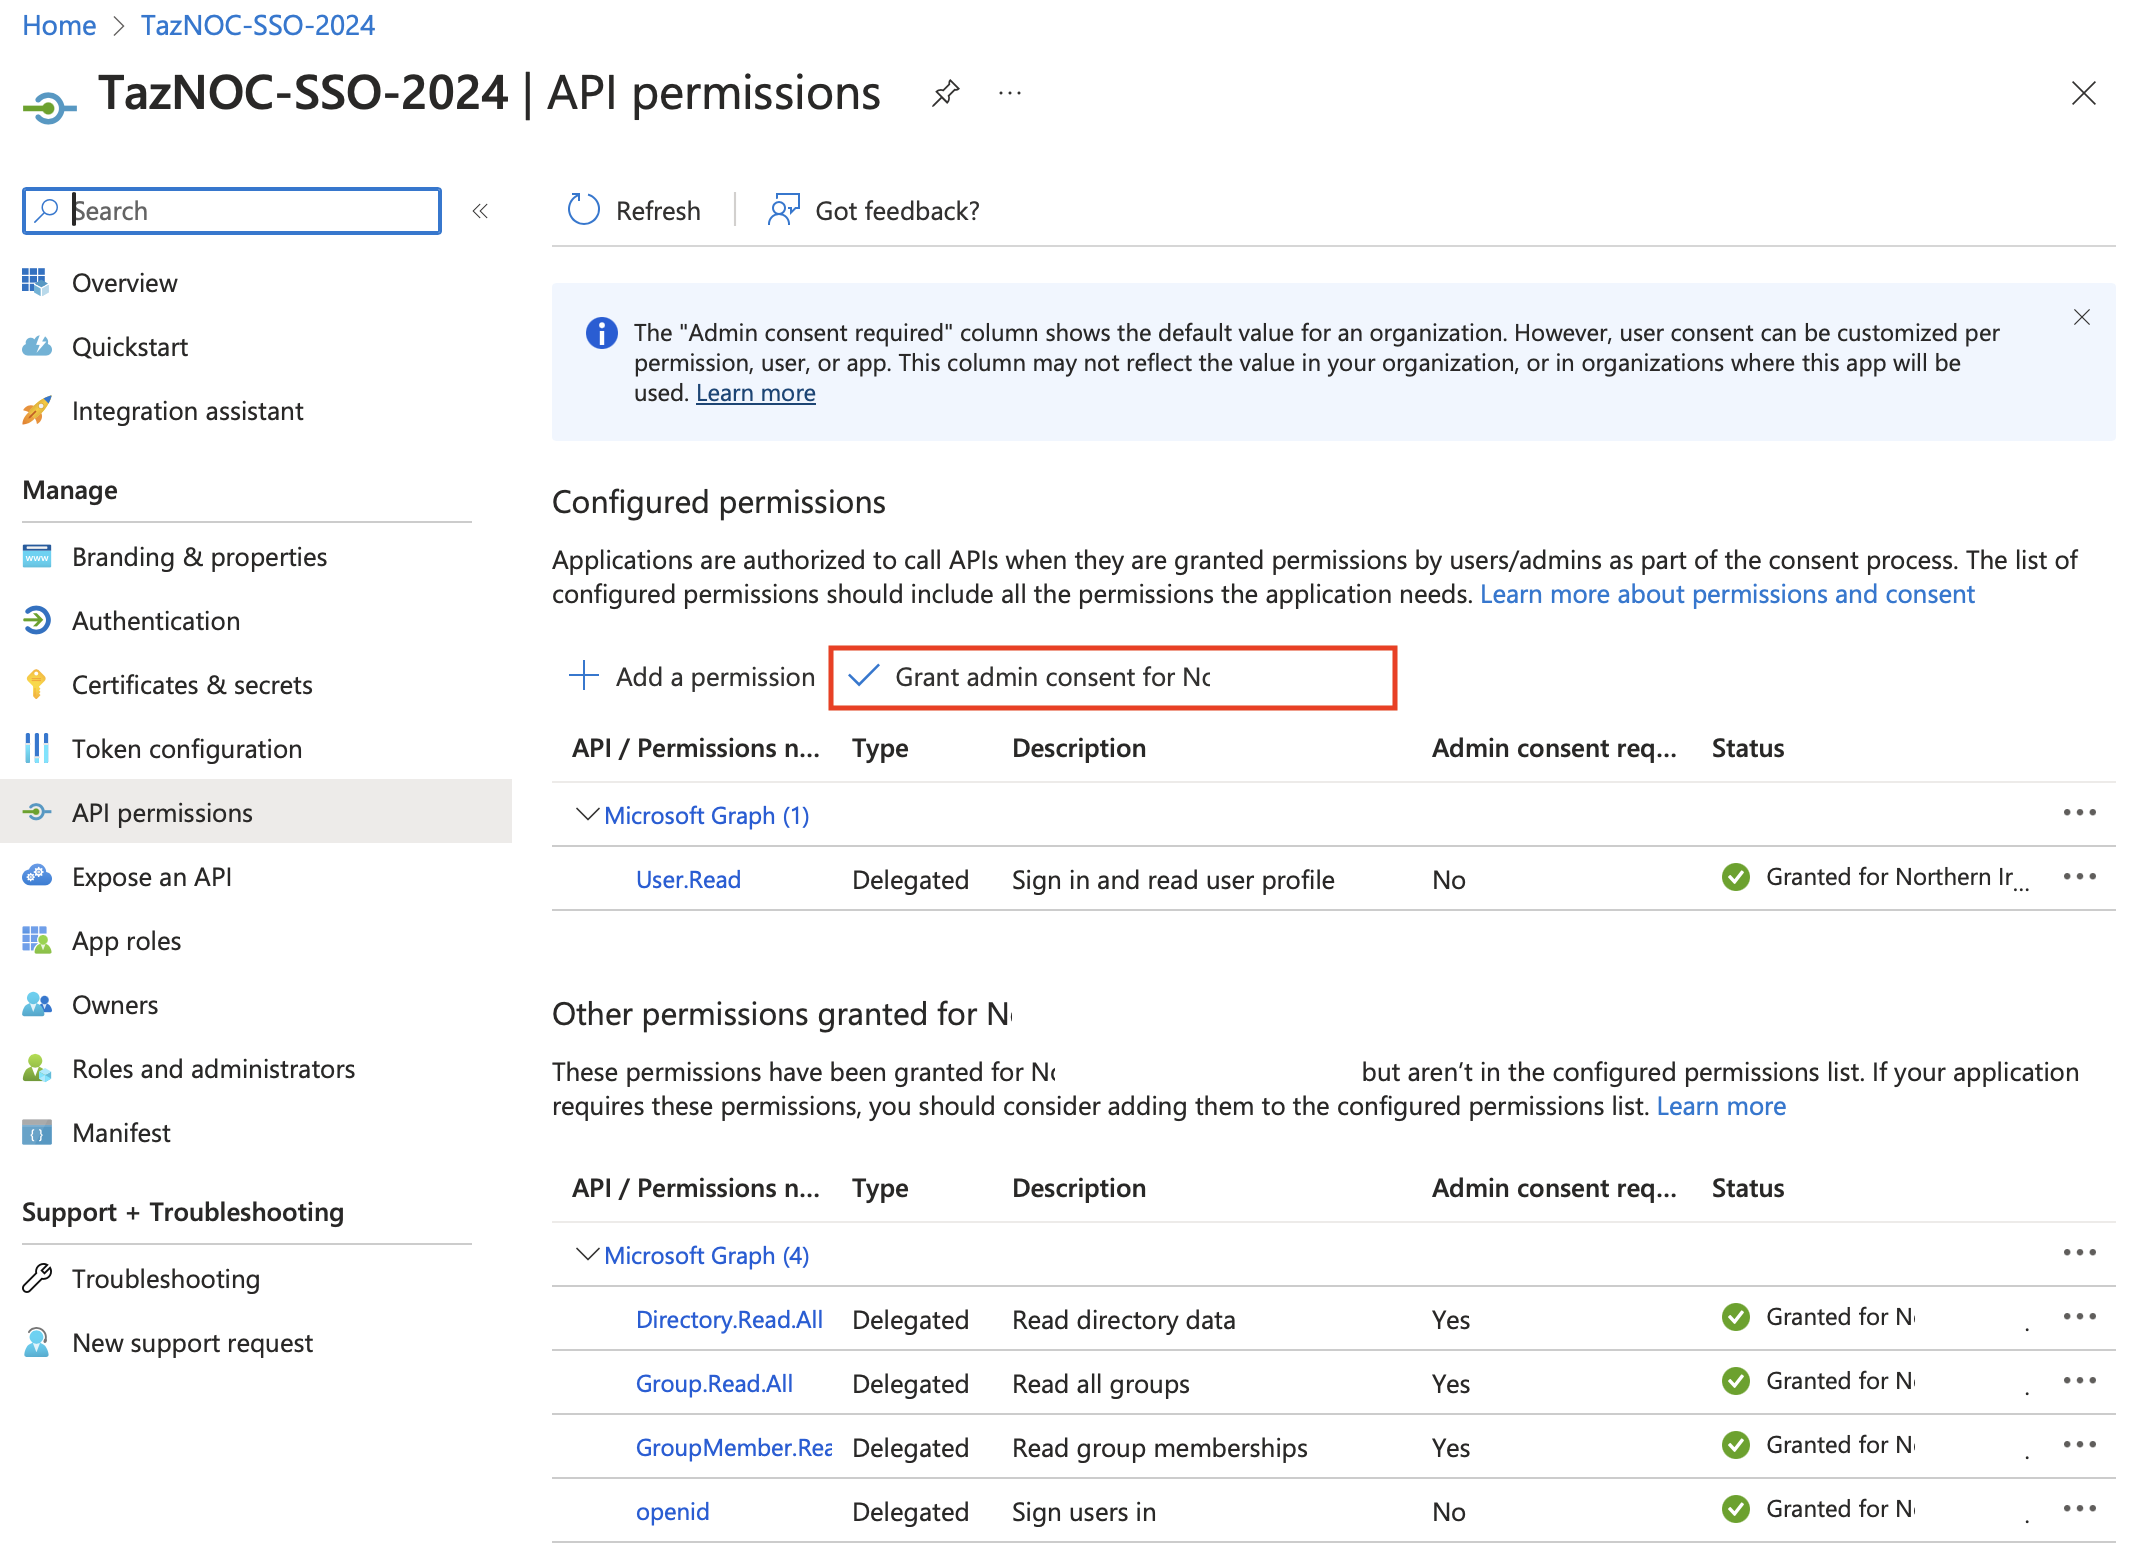
n. Add the 5 displayed API Permissions for Microsoft Graph, then click “Grant admin consent for <organization>”.
o. Navigate to the Users and groups page.
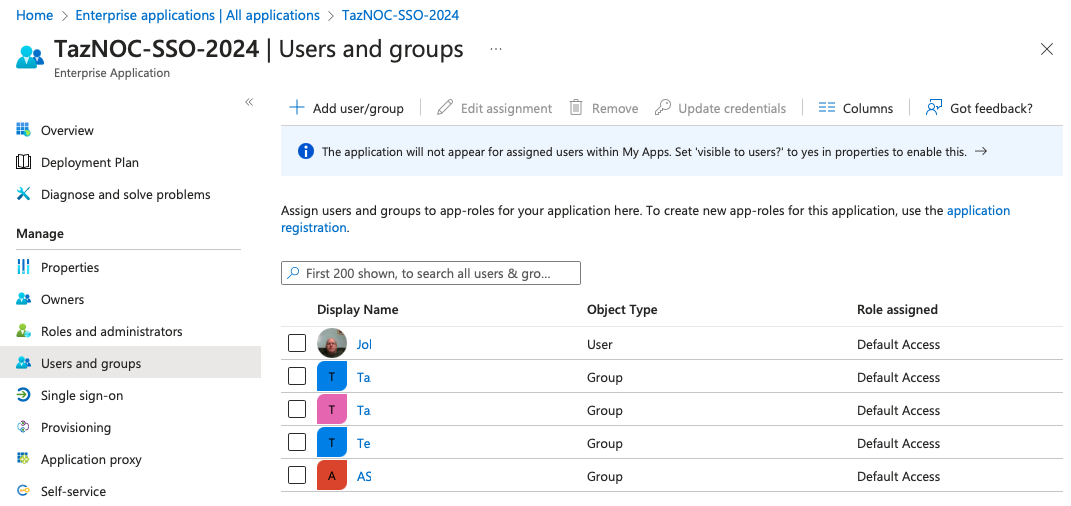
p. Add the required users and groups in your organization whom you want to give access to the NOC.
q. If you do not give full consent to a user and group, when they attempt to log in to the NOC using SSO, they might see a dialog box such as this.
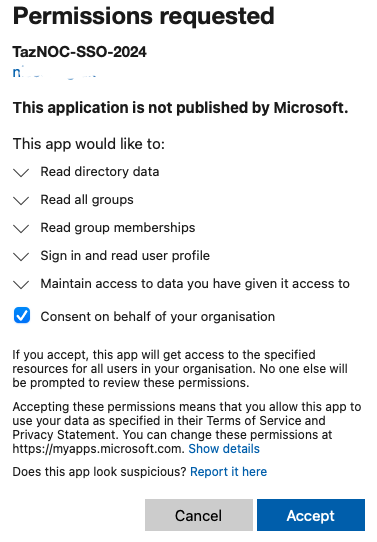
r. If this happens, select “Consent on behalf of your organization” and click Accept.
After creating the app, log in to account.nasuni.com.
Select SSO Setup from the Profile drop-down menu.
The SSO Setup page appears.
Enter the Company name for SSO authentication that uniquely identifies your organization. The name is not case-sensitive.
From the SSO Provider drop-down list, select Azure AD.
Enter the Application (client) ID in Client ID.
Enter the Client Secret.
If a Single tenant, enter the Directory (tenant) ID in Key details.
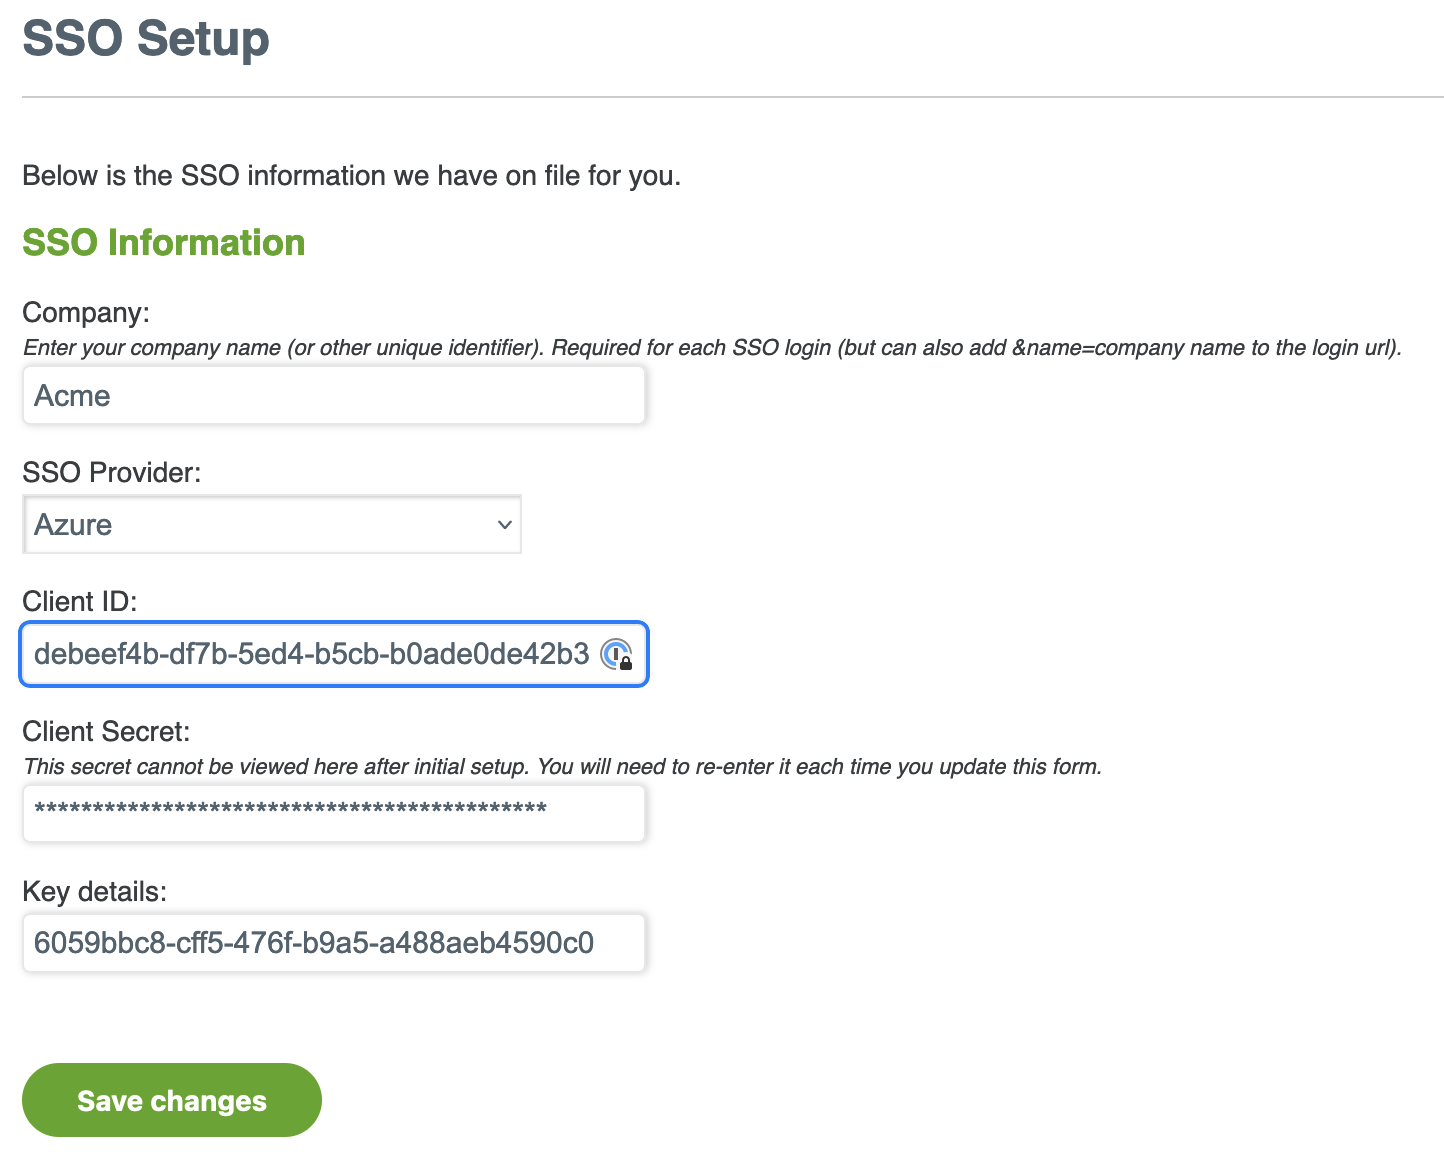
Click Save changes.
Click Verify Setup.
A test is run to attempt to communicate with your Identity Provider to confirm your settings.
If successful, a message says, “Your SSO setup is successfully configured for login”.
If the SSO setup is unsuccessful, an error message indicates the issue, such as, “Error retrieving access token”.
Using roles
Active Directory and similar directory services enable you to define groups and assign individual users to those groups. The NOC SSO feature enables you to define roles based on those groups, and to assign NOC permissions to those roles. The users in those groups then gain the permissions assigned to those roles.
The process works like this:
You use Active Directory or similar directory services to create groups.
You assign users to groups based on the tasks they perform or the information they use.
Using the NOC SSO Setup page, you can define roles corresponding to the groups.
Using the NOC SSO Setup page, you can assign NOC permissions to each role.
As a result, each user in each group has the role associated with that group and has the permissions assigned to that role.
If a user is a member of more than one group, that user gets all privileges associated with all roles that match those groups.
If a user does not match any roles that contain permissions, their attempted login is denied.
For example, you might create an Active Directory group named gfa_administrator_group, and user Jan might belong to that group. You can create the matching NOC role gfa_administrator_group and assign to that role the permissions “Customer can generate GFA key” and “Customer can view GFA key”. Since Jan is a member of the gfa_administrator_group, Jan would have that matching role and would have those permissions.
You can define any number of roles to match corresponding AD groups.
The permissions available are the following:
Customer can configure SSO
Customer can decommission NAA
Customer can decommission NEA or NMC
Customer can download software
Customer can generate GFA key
Customer can generate NAC key
Customer can manage MFA
Customer can set NIQ configuration
Customer can update account information
Customer can view GFA key
Customer can view NAA Auth codes
Customer can view NAC key
Customer can view NEA and NMC Auth codes
There are two default roles:
“Base permissions for all username+password logins. If empty, SSO is required.”
This is the role associated with logging in with the NOC-registered username and password (namely, a non-SSO login). By default, this role has all permissions since, initially, SSO has not been configured and username+password is the only available login method. After SSO is configured, you could elect to change these permissions. If this role has no permissions, username+password logins are disabled, leaving SSO as the only login method.
“Base permissions for all SSO logins. If empty, you must have a role to log in.”
Anyone logging in with SSO automatically matches this role and gets these permissions. By default, this role has no permissions associated with it. The use case for this role is rare. Unless your IdP is configured to control SSO logins without the use of groups and roles, this should be left empty.
To define roles, follow these steps:
Log in to account.nasuni.com.
If you have the Customer can configure SSO permission, at the bottom of the SSO Setup page is the “Create / Update Roles for SSO” pane.
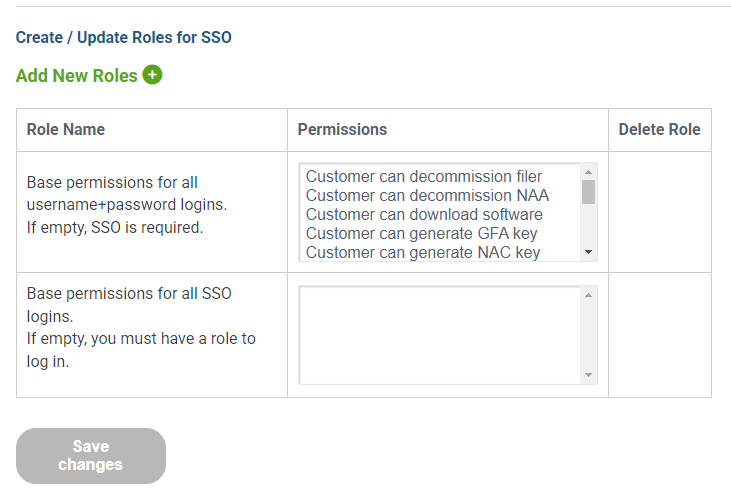
The two default roles are displayed.
To add a new role, click Add New Roles. A blank new role appears.

In the blank Role Name area, type a name for the new role. This name should match an existing group in Active Directory or similar directory service.
Click in the blank Permissions area. The Permissions for Role page appears.
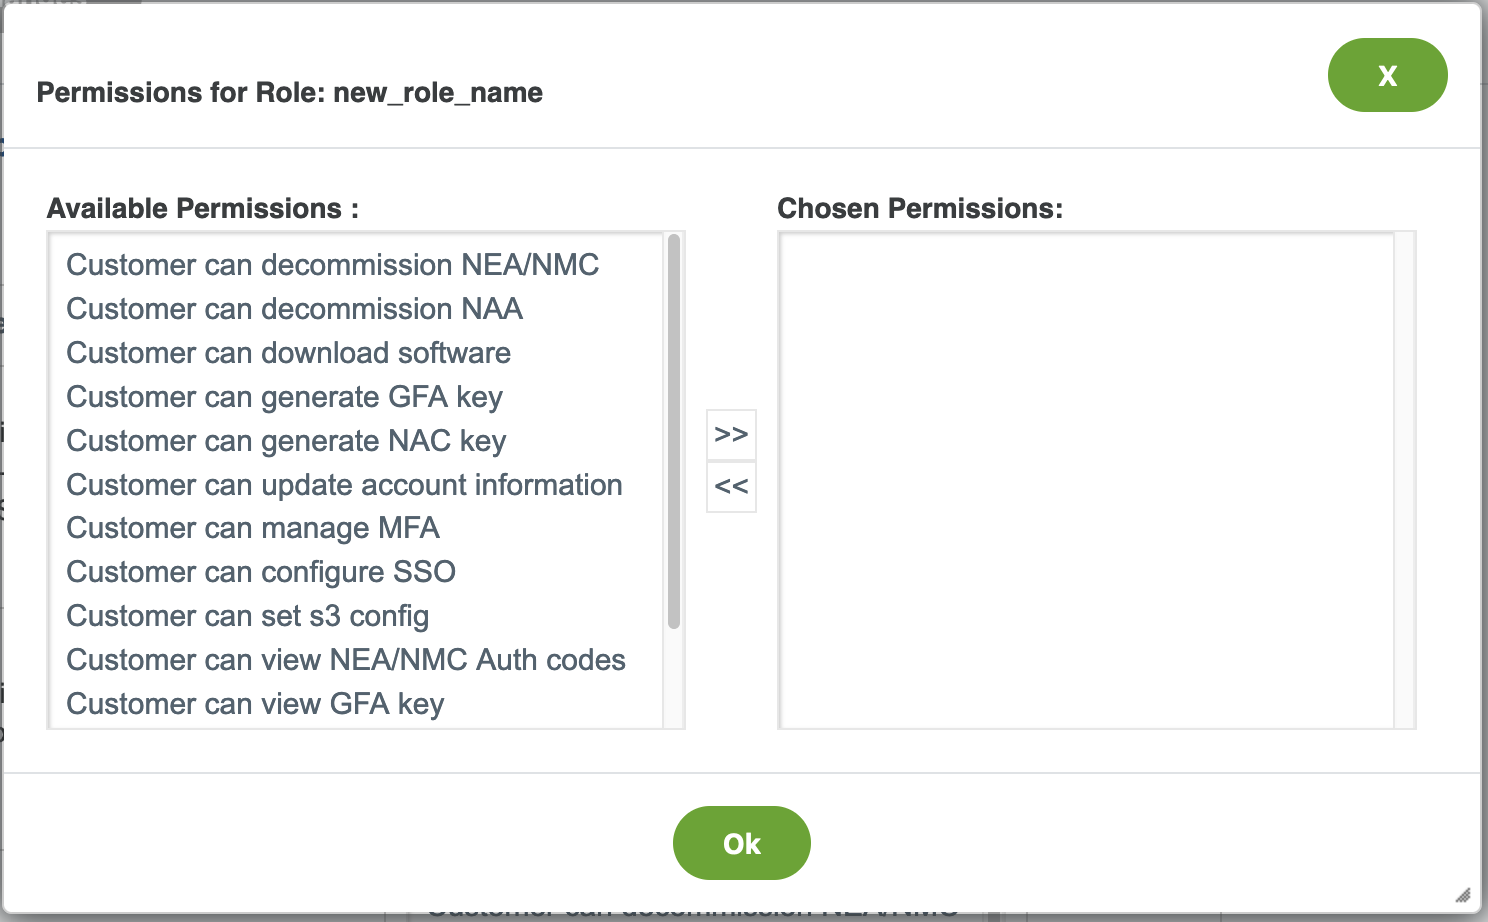
Select each permission from the Available Permissions list, then click >> to move that permission into the Chosen Permissions list.
You can remove a permission from the Chosen Permissions list by selecting the permission and clicking << .When you are done selecting permissions, click Ok.
To delete an existing role, click the Delete icon
 next to the permission.
When you are done creating, changing, or deleting roles, click Save changes.
The list of roles changes to reflect your changes.
Appendix: Multi-Factor Authentication (MFA) for a NOC Account
Introduction
Nasuni allows you to configure username+password logins to the Nasuni Orchestration Center (NOC) to require multi-factor authentication (MFA). Your NOC account is at account.nasuni.com.
MFA for NOC can help you to meet your organization's requirements for security with multi-factor authentication.
Note that this feature applies only to logins with your Nasuni-registered username+password, namely, non-SSO logins. For SSO logins, MFA is a function of the configuration of your SSO Identity Provider.
Configuring MFA for NOC Account
To configure MFA for NOC, follow these steps:
Log in to account.nasuni.com.
Select Manage MFA from the Profile drop-down menu.
The MFA Setup page appears.
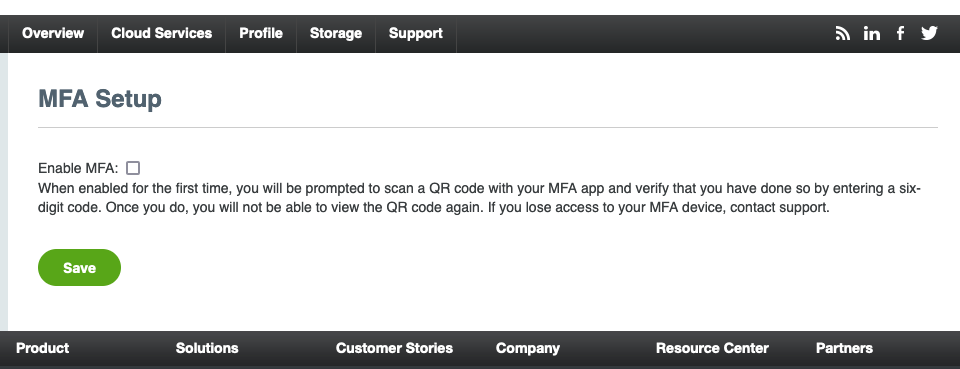
Check or clear the Enable MFA check box as desired and click Save.
If you are enabling MFA for the first time, a QR code displays.
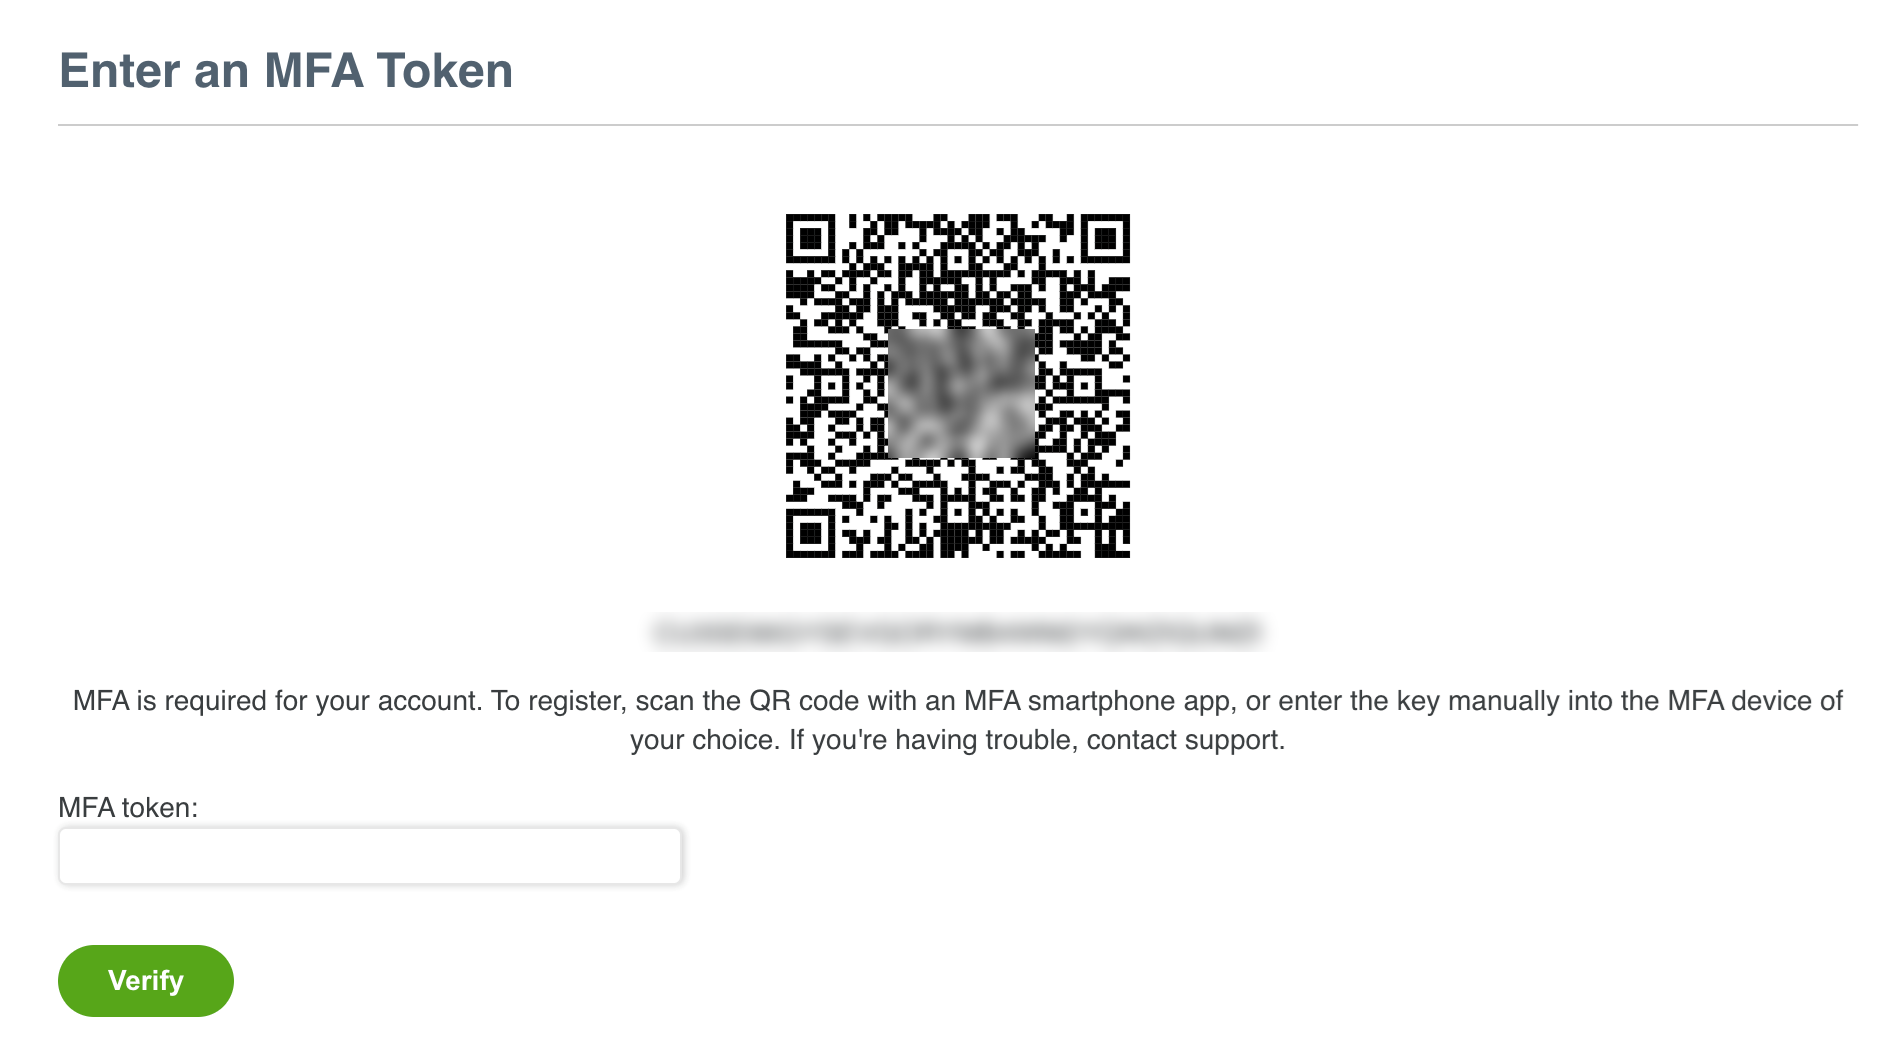
Scan the QR code or enter the long code beneath it into your Authenticator application.
Get a 6-digit token from your Authenticator application and enter it into the MFA token box.
Click Verify.
If your setup is successful, you are redirected to the main page of your NOC account, and subsequent logins with username+password prompt for an MFA token.
If verification is unsuccessful, you receive an error message and can retry configuring your Authenticator application.
Copyright © 2010-2024 Nasuni Corporation. All rights reserved.