Overview
This guide outlines the integration between Nasuni Data Service (NDS) and BigID, enabling customers to scan and classify data stored in Nasuni volumes via NDS endpoints in a read-only capacity.
Integration Highlights
Direct Access via NDS – BigID connects to Nasuni volumes using NDS, fully in the cloud.
Security & Compliance – Data remains in the customer’s environment, reducing compliance risk. Access is read-only.
Scalability – NDS supports large-scale scanning without the need for staging infrastructure.
Ease of Use – Minimal configuration required for BigID to access NDS volumes.
Prerequisites
Before beginning, ensure you have the following:
An NDS deployment connected to one or more Nasuni volumes, and the connection information.
Access to BigID
Configure the Connection - NDS for Azure
1 - Collect Inputs
Collect the following inputs:
Parameter | Description | Example |
|---|---|---|
Data Source Name | A unique name for the data source |
|
Account name | This will always be |
|
Authentication Key | A SAS token for your NDS endpoint. |
|
Value (for customEndpoint) | The domain (after “nds.”) from your NDS Blob Storage Endpoint. | If your endpoint was |
2 - Add the Data Source
To add the data source, follow these steps:
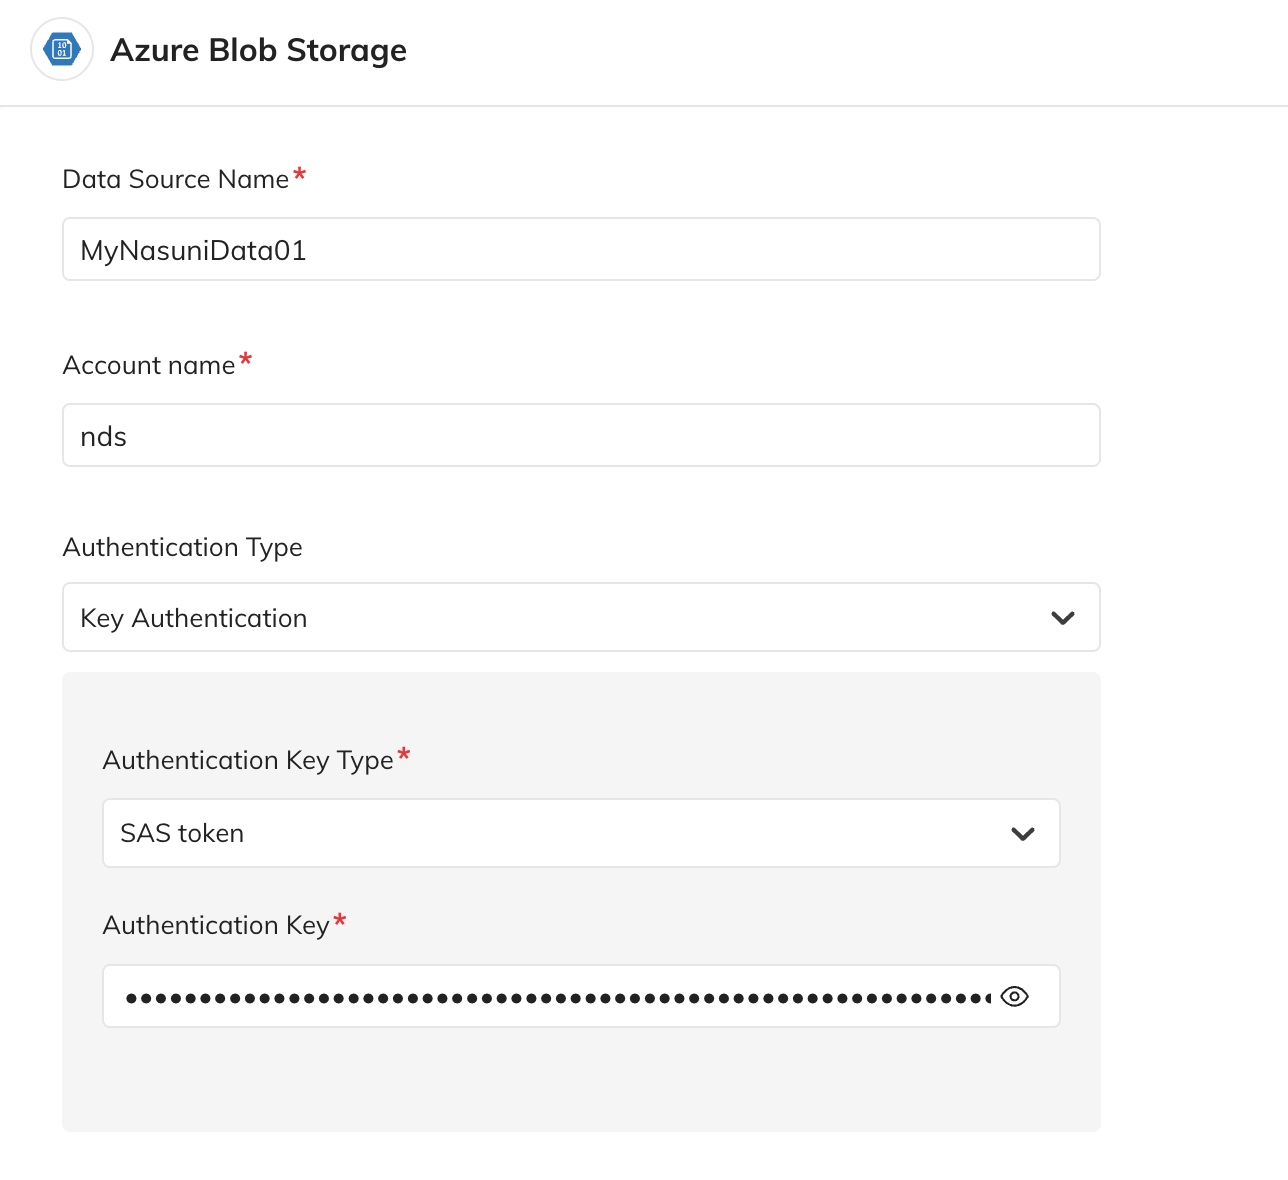
In BigID, navigate to Data Sources and choose the option to Add Data Source. Select Azure Blob Storage as the type.
Enter a Data Source Name of your choosing, and
ndsas the Account name.Set Authentication Type to Key Authentication, and Authentication Key Type to SAS token.
Paste your authentication key in this Authentication Key field. See the example in Collect Inputs.

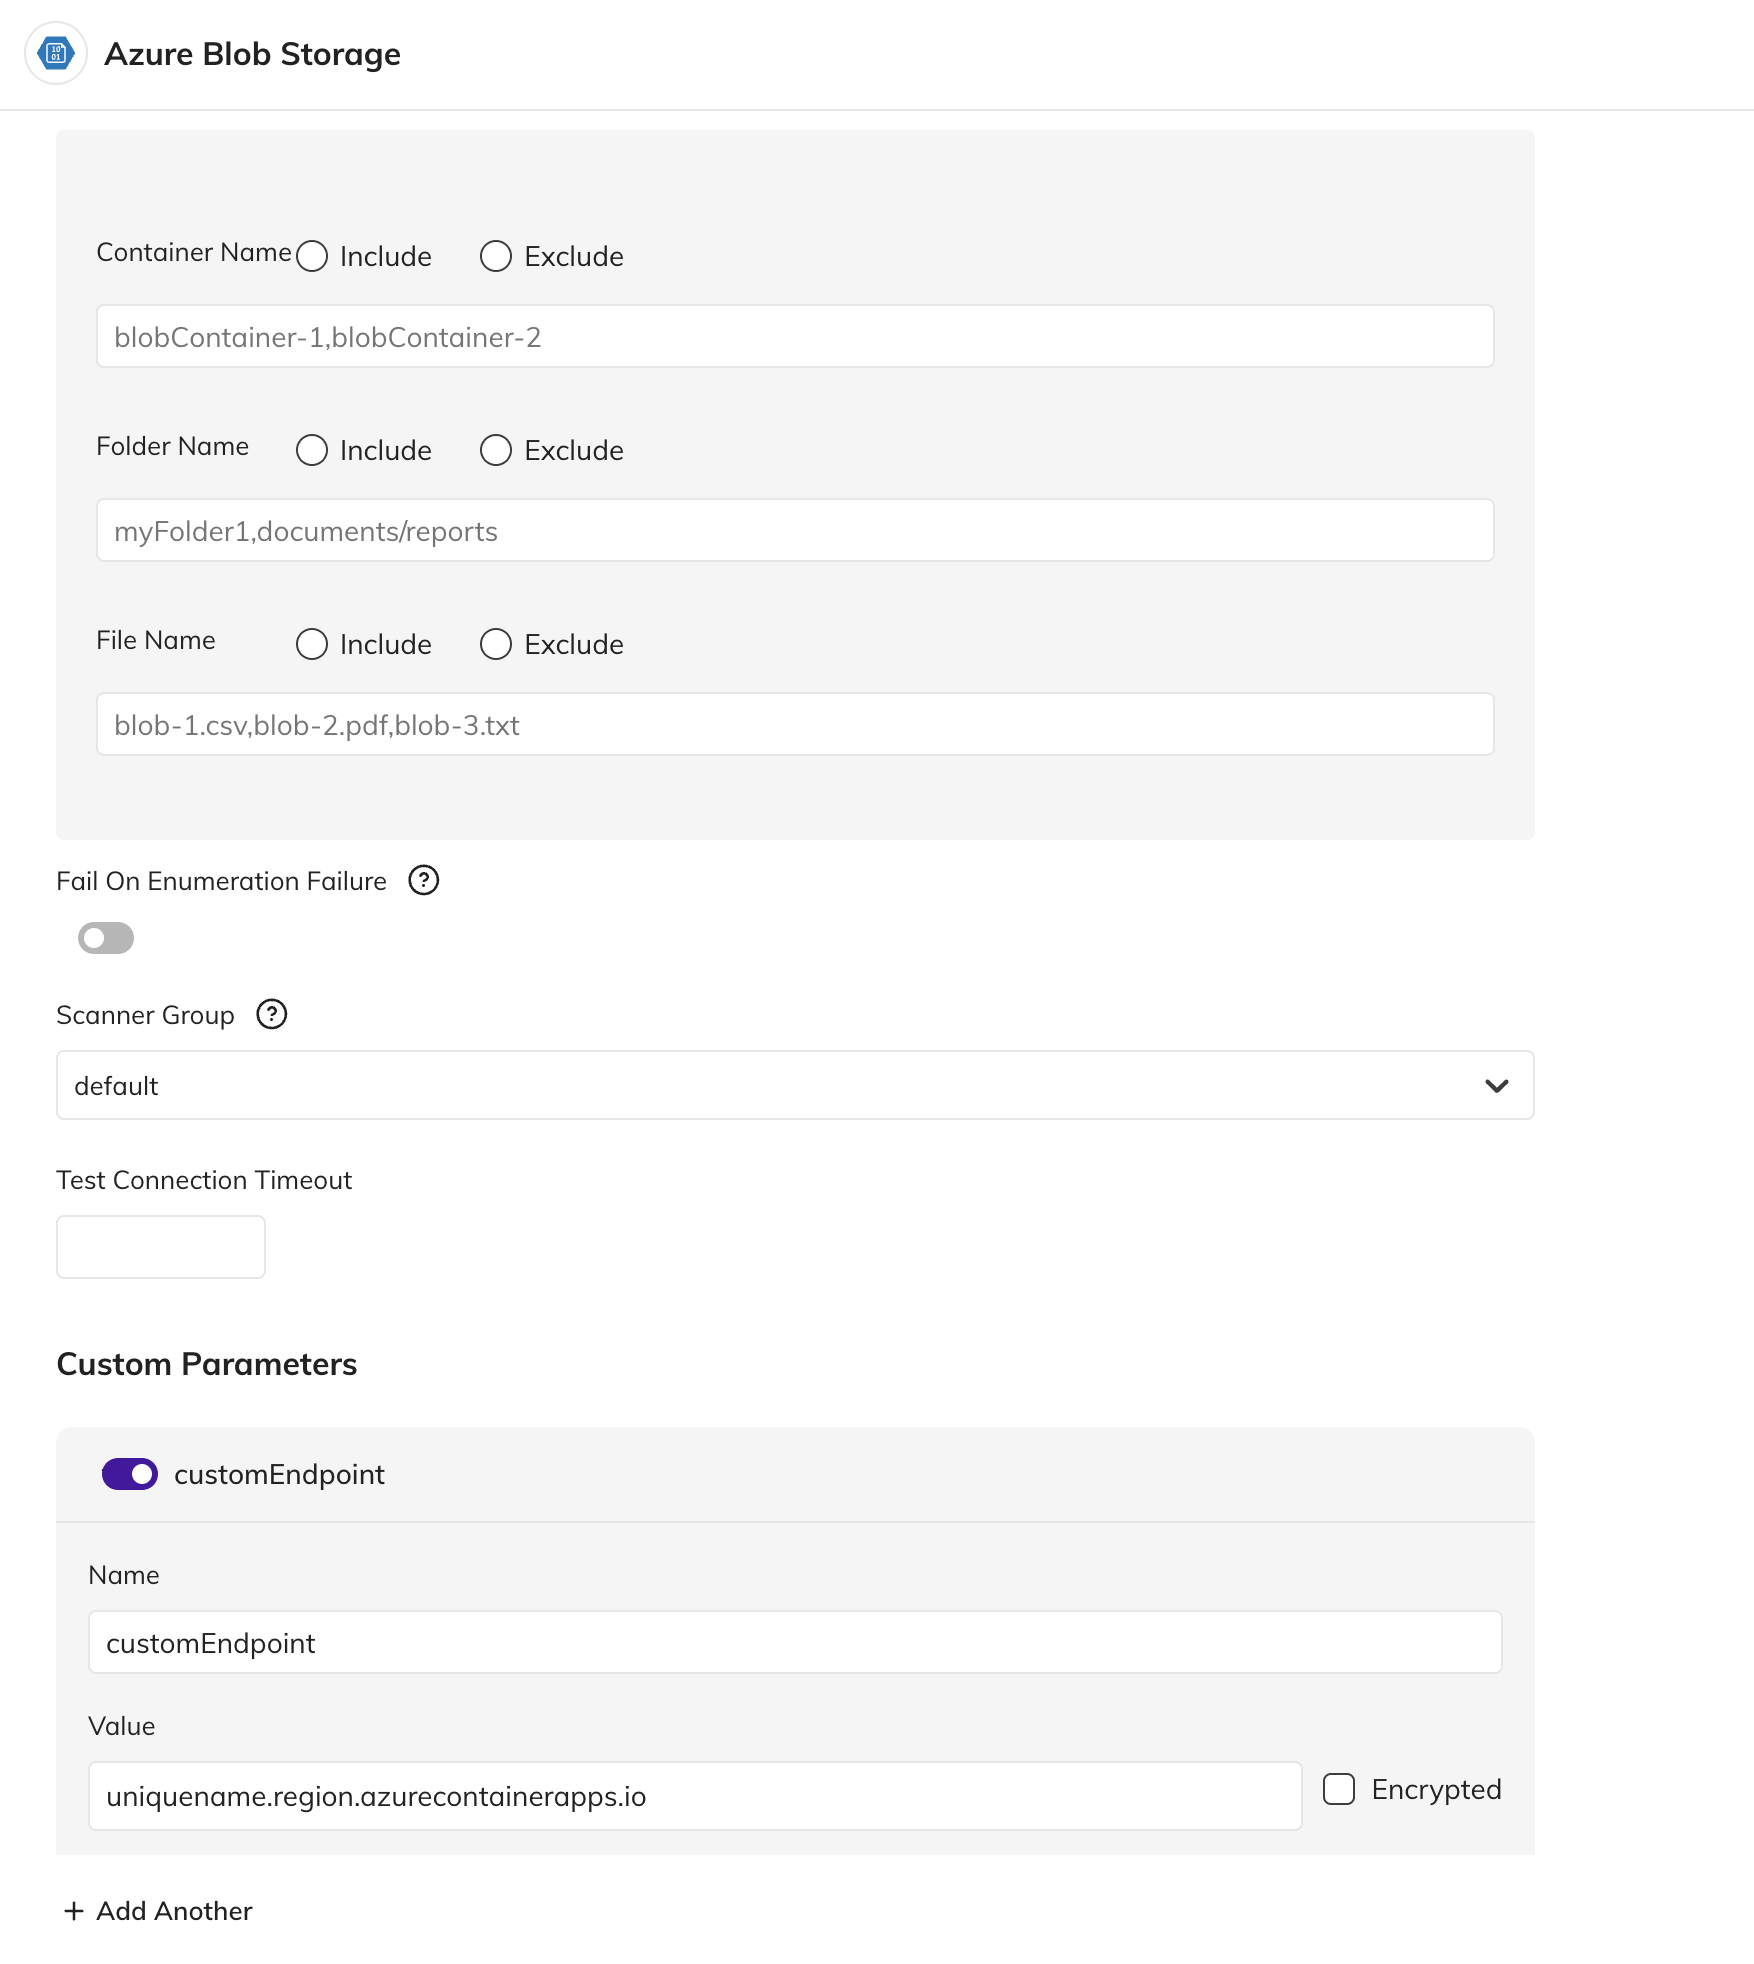
Expand the Advanced section, and scroll to Custom Parameters.
In the Name field, enter
customEndpoint. In the Value field, enter the domain (after “nds.”) from your NDS Blob Storage Endpoint. See the example in Collect Inputs.
Configure any other parameters as desired, and save the configuration. This connection enables read-only workloads within BigID.
Configure the Connection - NDS for AWS
1 - Collect Inputs
Collect the following inputs:
Parameter | Description | Example |
|---|---|---|
Data Source Name | A unique name for the data source |
|
Access Key | An Access Key from your AWS Account. |
|
Secret Key | Corresponding Secret Key for the Access Key. |
|
Bucket Name | S3 Bucket Alias |
|
2 - Add the Data Source
To add the data source, follow these steps:
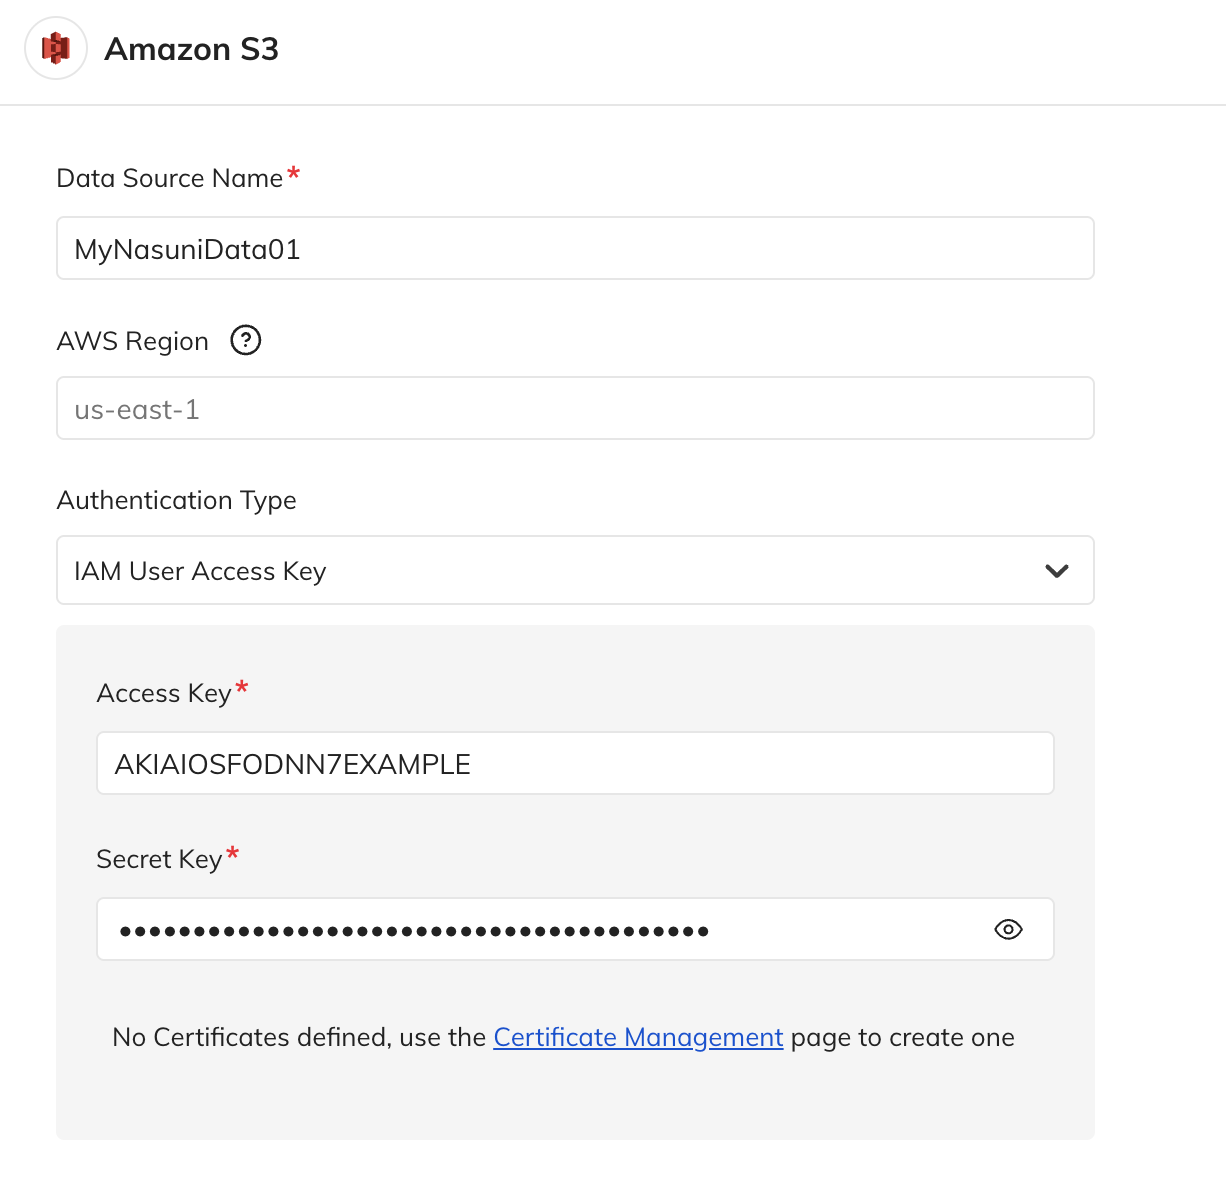
In BigID, navigate to Data Sources and choose the option to Add Data Source. Select Amazon S3 as the type.
Enter a Data Source Name of your choosing.
Enter the Access Key and Secret Key.

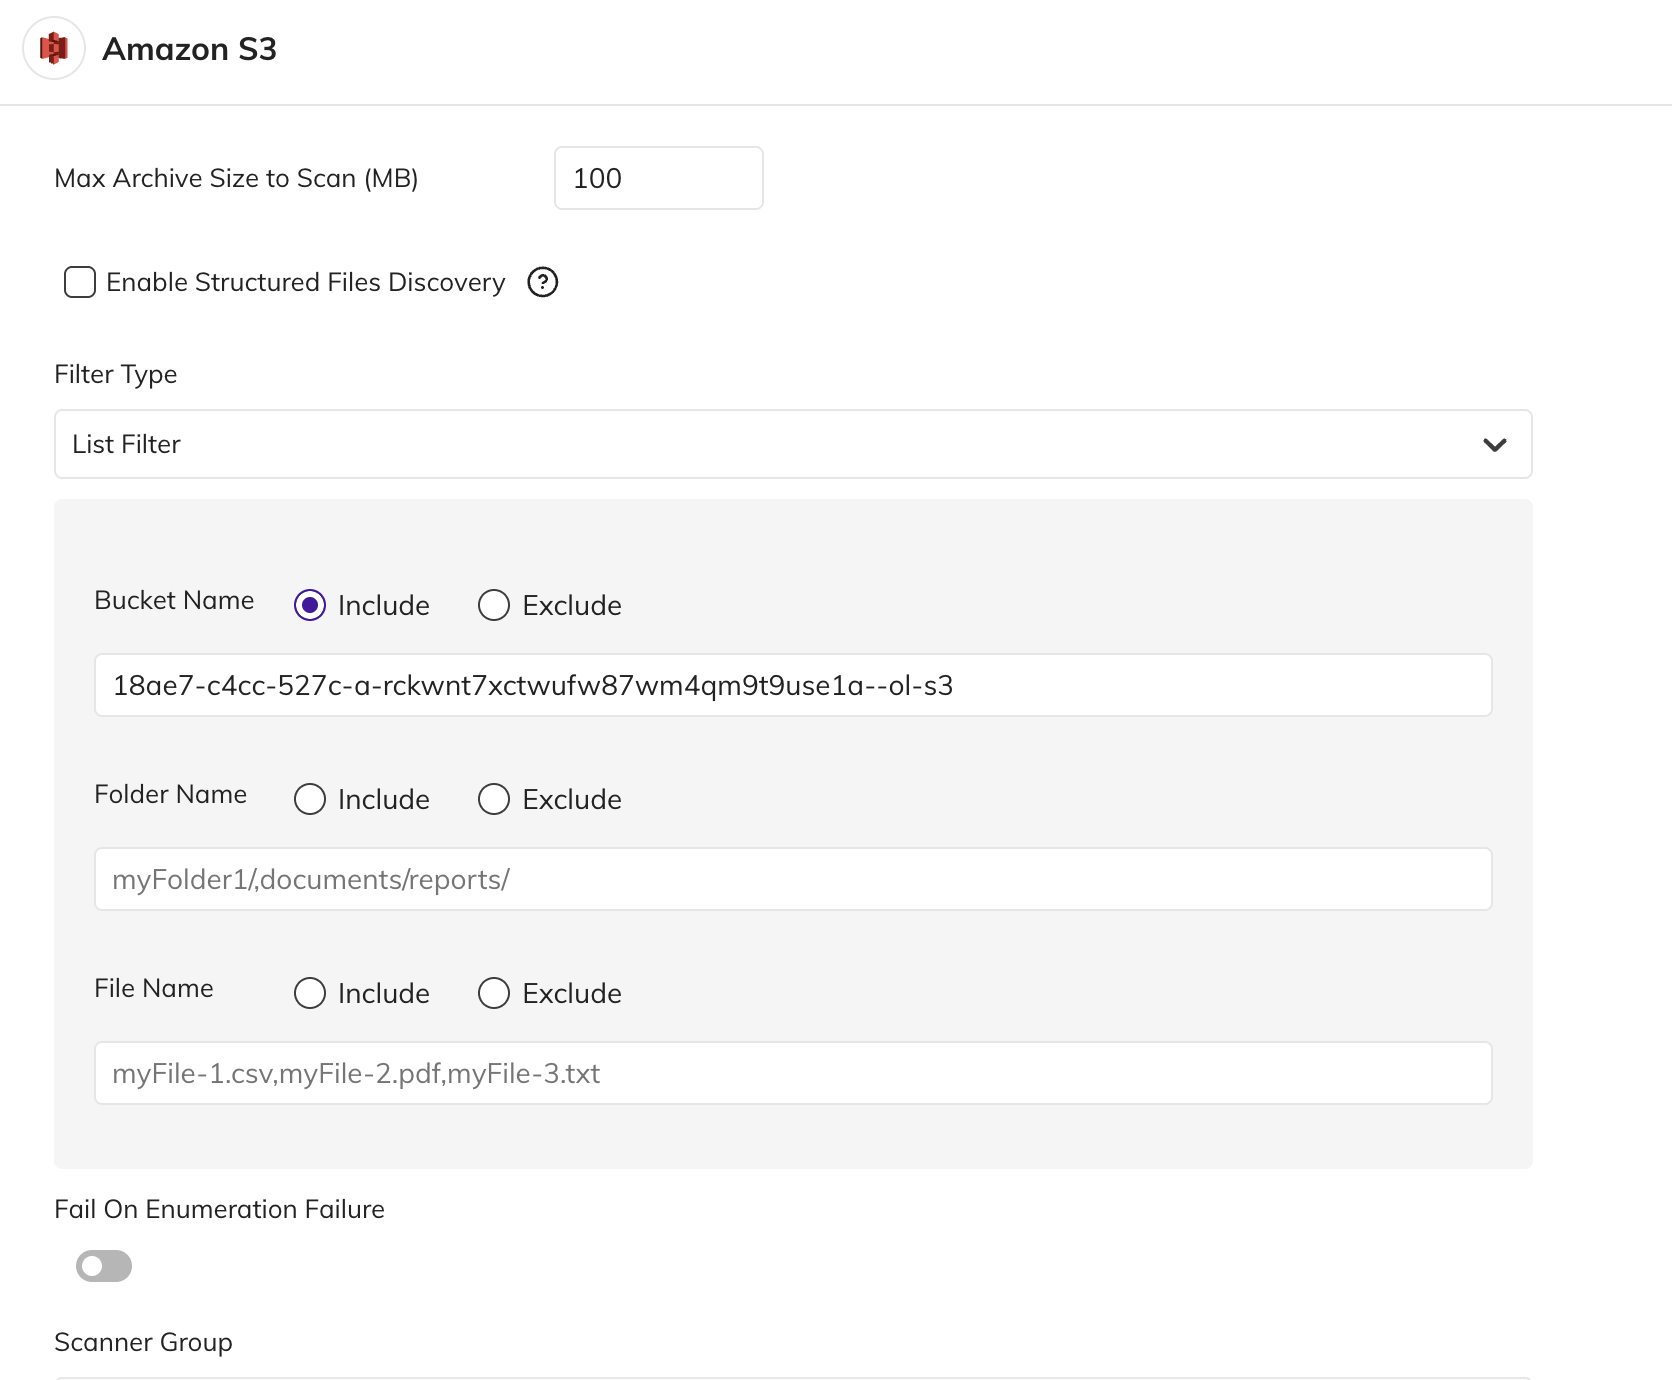
Enter the Bucket Name to Include.

Configure any other parameters as desired, and save the configuration. This connection enables read-only workloads within BigID.