On the Filers page, you can view managed Nasuni Edge Appliances. You can also perform the following actions:
Set API access keys.
Schedule automatic software updates.
Configure cache settings.
Change SMB (CIFS) and FTP/SFTP settings.
Change the description of managed Nasuni Edge Appliances.
Configure full disk encryption for disks that have this feature available.
Configure email settings.
Manage encryption keys for managed Nasuni Edge Appliances.
Set the escrow passphrase for managed Nasuni Edge Appliances.
Configure Global File Lock.
Schedule of Quality of Service (inbound and outbound bandwidth).
Schedule when to send quota reports.
Configure SNMP settings.
Configure syslog export.
Configure time servers.
Configure Web Access branding.
Refresh the Nasuni Edge Appliance license.
Configure remote support settings.
Send diagnostic information to Nasuni.
Manage Side Load processing.
View the status of jobs to move data into the cache.
Review the status of SMB (CIFS) shares, shared links, and FTP/SFTP directories on managed Nasuni Edge Appliances.
Review pending updates to Nasuni Edge Appliances.
Review the platform settings and status of managed Nasuni Edge Appliances.
Apply software updates to managed Nasuni Edge Appliances.
Review security settings and network settings for managed Nasuni Edge Appliances.
Shut down and reboot managed Nasuni Edge Appliances.
Review SSL certificates for managed Nasuni Edge Appliances.
Overview of the Filers Page
Click Filers. The Filers page displays a dashboard of Nasuni Edge Appliance information and a list of all Nasuni Edge Appliances in the account.
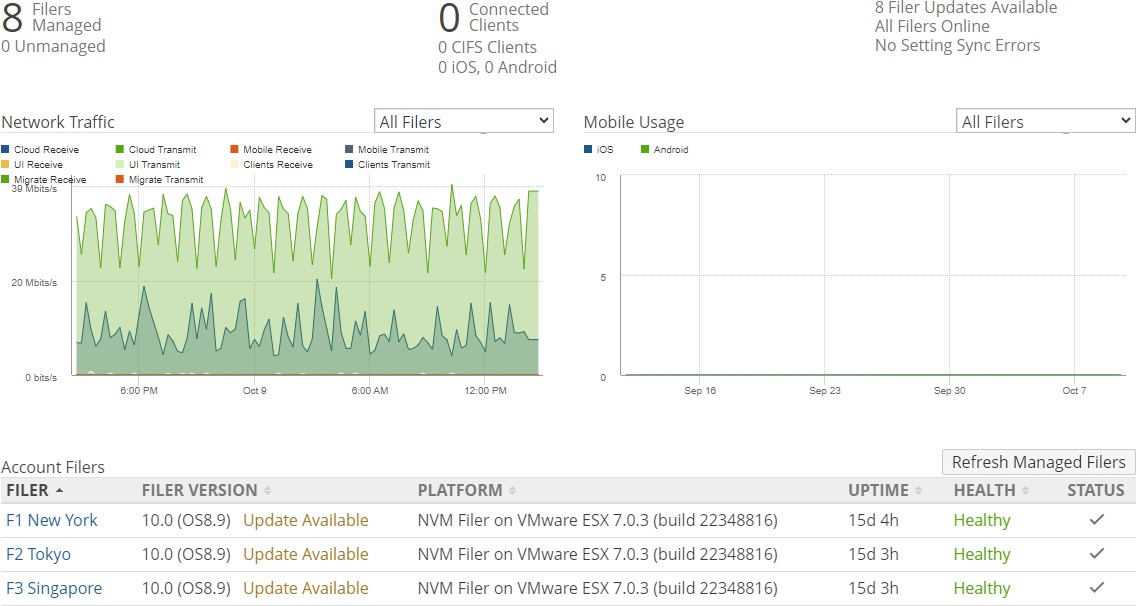
Figure 8-1: Filers page.
View Managed, Unmanaged, and Remote Support Status
In the Filers Managed area, the following information appears:
Total number of Nasuni Edge Appliances managed in the account. Only Nasuni Edge Appliances that the user has access to are included.
Total number of unmanaged Nasuni Edge Appliances in the account. Only Nasuni Edge Appliances that the user has access to are included.
Note: If configured, an email notification is sent when a new Nasuni Edge Appliance is deployed, whether the new Nasuni Edge Appliance is managed or unmanaged.
Number of Nasuni Edge Appliances that have Remote Support enabled. Only Nasuni Edge Appliances that the user has access to are included.
Clicking Enabled Remote Support opens the Remote Support Service page. For details, see “Remote Support Service”.
Number of Nasuni Edge Appliances that have active Remote Support connections in progress. Only Nasuni Edge Appliances that the user has access to are included.
Clicking Active Support Session opens the Remote Support Service page. For details, see “Remote Support Service”.
Monitor Connected Clients and CIFS Connections
Tip: Nasuni monitors platform-specific limits on the number of supported concurrent connections. When the number of concurrent connections reaches the “soft limit” for an Edge Appliance, you receive a notification of how many connections remain, and a suggestion to reduce the number of connections for that Edge Appliance, if possible. When the number of concurrent connections reaches the “hard limit” for an Edge Appliance, you receive a notification, and all new connections are denied for that Edge Appliance until the number of connections decreases below the “hard limit” again.
Platform | Soft Limit | Hard Limit |
|---|---|---|
N1040 | 3000 connections | 4000 connections |
N1050 | 3000 connections | 4000 connections |
N2040 | 5000 connections | 6000 connections |
N2050 | 5000 connections | 6000 connections |
N4040 | 8000 connections | 10000 connections |
N4050 | 8000 connections | 10000 connections |
In the Connected Clients area, the following information appears:
Total number of connected clients, including SMB (CIFS) clients.
Number of SMB (CIFS) clients. Clicking CIFS Clients opens the Filer CIFS Clients page. For details, see “SMB (CIFS) Clients”.
Note: Version 9.9 and later Edge Appliances terminate dead connections (zero bytes transferred) after 20 seconds and allow slow connections (active data transfer) to persist for up to 600 seconds.
Monitor Filer Health, Warnings, and Updates
In the Filer Health area in the upper right, the following information appears:
Number of Nasuni Edge Appliances offline, if any.
Note: The Edge Appliance sends a “heartbeat” to the NMC every 5 minutes. If a heartbeat is not received after 60 minutes, the Edge Appliance is flagged as offline.
Note: If a Nasuni Edge Appliance goes offline, an email alert is sent, if configured.
Number of hardware errors, if any. Clicking hardware error opens the Filer Platform/ Hardware Settings page. For details, see “Platform Settings”.
Number of setting sync errors, namely, requested changes to Nasuni Edge Appliances that have failed for some reason, if any. Clicking setting sync error opens the Outstanding Settings Updates Filers page. For details, see “Pending Updates”.
Number of Nasuni Edge Appliance updates available, if any. Clicking Filer updates opens the Filer Software Updates page. For details, see “Software Updates”.
Tip: This area does not update automatically. To update the display, refresh the browser page.
Monitor Network Traffic for Managed Edge Appliances
You can view a chart of the network traffic of the Nasuni Edge Appliances vs. time. This chart shows data received from and transmitted to cloud object storage, the user interface, and clients. The scale is in Kbits/second or Mbits/second, depending on throughput. Only Nasuni Edge Appliances that the user has access to are included.
The Network Traffic chart looks like this:
.png?sv=2026-02-06&spr=https&st=2026-08-01T14%3A42%3A53Z&se=2026-08-01T16%3A53%3A53Z&sr=c&sp=r&sig=tK%2BrHKWGxphG9lWQnZlXuuxqOk%2FqRG34LTIjawcLOcU%3D)
Figure 8-2: Network Traffic chart.
Different colors represent types of network traffic. From the drop-down list, select one of the following choices:
All Filers: Displays network traffic for all Nasuni Edge Appliances under the control of the Nasuni Management Console.
specific Nasuni Edge Appliance: Displays network traffic for the selected Nasuni Edge Appliance. Only Nasuni Edge Appliances that the user has access to are included.
On the Network Traffic chart, you can select which network activity to include or exclude by clicking any or all of the following:
Cloud Transmit: for data transmitted to the cloud by the Nasuni Edge Appliance.
Cloud Receive: for data received from the cloud by the Nasuni Edge Appliance.
UI Transmit: for data transmitted to the user interface by the Nasuni Edge Appliance.
UI Receive: for data received from the user interface by the Nasuni Edge Appliance.
Client Transmit: for data transmitted to the client by the Nasuni Edge Appliance.
Client Receive: for data received from the client by the Nasuni Edge Appliance.
If you hover the mouse over any part of the chart, a label appears displaying details about the amount of network activity at that date and time.
.png?sv=2026-02-06&spr=https&st=2026-08-01T14%3A42%3A53Z&se=2026-08-01T16%3A53%3A53Z&sr=c&sp=r&sig=tK%2BrHKWGxphG9lWQnZlXuuxqOk%2FqRG34LTIjawcLOcU%3D)
Figure 8-3: Details of network traffic on Network Traffic chart.
To zoom in on a specific range of displayed data, click the chart at the high end of the range you want, then drag to the low end of the range you want, then release. The chart rescales to zoom in on the selected range.
To reset the zoom to the default display, click Reset zoom.
View the List of Managed Edge Appliances
A list appears of the Nasuni Edge Appliances in this account.
.png?sv=2026-02-06&spr=https&st=2026-08-01T14%3A42%3A53Z&se=2026-08-01T16%3A53%3A53Z&sr=c&sp=r&sig=tK%2BrHKWGxphG9lWQnZlXuuxqOk%2FqRG34LTIjawcLOcU%3D)
Figure 8-4: List of Nasuni Edge Appliances in this account.
Tip: Only Nasuni Edge Appliances that the user has access to are included.
Tip: After performing a disaster recovery on a Nasuni Edge Appliance, refresh this list by clicking
Refresh Managed Filers.
Tip: Nasuni monitors platform-specific limits on the number of supported concurrent connections. When the number of concurrent connections reaches the “soft limit” for an Edge Appliance, you receive a notification of how many connections remain, and a suggestion to reduce the number of connections for that Edge Appliance, if possible. When the number of concurrent connections reaches the “hard limit” for an Edge Appliance, you receive a notification, and all new connections are denied for that Edge Appliance until the number of connections decreases below the “hard limit” again.
Platform | Soft Limit | Hard Limit |
|---|---|---|
N1040 | 3000 connections | 4000 connections |
N1050 | 3000 connections | 4000 connections |
N2040 | 5000 connections | 6000 connections |
N2050 | 5000 connections | 6000 connections |
N4040 | 8000 connections | 10000 connections |
N4050 | 8000 connections | 10000 connections |
Tip: This function can also be performed using the NMC API. For details, see NMC API.
The following properties appear for each Nasuni Edge Appliance in the list of Nasuni Edge Appliances:
Filer: The name of the Nasuni Edge Appliance.
If the Nasuni Edge Appliance is offline, the label “Filer Offline” appears.
Note: The Edge Appliance sends a “heartbeat” to the NMC every 5 minutes. If a heartbeat is not received after 60 minutes, the Edge Appliance is flagged as offline.
Note: If a Nasuni Edge Appliance goes offline, an email alert is sent, if configured.
If the Nasuni Edge Appliance is not managed by the Nasuni Management Console, the label “Filer Not Managed” appears.
Clicking the name of the Nasuni Edge Appliance opens the Filer Details page. See “Filer Details page”.
Filer Version: The currently running version of the Nasuni Edge Appliance software. If updates to new versions of the Nasuni Edge Appliance software are available, the label “Updates Available” appears. To schedule automatic updates, see “Automatic Software Updates”. manually update software, see “Software Updates”.
Platform: The hardware appliance or virtual machine platform that the Nasuni Edge Appliance runs on.
Uptime: The amount of time that the Nasuni Edge Appliance has been running, in days, hours, and minutes.
Health: The overall health of the Edge Appliance. “Healthy”, if there are no unhealthy conditions. “Warning”, if there are any warning conditions that are not in the unhealthy state. “Unhealthy”, if there are any unhealthy conditions. For more details, see “Health Monitor”.
Tip: After addressing an unhealthy condition of an Edge Appliance, you can refresh this list by clicking Refresh Managed Filers.
Status: The current status of the Edge Appliance configuration. A checkmark indicates that the NMC is up to date with the Edge Appliance configuration. If the status is pending, then the NMC is waiting for an update of the Edge Appliance configuration. If there are errors, then there might be an issue with the Edge Appliance configuration.
Open the Filer Details Page
Clicking the name of a Nasuni Edge Appliance opens the Filer Details page.
.png?sv=2026-02-06&spr=https&st=2026-08-01T14%3A42%3A53Z&se=2026-08-01T16%3A53%3A53Z&sr=c&sp=r&sig=tK%2BrHKWGxphG9lWQnZlXuuxqOk%2FqRG34LTIjawcLOcU%3D)
Figure 8-5: Filer Details page.
Network Traffic
You can view a chart of the network traffic of the Nasuni Edge Appliance vs. time. This chart shows data received from and transmitted to cloud object storage, the user interface, and clients. The scale is in Kbits/second or Mbits/second, depending on throughput.
On the Network Traffic chart, you can select which network activity to include or exclude by clicking any or all of the following:
Cloud Transmit: for data transmitted to the cloud by the Nasuni Edge Appliance.
Cloud Receive: for data received from the cloud by the Nasuni Edge Appliance.
UI Transmit: for data transmitted to the user interface by the Nasuni Edge Appliance.
UI Receive: for data received from the user interface by the Nasuni Edge Appliance.
Client Transmit: for data transmitted to the client by the Nasuni Edge Appliance.
Client Receive: for data received from the client by the Nasuni Edge Appliance.
If you hover the mouse over any part of the chart, a label appears displaying details about the amount of network activity at that date and time.
.png?sv=2026-02-06&spr=https&st=2026-08-01T14%3A42%3A53Z&se=2026-08-01T16%3A53%3A53Z&sr=c&sp=r&sig=tK%2BrHKWGxphG9lWQnZlXuuxqOk%2FqRG34LTIjawcLOcU%3D)
Figure 8-6: Details of network traffic on Network Traffic chart.
To zoom in on a specific range of displayed data, click the chart at the high end of the range you want, then drag to the low end of the range you want, then release. The chart rescales to zoom in on the selected range.
To reset the zoom to the default display, click Reset zoom.
CPU Activity
You can view a chart of CPU activity vs. time. This chart shows the percentage usage of the CPU.
If you hover the mouse over any part of the chart, a label appears displaying details about the CPU activity at that date and time.
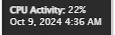
Figure 8-7: Details on CPU activity chart.
Memory Usage
You can view a chart of memory usage vs. time. This chart shows the amount of memory used in units such as GiB.
Note: Nasuni Edge Appliances and the NMC display the size of data in base 10 units (including MB = 1,000,000 bytes, GB = 1,000,000,000 bytes, and TB = 1,000,000,000,000 bytes).
In contrast, some platforms display the size of data in base 2 units (including MB = 1,048,576 bytes, GB = 1,073,741,824 bytes, and TB = 1,099,511,627,776 bytes).
For example, a file that Nasuni displays as 10 MB would be displayed by some platforms as 9.53 MB.
Tip: Due to the way Memory Usage is calculated, the display can show spikes that do not reflect the actual values. Refreshing the display can remove these spikes.
If you hover the mouse over any part of the chart, a label appears displaying details about the memory usage at that date and time.
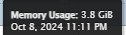
Figure 8-8: Details on Memory Usage chart.
Filer Details
The Filer Details page displays a summary of information about the Nasuni Edge Appliance:
Description: Description of this Nasuni Edge Appliance. Clicking the description opens the Filer Description page, with the Description Settings dialog box selected. For details, see “Nasuni Edge Appliance Description”.
Serial Number: Serial number of this Nasuni Edge Appliance, which is used to recover a Nasuni Edge Appliance.
Important: Authorization codes (also called “Auth codes”) are intended for a single use, and are not permanent. Authorization codes change if the associated serial number is used successfully, if the authorization code is refreshed via the NMC (Account Status --> Serial Numbers, then click Refresh), and if the authorization code is regenerated.
You can regenerate a serial number by using the Serial Numbers page of portal.nasuni.com.Important:
Automatic Updates: The schedule to automatically update the software for this Nasuni Edge Appliance. Clicking the schedule opens the Filer Automatic Software Update Settings page, with the Automatic Updates dialog box selected. For details, see “Automatic Software Updates”.
Cache Settings: The minimum and maximum amount of local cache space reserved for new, incoming data on this Nasuni Edge Appliance. The percentage of the cache to reserve for new, incoming data also appears, or, if the percentage is managed automatically, the label “Automatic” appears. Clicking the setting opens the Filer Cache Settings page, with the Cache Settings dialog box selected. For details, see “Cache Settings”.
Encryption Keys: Number of encryption keys in use on this Nasuni Edge Appliance. Clicking this setting opens the Filer Encryption Keys page. For details, see “Encryption Keys”.
Quality of Service: Number of Quality of Service rules for this Nasuni Edge Appliance. Clicking this setting opens the Filer Quality of Service page, with the Quality of Service Settings dialog box selected. For details, see “Quality of Service (Bandwidth) Settings”.
Configuration Policies: This feature has been deprecated and can be ignored.
SNMP Settings: An indicator of whether SNMP settings are enabled for this Nasuni Edge Appliance. Clicking this setting opens the Filer SNMP Settings page, with the SNMP Settings dialog box selected. For details, see “SNMP Settings”.
Time Configuration: The time zone and number of time servers for this Nasuni Edge Appliance. Clicking this setting opens the Filer Time Configuration page, with the Timezone Settings dialog box selected. For details, see “Time Configuration”.
Remote Support: Remote Support status for this Nasuni Edge Appliance. Clicking this setting opens the Remote Support Service page, with the Edit Remote Support Service dialog box selected. For details, see “Remote Support Service”.
Software updates: Software updates available for this Nasuni Edge Appliance. Clicking this setting opens the Filer Software Updates page, with the Update Filer dialog box selected. For details, see “Software Updates”.
Uptime: Uptime for this Nasuni Edge Appliance.
Security Mode: Security mode for this Nasuni Edge Appliance: Active Directory, LDAP Directory Services, Publicly Available, or Unknown. Clicking this setting opens the Filer Security Settings page. For details, see “Security Settings”.
SSL Certificate: SSL certificate settings for this Nasuni Edge Appliance. Clicking this setting opens the SSL Certificates page. For details, see “SSL Certificates”.
CIFS: Number of SMB (CIFS) shares, clients, and locks for this Nasuni Edge Appliance. Clicking this setting opens the Shares page. For details, see “SMB (CIFS) Shares”.
NFS: Number of NFS exports for this Nasuni Edge Appliance. Clicking this setting opens the Exports page. For details, see “NFS Exports”.
FTP: Number of FTP/SFTP directories for this Nasuni Edge Appliance. Clicking this setting opens the Filer FTP Status page. For details, see “FTP clients”.
In the Platform area:
Filer Version: The version of the Nasuni Edge Appliance software, such as 9.3, and the version of the Nasuni Edge Appliance base operating system, such as OS7.
Platform: Type of platform for this Nasuni Edge Appliance. For details, see “Platform Settings”.
CPUs: Number of CPUs for this Nasuni Edge Appliance. For details, see “Platform Settings”.
Memory: Memory for this Nasuni Edge Appliance. For details, see “Platform Settings”.
Disk Cache: Size of disk cache, and percentage of cache used, for this Nasuni Edge Appliance. For details, see “Platform Settings”.
Note: Nasuni’s display of size might differ from other indications of size, such as Windows Explorer and other utilities. Typically, such utilities display only the size of the data currently present in the local cache, while Nasuni displays the full size, regardless of where the data is.
Ambient Temperature (for Nasuni Edge Appliance hardware appliances only): The ambient temperature in Celsius and Fahrenheit.
Exhaust Temperature (for Nasuni Edge Appliance hardware appliances only): The exhaust temperature in Celsius and Fahrenheit.
Inlet Temperature (for Nasuni Edge Appliance hardware appliances only): The inlet temperature in Celsius and Fahrenheit.
Power Supplies (for Nasuni Edge Appliance hardware appliances only): The status of the power supplies. If the status is Alert, you should investigate the situation.
RAID Arrays (for Nasuni Edge Appliance hardware appliances only): Number of RAID arrays and status of the RAID arrays. If the status is Alert, you should investigate the situation.
RAID Disks (for Nasuni Edge Appliance hardware appliances only): Number of disks and status of the disks. If the status is Alert, you should investigate the situation.
Hostname: Hostname of this Nasuni Edge Appliance. For details, see “Network”.
IP Addresses: IP addresses for this Nasuni Edge Appliance. Clicking this setting opens the Nasuni Edge Appliance user interface. For details, see “Network”.
Default Gateway: Default gateway for this Nasuni Edge Appliance. For details, see “Network”.
DNS Servers: DNS servers for this Nasuni Edge Appliance. For details, see “Network”.
Search Domains: Search domains for this Nasuni Edge Appliance. For details, see “Network”.
Health Monitor
Health Monitor is a feature for monitoring a number of Edge Appliance conditions. Health Monitor conditions can be helpful in troubleshooting issues with Edge Appliances. The monitored results are displayed in the Health area here.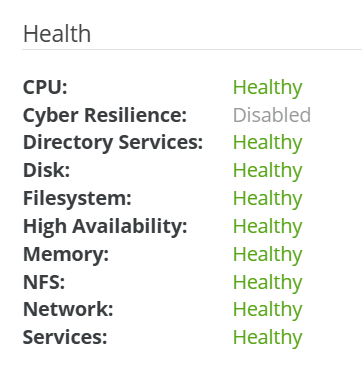
Note: Some of the conditions have two thresholds. If such a condition exceeds one threshold, that results in a “Warning” indication. If that condition then exceeds the other threshold, that results in an “Unhealthy” indication.
Tip: You can also monitor hardware conditions using iDRAC. See iDRAC Configuration.
The overall health of the Edge Appliance is displayed on the Filers page.
Tip: For details of Health Monitor polling intervals, thresholds, and remediation, see Appendix D, “Health Monitor Overview,”.
Tip: If any Health condition is displayed as “Unhealthy”, you can view detailed information and any recommendations by hovering over the “Unhealthy” indicator. Alternatively, clicking “View Recommendations” opens the Health Monitor Current Status dialog box which displays detailed information and any recommendations.
.png?sv=2026-02-06&spr=https&st=2026-08-01T14%3A42%3A53Z&se=2026-08-01T16%3A53%3A53Z&sr=c&sp=r&sig=tK%2BrHKWGxphG9lWQnZlXuuxqOk%2FqRG34LTIjawcLOcU%3D)
Figure 8-10: Health Monitor Current Status dialog box.
In the Health area, the following items are displayed:
CPU: “Unhealthy”, if the CPU utilization is above 95 percent for an extended period of time. “Warning”, if the CPU utilization is above 90 percent for an extended period of time. Otherwise, “Healthy”.
Directory Services: “Unhealthy”, if this Edge Appliance has failed connecting to Active Directory several times in a row. Otherwise, “Healthy”.
Disk (for Nasuni Edge Appliance hardware appliances only): “Unhealthy”, if any of the following conditions is true for this Edge Appliance:
Filesystem: “Unhealthy”, if any of the following conditions is true for this Edge Appliance:
Memory: “Unhealthy”, if available memory for this Edge Appliance is below 5 percent for an extended period of time. “Warning”, if available memory for this Edge Appliance is below 10 percent for an extended period of time. Otherwise, “Healthy”.
NFS: “Unhealthy”, if one or more NFS exports might not be available for this Edge Appliance for an extended period of time. Otherwise, “Healthy”.
Nasuni File IQ: “Unhealthy”, if any of the following conditions is true:
NFIQ database is down for an extended period of time.
NFIQ Audit Event Consumer Service (fsep) is down or experiencing errors for an extended period of time.
NFIQ Metadata Crawler Service (fsms) is down or experiencing errors for an extended period of time.
NFIQ Audit Event Aggregator Service (fsagg) is down or experiencing errors for an extended period of time.
NFIQ Audit Event Consumer Service (fsep) is not able to connect to Azure Event Hubs for an extended period of time.
Note: If the File IQ status is Unhealthy, a link to the File IQ Status appears, which gives details about the cause.
Network: “Unhealthy”, if any of the following conditions is true for this Edge Appliance:
This Edge Appliance is having trouble connecting to cloud object storage for an extended period of time.
This Edge Appliance is having connectivity problems reaching the Nasuni Orchestration Center (NOC) for an extended period of time.
This Edge Appliance is unable to connect to the Global File Lock servers for an extended period of time.
This Edge Appliance is unable to connect to the NMC message queuing service for an extended period of time. NMC management of this Edge Appliance might be impacted.
Services: “Unhealthy”, if any of the following conditions is true for this Edge Appliance:
The UniFS filesystem process is not available for an extended period of time.
One or more Nasuni services are not responding for an extended period of time. Otherwise, “Healthy”.
API Keys
Certain programs external to the Nasuni Edge Appliance require a Nasuni API access key for configuration purposes.
API Access key for external auditing using Varonis
Nasuni can use an external auditing service, such as Varonis. To complete configuration of the Varonis application to use Nasuni auditing events, you must provide a Nasuni API access key. For details of the Varonis configuration, see “Varonis Configuration”. For more details, see “Audit Destinations Status”.
Tip: The NMC API can be used to configure auditing, including configuring AMQP destinations for audit messages (such as for Varonis or RabbitMQ).
To obtain an API Access Key and Passcode, follow these steps:
Click Filers and select API Keys from the menu on the left. The Filer API Access Key Settings page appears.
.png?sv=2026-02-06&spr=https&st=2026-08-01T14%3A42%3A53Z&se=2026-08-01T16%3A53%3A53Z&sr=c&sp=r&sig=tK%2BrHKWGxphG9lWQnZlXuuxqOk%2FqRG34LTIjawcLOcU%3D)
Figure 8-11: Filer API Access Key Settings page.
Click New API Key. The Add API Access Key dialog box appears.
.png?sv=2026-02-06&spr=https&st=2026-08-01T14%3A42%3A53Z&se=2026-08-01T16%3A53%3A53Z&sr=c&sp=r&sig=tK%2BrHKWGxphG9lWQnZlXuuxqOk%2FqRG34LTIjawcLOcU%3D)
Figure 8-12: Add API Access Key dialog box.
From the Filer drop-down list, select the Nasuni Edge Appliance.
In the Name text box, enter a name for this API key. Use a name that is meaningful to you, such as “
varonis_key”.Click Add API Key. The Nasuni Edge Appliance generates a Key Passcode for this key. A message appears that includes the Key Passcode.
Copy and store the Key Passcode.
The new key appears in the API Access Keys list.
To regenerate the Key Passcode, click Edit
 .
.To delete this key, click Delete Key
 .
.
Automatic Software Updates
You can view and edit settings for automatic software updates for the Nasuni Edge Appliances on the
Filer Automatic Software Update Settings page.
You can configure managed Nasuni Edge Appliances to automatically download and install software updates on selected days and times. This feature is disabled by default.
Warning: Do not attempt to restore from a virtual machine snapshot or backup.
Tip: To prevent automatic software updates from occurring at inconvenient times, specify the days and times for automatic software updates to occur. To prevent automatic software updates entirely, clear all days and times.
Important: The version of the Nasuni Management Console must support the version of the Nasuni Edge Appliance that the Nasuni Management Console is to manage. If a Nasuni Edge Appliance is joined to a Nasuni Management Console, update the Nasuni Management Console software before updating the Nasuni Edge Appliance software.
For details, see “NMC version”.
Tip: If updating the Edge Appliance software from a version before 9.0 to version 9.0 and later, for NFS volumes and multiple protocol (SMB (CIFS) and NFS) volumes that are using the Advanced mode of Global File Lock, change the mode of Global File Lock before performing the update. NFS volumes and multiple protocol (SMB (CIFS) and NFS) volumes do not support the Advanced mode of Global File Lock for version 9.0 and later.
You can also manually update the Nasuni Edge Appliance software, as detailed in “Software Updates” .
See Worksheet for a worksheet for planning configurations.
Viewing automatic software update settings
To view automatic software update settings, follow these steps:
Click Filers, then click Automatic Updates in the left-hand column. The Filer Automatic Software Update Settings page displays a list of Nasuni Edge Appliances.
.png?sv=2026-02-06&spr=https&st=2026-08-01T14%3A42%3A53Z&se=2026-08-01T16%3A53%3A53Z&sr=c&sp=r&sig=tK%2BrHKWGxphG9lWQnZlXuuxqOk%2FqRG34LTIjawcLOcU%3D)
Figure 8-13: Filer Automatic Software Update Settings page.
The following information appears for each Nasuni Edge Appliance in the list:
Description: The description of the Nasuni Edge Appliance. You can change the description, as detailed in “Nasuni Edge Appliance Description”.
Days: The days of the week on which to look for automatic software updates. If no days are selected to look for automatic software updates, the label “Disabled” appears.
Hour: The time at which to look for automatic software updates on the selected days.
Editing automatic software update settings
Important: The version of the Nasuni Management Console must support the version of the Nasuni Edge Appliance that the Nasuni Management Console is to manage. If a Nasuni Edge Appliance is joined to a Nasuni Management Console, update the Nasuni Management Console software before updating the Nasuni Edge Appliance software.
For details, see “NMC version”.
To edit automatic software update settings, follow these steps:
On the Filer Automatic Software Update Settings page, select the Nasuni Edge Appliances in the list whose automatic software update settings you want to edit.
Click Edit Filers. The Automatic Updates dialog box appears.
.png?sv=2026-02-06&spr=https&st=2026-08-01T14%3A42%3A53Z&se=2026-08-01T16%3A53%3A53Z&sr=c&sp=r&sig=tK%2BrHKWGxphG9lWQnZlXuuxqOk%2FqRG34LTIjawcLOcU%3D)
Figure 8-14: Automatic Updates dialog box.
To copy the automatic software update settings from a Nasuni Edge Appliance, select the Nasuni Edge Appliance from the Copy Settings drop-down list. The automatic software update settings of the selected Nasuni Edge Appliance appear in the Automatic Updates dialog box.
Select the days to look for automatic software updates (for example, Sunday, Tuesday, and Thursday) in the Days area.
Tip: To prevent automatic software updates entirely, clear all days.
From the Time drop-down list, select the time on the selected day to look for automatic software updates.
Tip: The time is the local time for the Nasuni Edge Appliance.
Click Save Update Schedule. The automatic software update settings are changed. The Nasuni Edge Appliances appear in the list on the Filer Automatic Software Update Settings page.
Alternatively, to exit the dialog box without changing the automatic software update settings, click Close.
Cache Settings
On the Filer Cache Settings page, you can view and edit the settings for the local cache space reserved for new writes.
The cache performs two different, but related, tasks:
The cache temporarily contains new, incoming data that the Nasuni Edge Appliance has not yet sent to object storage. You can set this Reserved cache space to any value from 5 percent to 90 percent. Alternatively, you can allow the Reserved cache space to be managed automatically, which is recommended.
The cache also retains protected data locally that users are most likely to need. This space consists of that part of the cache not Reserved for new, incoming data.
For example, if the space Reserved for new, incoming data is 70 percent, that leaves 30 percent of the cache to retain data locally.
By default, the Nasuni Edge Appliance automatically manages the amount of local cache space reserved for new, incoming data, using an advanced algorithm to optimize cache usage. However, the administrator can manually set the area of the cache reserved for new, incoming data. The area for new, incoming data can be from 5 percent to 90 percent of the cache. The remainder of the cache retains the data locally that users are most likely to need.
The larger the area for new, incoming data is, the less data the Nasuni Edge Appliance can retain locally, and the more slowly users can access data. It might also be necessary for the Nasuni Edge Appliance to frequently retrieve data from the cloud, which could delay access.
However, the larger the area for new, incoming data is, the larger the batches of new, incoming data that the Nasuni Edge Appliance can send to permanent storage in the cloud, protecting that data from loss.
If the cache becomes too full, protected data is “evicted” from the cache until the cache once again has adequate space to perform its tasks. Specifically, if the cache usage exceeds the eviction threshold (default: 85 percent), protected data is evicted from the cache until the cache usage goes below the eviction target (default: 70 percent).
The eviction target is automatically set to 15 percentage points below the specified eviction threshold. For example, if you change the eviction threshold to 65 percent, the new eviction target becomes 50 percent (15 percentage points below 65 percent). For details, see Eviction Algorithm.
Notifications occur when eviction starts, when eviction is complete, and if performing the eviction did not reduce cache usage below the eviction target.
You can estimate the area necessary for each use by examining data usage patterns. For example, if you have a 1 TB cache and must keep 200 GB of data locally, then you can set the area for new, incoming data as high as 800 GB or 80 percent. On the other hand, if you rarely have more than 300 GB in a snapshot, then you can set the area for new, incoming data as low as 30 percent, leaving 70 percent of the cache for retaining data locally.
By manually setting the amount of cache space reserved for new, incoming data, you disable the automatic management of this value.
To view unprotected files in the cache, see “Unprotected Files”.
Viewing cache settings
To view the amount of local cache space reserved for new, incoming data, follow these steps:
Click Filers, then click Cache Settings in the left-hand column. The Filer Cache Settings page displays a list of managed Nasuni Edge Appliances.
.png?sv=2026-02-06&spr=https&st=2026-08-01T14%3A42%3A53Z&se=2026-08-01T16%3A53%3A53Z&sr=c&sp=r&sig=tK%2BrHKWGxphG9lWQnZlXuuxqOk%2FqRG34LTIjawcLOcU%3D)
Figure 8-15: Filer Cache Settings page.
The following information appears for each Nasuni Edge Appliance in the list:
Description: The description of the Nasuni Edge Appliance. You can change the description, as detailed in “Nasuni Edge Appliance Description”.
Minimum Value: The minimum value of space to reserve for new, incoming data, in percent.
Maximum Value: The maximum value of space to reserve for new, incoming data, in percent.
Reserved: The amount of space reserved for new, incoming data in the cache, in percent. If the amount of space reserved for new, incoming data is managed automatically by the Nasuni Edge Appliance, the label “Automatic” appears.
The space not Reserved for new, incoming data is available to retain data locally.
Editing cache settings
To edit cache settings, follow these steps:
On the Filer Cache Settings page, select the Nasuni Edge Appliances in the list whose cache settings you want to edit.
Click Edit Filers. The Cache Settings dialog box appears.
.png?sv=2026-02-06&spr=https&st=2026-08-01T14%3A42%3A53Z&se=2026-08-01T16%3A53%3A53Z&sr=c&sp=r&sig=tK%2BrHKWGxphG9lWQnZlXuuxqOk%2FqRG34LTIjawcLOcU%3D)
Figure 8-16: Cache Settings dialog box.
To copy the cache settings from a Nasuni Edge Appliance, select the Nasuni Edge Appliance from the Copy Settings drop-down list. The cache settings of the selected Nasuni Edge Appliance appear in the Cache Settings dialog box.
From the Reserved drop-down list, select the percentage of the cache to reserve for new data. Alternatively, to enable the Nasuni Edge Appliances to manage the reserved cache space themselves, select Automatic.
The space not Reserved for new, incoming data is available to retain data locally.
Click Save Cache Settings. The cache settings are changed. The Nasuni Edge Appliances appear in the list on the Filer Cache Settings page.
Alternatively, to exit the dialog box without changing the cache settings, click Close.
SMB (CIFS) Settings
You can view and configure SMB (CIFS) settings for Nasuni Edge Appliances. These advanced features of the SMB (CIFS) interface apply to all volumes on a Nasuni Edge Appliance.
Durable handles allow SMB 2.0 and higher clients to open a file and survive a temporary connection loss (60 seconds or less). Durable handles are supported for volumes with NTFS Exclusive Permissions Policy and cannot be used with Global File Lock.
Note: When Global Locking is enabled, support for SMB durable handles (allowing clients to survive temporary connection loss) is disabled. Enabling Global Locking anywhere on the volume disables durable handles. If durable handles is disabled in this way, durable handles cannot be enabled again.
Viewing SMB (CIFS) settings
To view SMB (CIFS) settings, follow these steps:
Click Filers, then click CIFS Settings in the left-hand column. The Filer CIFS Settings page displays a list of Nasuni Edge Appliances.
.png?sv=2026-02-06&spr=https&st=2026-08-01T14%3A42%3A53Z&se=2026-08-01T16%3A53%3A53Z&sr=c&sp=r&sig=tK%2BrHKWGxphG9lWQnZlXuuxqOk%2FqRG34LTIjawcLOcU%3D)
Figure 8-17: Filer CIFS Settings page.
The following information appears for each Nasuni Edge Appliance:
Description: The description of the Nasuni Edge Appliance.
Allocation Roundup Size: Value to round up file sizes on disk. The default is to be disabled.
Protocol Level: The maximum version of the CIFS/SMB protocol that the server negotiates with the client.
Enhanced Support for POSIX Clients: Whether to allow clients to use Portable Operating System Interface (POSIX) semantics: Yes (allow) or No (do not allow). If not enabled, POSIX clients can still connect. However, they do not have the full range of file server operations.
Editing SMB (CIFS) settings
To edit SMB (CIFS) settings, follow these steps:
On the Filer CIFS Settings page, select the Nasuni Edge Appliances to change, then click Edit Filers. The CIFS Settings dialog box appears.
.png?sv=2026-02-06&spr=https&st=2026-08-01T14%3A42%3A53Z&se=2026-08-01T16%3A53%3A53Z&sr=c&sp=r&sig=tK%2BrHKWGxphG9lWQnZlXuuxqOk%2FqRG34LTIjawcLOcU%3D)
Figure 8-18: CIFS Settings dialog box.
To copy the settings from a Nasuni Edge Appliance, select the Nasuni Edge Appliance from the Copy Settings drop-down list. The settings of the selected Nasuni Edge Appliance appear in the dialog box.
From the Allocation Roundup Size drop-down list, select the allocation roundup size. The default is to be disabled.
From the Protocol Level drop-down list, select the maximum version of the CIFS/SMB protocol that the server negotiates with the client. This is the highest level that the Nasuni Edge Appliance supports. The client can negotiate a lower version, if necessary. The choices include the following:
CIFS: Common Internet File System protocol, also called SMB 1.0. SMB 1.0 is disabled by default. To enable SMB 1.0, contact Nasuni Support.
CIFS & SMB2: Server Message Block version 2.0. SMB 2.0 offers improved performance over SMB 1.0.
CIFS & SMB3: Server Message Block version 3.0. SMB 3.0 offers improved performance and security over SMB 2.0.
Tip: Best practice is to select “CIFS & SMB3”. Using SMB3 can improve performance.
To allow clients to use Portable Operating System Interface (POSIX) semantics, select the Enhanced Support for POSIX Clients check box (selected by default). If you clear this option, POSIX clients can still connect. However, they do not have the full range of file server operations.
To not allow anonymous connections, select Restrict Anonymous. When selected, users cannot log into SMB (CIFS) without entering a username and password.
Tip: If “Restrict Anonymous” is not set, anonymous connections are allowed, and users can log into SMB (CIFS) without entering a valid username and password.
If “Restrict Anonymous” is set, anonymous connections are not allowed, and users must enter a valid username and password to log into SMB (CIFS). In particular, users cannot discover shares, cannot discover or list sessions, and cannot discover or list users and groups. Additional restriction options can be configured by contacting Support.
To save your settings, click Save CIFS Settings. Otherwise, click Close.
Note: Changing these settings only affects new CIFS/SMB clients. You must disconnect or reset an existing client's connection to use the new settings.
FTP Settings
You can view and configure FTP/SFTP settings for Nasuni Edge Appliances. These advanced features of the FTP protocol apply to all volumes on a Nasuni Edge Appliance.
Note: Nasuni supports SFTP, the SSH File Transfer Protocol. This is not the same as FTPS, the File Transfer Protocol over SSL.
Tip: You can ensure that the SFTP (SSH File Transfer Protocol) protocol is used, rather than the FTP protocol, with the Firewall page in the Edge Appliance UI. For each Traffic Group, select SFTP and deselect FTP.
Tip: In order to access data using the FTP/SFTP protocol, the following steps are necessary:
Create an SMB (CIFS) or NFS volume. See “Create Volume”.
Enable the FTP protocol on the volume. See “Enabling multiple volume protocols”.
(Optional) Configure FTP/SFTP settings. See “Editing FTP settings”.
Add a new FTP/SFTP directory. See “Creating FTP directories”.
(Optional) Create a permission group that has storage access. See “Adding Permission Groups” in the Nasuni Edge Appliance Administration Guide.
(Optional) Create a user in a permission group that has storage access. See “Adding Users” in the Nasuni Edge Appliance Administration Guide. Active Directory and LDAP users can log in for FTP access just as they do for SMB (CIFS) access. Also, if anonymous access is enabled, you don't need a specific group or user.
Access files using the FTP/SFTP protocol.
Viewing FTP settings
To view FTP/SFTP settings, follow these steps:
Click Filers, then click FTP Settings in the left-hand column. The Filer FTP Settings page displays a list of Nasuni Edge Appliances.
.png?sv=2026-02-06&spr=https&st=2026-08-01T14%3A42%3A53Z&se=2026-08-01T16%3A53%3A53Z&sr=c&sp=r&sig=tK%2BrHKWGxphG9lWQnZlXuuxqOk%2FqRG34LTIjawcLOcU%3D)
Figure 8-19: Filer FTP Settings page.
The following information appears for each Nasuni Edge Appliance:
Description: The description of the Nasuni Edge Appliance.
Masquerade Address: IP address (not DNS hostname) presented to client, instead of local server’s IP address or DNS hostname.
Idle Login Timeout: Time in seconds to wait before closing an idle connection. Zero (0) means never close an idle connection.
Anonymous Access Username: Username that the user must log in with in order to access any FTP/SFTP directory anonymously. Default: anonymous.
Anonymous Access Group: Group associated with the Anonymous Access Username.
Editing FTP settings
Note: Nasuni supports SFTP, the SSH File Transfer Protocol. This is not the same as FTPS, the File Transfer Protocol over SSL.
To edit FTP/SFTP settings, follow these steps:
On the Filer FTP Settings page, select the Nasuni Edge Appliances to change, then click Edit Filers. The FTP Settings dialog box appears.
.png?sv=2026-02-06&spr=https&st=2026-08-01T14%3A42%3A53Z&se=2026-08-01T16%3A53%3A53Z&sr=c&sp=r&sig=tK%2BrHKWGxphG9lWQnZlXuuxqOk%2FqRG34LTIjawcLOcU%3D)
Figure 8-20: FTP Settings dialog box.
To copy the settings from a Nasuni Edge Appliance, select the Nasuni Edge Appliance from the Copy Settings drop-down list. The settings of the selected Nasuni Edge Appliance appear in the dialog box.
Optionally, in the Masquerade Address text box, type an IP address or DNS hostname to present to the client instead of the local server's IP address or DNS hostname.
Optionally, in the Idle Login Timeout text box, type the time in seconds to wait before closing an idle connection. Zero (0) means never close an idle connection.
Optionally, in the Anonymous Access Username text box, type the username that the user must log in with in order to access any FTP/SFTP directory anonymously. Default: anonymous. The username is case sensitive.
Optionally, in the Anonymous Access Group text box, type the group associated with the Anonymous Access Username.
Click Save FTP Settings to save your settings. Otherwise, click Close.
Nasuni Edge Appliance Description
You can view and change Nasuni Edge Appliance descriptions on the Filer Description page.
You can change the name of the Nasuni Edge Appliance from the name assigned when you installed it. The name can be up to 140 characters in length.
This name is used as a descriptive name for the Nasuni Edge Appliance when you log in to your account at www.nasuni.com or perform a disaster recovery.
See Worksheet for a worksheet for planning configurations.
Caution: Avoid using characters that systems, such as Active Directory, specify as disallowed, including period (.), backslash (\), forward slash (/), colon (:), asterisk (*), question mark (?), quotation mark ("), less than sign (<), greater than sign (>), percent (%), and vertical bar (|). Errors can occur for Nasuni Edge Appliances whose names include such characters. For example, it might not be possible to configure the Nasuni Edge Appliance for Active Directory access. You can change the name of the Nasuni Edge Appliance to avoid such characters.
Viewing Nasuni Edge Appliance descriptions
To view Nasuni Edge Appliance descriptions, follow these steps:
Click Filers, then click Description in the left-hand column. The Filer Description page displays a list of managed Nasuni Edge Appliances.
.png?sv=2026-02-06&spr=https&st=2026-08-01T14%3A42%3A53Z&se=2026-08-01T16%3A53%3A53Z&sr=c&sp=r&sig=tK%2BrHKWGxphG9lWQnZlXuuxqOk%2FqRG34LTIjawcLOcU%3D)
Figure 8-21: Filer Description page.
The following information appears for each Nasuni Edge Appliance in the list:
Description: The description of the Nasuni Edge Appliance.
Editing the Nasuni Edge Appliance description
Tip: This function can also be performed using the NMC API. For details, see NMC API.
To edit the selected Nasuni Edge Appliance description, follow these steps:
On the Filer Description page, click Edit
.png?sv=2026-02-06&spr=https&st=2026-08-01T14%3A42%3A53Z&se=2026-08-01T16%3A53%3A53Z&sr=c&sp=r&sig=tK%2BrHKWGxphG9lWQnZlXuuxqOk%2FqRG34LTIjawcLOcU%3D) . The Description Settings dialog box appears.
. The Description Settings dialog box appears..png?sv=2026-02-06&spr=https&st=2026-08-01T14%3A42%3A53Z&se=2026-08-01T16%3A53%3A53Z&sr=c&sp=r&sig=tK%2BrHKWGxphG9lWQnZlXuuxqOk%2FqRG34LTIjawcLOcU%3D)
Figure 8-22: Description Settings dialog box.
Enter a new description in the Filer Description text box. The description can be up to 140 characters in length.
Caution: Avoid using characters that systems, such as Active Directory, specify as disallowed, including period (.), backslash (\), forward slash (/), colon (:), asterisk (*), question mark (?), quotation mark ("), less than sign (<), greater than sign (>), percent (%), and vertical bar (|). Errors can occur for Nasuni Edge Appliances whose names include such characters. For example, it might not be possible to configure the Nasuni Edge Appliance for Active Directory access.
To accept your, click Save Description. The description is changed and appears in the list of Nasuni Edge Appliances.
Alternatively, to exit this screen without changing the description, click Close.
Disk Encryption
You can view and change the disk encryption settings for Nasuni Edge Appliances. If Full Disk Encryption is available for a Nasuni Edge Appliance, you can enable disk encryption. If disk encryption is enabled, you can change the encryption password.
Warning: After Full Disk Encryption is enabled, it cannot be disabled.
Viewing disk encryption status
To view the status of disk encryption for Nasuni Edge Appliances, follow these steps:
Click Filers, then click Disk Encryption in the left-hand column. The Full Disk Encryption page displays a list of managed Nasuni Edge Appliances.
.png?sv=2026-02-06&spr=https&st=2026-08-01T14%3A42%3A53Z&se=2026-08-01T16%3A53%3A53Z&sr=c&sp=r&sig=tK%2BrHKWGxphG9lWQnZlXuuxqOk%2FqRG34LTIjawcLOcU%3D)
Figure 8-23: Full Disk Encryption page.
The following information appears for each Nasuni Edge Appliance in the list:
Description: The description of the Nasuni Edge Appliance.
Full Disk Encryption: The status of disk encryption for the Nasuni Edge Appliance: Not Available, Not Enabled, or Enabled.
Editing the disk encryption status of the Nasuni Edge Appliance
Warning: After Full Disk Encryption is enabled, it cannot be disabled.
To enable disk encryption, follow these steps:
To enable disk encryption: On the Full Disk Encryption page, for a Nasuni Edge Appliance that has the status of Not Enabled, click Edit
 . The Enable Full Disk Encryption dialog box appears.
.png?sv=2026-02-06&spr=https&st=2026-08-01T14%3A42%3A53Z&se=2026-08-01T16%3A53%3A53Z&sr=c&sp=r&sig=tK%2BrHKWGxphG9lWQnZlXuuxqOk%2FqRG34LTIjawcLOcU%3D)
Figure 8-24: Enable Full Disk Encryption dialog box.
Enter a password for the disk, and verify the password.
To change the password for a disk with disk encryption enabled: On the Full Disk Encryption page, for a Nasuni Edge Appliance that has the status of Enabled, click Edit
 . The Change Full Disk Encryption Password dialog box appears.
.png?sv=2026-02-06&spr=https&st=2026-08-01T14%3A42%3A53Z&se=2026-08-01T16%3A53%3A53Z&sr=c&sp=r&sig=tK%2BrHKWGxphG9lWQnZlXuuxqOk%2FqRG34LTIjawcLOcU%3D)
Figure 8-25: Change Full Disk Encryption Password dialog box.
Enter the current password, then enter a new password for the disk, and verify the password. Click Save.
Email Settings
Clicking the Email Settings link opens the Filer & Console Email Settings page. See “Email Settings”.
Encryption Keys
Note: For details of encryption key management, see Encryption Key Best Practices.
You can view, upload, send, escrow, and delete encryption keys on the Filer Encryption Keys page. You can also select backup keys. You can view, add, enable, and disable volume encryption keys on the Volume Encryption Keys page. You can view, upload, escrow, and delete encryption keys on the Console Settings Encryption Keys page.
The Nasuni Edge Appliance automatically encrypts your data at your premises using the OpenPGP encryption protocol, with the default encryption of 256-bit Advanced Encryption Standard (AES-256). The data remains encrypted in cloud object storage.
You can generate your own encryption keys using any OpenPGP-compatible program, such as Gpg4win, GPGTools, and OpenPGP Studio. For details, see Generating Encryption Keys. You can then add (import or upload) the encryption key to the Nasuni Management Console. (For security reasons, encryption keys that you upload cannot be downloaded from the system.) The encryption key is used to encrypt your data before it is sent to cloud object storage and decrypt data when it is read back.
Note: If an uploaded encryption key has an associated passphrase, that passphrase is removed from the encryption key when it is uploaded. The Edge Appliance does not need the passphrase in order to use the encryption key. However, if you do not escrow this encryption key, if you ever perform a recovery procedure on the Edge Appliance, you must provide that passphrase when you upload that encryption key during the recovery procedure.
You can send existing encryption keys to Nasuni Edge Appliances. You can escrow your encryption keys with Nasuni.
All data on a volume is encrypted using one or more OpenPGP-compatible encryption keys before being sent to cloud object storage. Volumes may be encrypted with one or more encryption keys, and encryption keys may be used for any number of volumes.
There are several actions you can perform on encryption keys, including adding new encryption keys, enabling or disabling encryption keys, escrowing encryption keys with Nasuni, and, under certain circumstances, deleting encryption keys.
All uploaded encryption keys must be at least 2048 bits long.
Warning: Do NOT save encryption key files to a volume on a Nasuni Edge Appliance. You will NOT be able to use these to recover data. This is NOT how to upload encryption keys to a Nasuni Edge Appliance. To upload encryption keys to a Nasuni Edge Appliance, use the Encryption Keys page.
At least one encryption key must be enabled for a volume, but several encryption keys can be enabled at the same time. When multiple encryption keys are enabled, all of the encryption keys enabled at the time are used to encrypt the data. Any of the encryption keys enabled at the time a piece of data is encrypted can be used to later decrypt the data. Only the encryption keys enabled when the data was written can decrypt that data. An encryption key that was enabled after the data was written cannot decrypt any data that was written before that key was enabled.
There are several reasons you might want to disable an encryption key, such as, when someone with access to the encryption key leaves the company, or if your enterprise has a policy of rotating encryption keys periodically. (For details about “rotating” or rolling over encryption keys, see “Rotating” (or rolling over) encryption keys for a volume.) When you disable an encryption key, no future data is encrypted with that encryption key. However, all data previously encrypted by that disabled encryption key remains encrypted by that disabled encryption key. For this reason, before you disable an encryption key, you should consider establishing a snapshot retention policy that removes the data that was encrypted with the disabled encryption key. Because volumes must have at least one encryption key associated with them, in practice you add a new encryption key to a volume first, and then disable the existing encryption key.
You can delete encryption keys, but only in the case where they are not being used by any volumes.
You cannot modify encryption keys stored on the system. For security reasons, encryption keys that you upload cannot be downloaded from the system. You can only download encryption keys that the Nasuni Edge Appliance has generated internally.
You can escrow your encryption keys with Nasuni (or a trusted third party), or store your own encryption keys. Before you can escrow your encryption keys with Nasuni, you must create an escrow passphrase, in case you need these escrowed encryption keys when you perform a recovery procedure.
You can specify that you do not want Nasuni to generate any of your encryption keys. This ensures that your data is encrypted only with encryption keys that you upload. If you specify this, you must upload all the encryption keys used. Specifically, when creating a volume, you cannot select Create New Key as the source of the volume encryption key. For security reasons, encryption keys that you upload cannot be downloaded from the system. If you want to specify that Nasuni not generate encryption keys, request Nasuni Support to disable key generation in your license.
Similarly, you can specify that you do not want Nasuni to escrow encryption keys. If you specify this, you must manage your own encryption keys, because Nasuni does not manage them. If you specify this, you can still have Nasuni generate encryption keys, and those generated encryption keys are still automatically escrowed, because all generated encryption keys are automatically escrowed. If you want to specify that Nasuni not escrow encryption keys, request Nasuni Support to disable key escrow in your license.
To ensure that none of your encrypted keys is escrowed with Nasuni, you must specify BOTH that Nasuni not generate encryption keys AND that Nasuni not escrow encryption keys.
Note: To add an encryption key to a volume, see “Adding encryption keys to a volume”.
See Worksheet for a worksheet for planning configurations.
Viewing encryption keys on Nasuni Edge Appliances
To view encryption keys on Nasuni Edge Appliances, follow these steps:
Click Filers, then click Encryption Keys in the left-hand column. The Filer Encryption Keys page displays a list of encryption keys on managed Nasuni Edge Appliances.
.png?sv=2026-02-06&spr=https&st=2026-08-01T14%3A42%3A53Z&se=2026-08-01T16%3A53%3A53Z&sr=c&sp=r&sig=tK%2BrHKWGxphG9lWQnZlXuuxqOk%2FqRG34LTIjawcLOcU%3D)
Figure 8-26: Filer Encryption Keys page.
The following information appears for each encryption key in the list:
Filer: The name of the Nasuni Edge Appliance where this encryption key is located.
Escrowed by Nasuni: Whether this encryption key is escrowed by Nasuni: Yes (encryption key is escrowed by Nasuni) or No (encryption key is not escrowed by Nasuni).
Actions: Actions available for each encryption key.
Adding (importing or uploading) encryption keys to Nasuni Edge Appliances
Note: For details of encryption key management, see Encryption Key Best Practices.
You can add (import or upload) encryption keys to Nasuni Edge Appliances.
You can generate your own encryption keys using any OpenPGP-compatible program, such as Gpg4win, GPGTools, and OpenPGP Studio. For details, see Generating Encryption Keys. You can then add (import or upload) the encryption key to the Nasuni Management Console. The encryption key is used to encrypt your data before it is sent to cloud object storage and decrypt data when it is read back. The Nasuni Edge Appliance accepts multiple encryption algorithms for encryption keys.
All uploaded encryption keys must be at least 2048 bits long.
Important: For security reasons, encryption keys that you upload cannot be downloaded from the system.
Tip: You can also upload encryption keys using the NMC API. This can be useful for automating tasks and for enhancing security. For more details, see Nasuni API Documentation.
Note: If an uploaded encryption key has an associated passphrase, that passphrase is removed from the encryption key when it is uploaded. The Edge Appliance does not need the passphrase in order to use the encryption key. However, if you do not escrow this encryption key, if you ever perform a recovery procedure on the Edge Appliance, you must provide that passphrase when you upload that encryption key during the recovery procedure.
Important: Before you can escrow your encryption keys with Nasuni, you must create an escrow passphrase, in case you need these escrowed encryption keys when you perform a recovery procedure. See “Escrow Passphrase”.
Important: Imported encryption keys are not automatically escrowed. You MUST SAVE all imported encryption keys to another location outside the Nasuni Edge Appliance, so that they are available if needed for disaster recovery. All encryption keys associated with a volume must be recovered as part of the disaster recovery process. To escrow encryption keys with Nasuni, see “Escrowing Encryption Keys with Nasuni” .
To add (import or upload) encryption keys to Nasuni Edge Appliances, follow these steps:
On the Filer Encryption Keys page, click Upload Encryption Keys. The Import Key(s) dialog box appears.
.png?sv=2026-02-06&spr=https&st=2026-08-01T14%3A42%3A53Z&se=2026-08-01T16%3A53%3A53Z&sr=c&sp=r&sig=tK%2BrHKWGxphG9lWQnZlXuuxqOk%2FqRG34LTIjawcLOcU%3D)
Figure 8-27: Import Key(s) dialog box.
Select the managed Nasuni Edge Appliances to which you want to upload the encryption key.
Click Choose File, then navigate to the encryption key file. This file should be OpenPGP- compatible.
Caution: The maximum length of a file name is 255 bytes.
In addition, the length of a path, including the file name, must be less than 4,000 bytes.
Since the UTF-8 representation of characters from some character sets can occupy several bytes, the maximum number of characters that a file path or a file name might contain can vary.
If a particular client has other limits, the smaller of the two limits applies.
If an encryption key passphrase is needed, enter the encryption key passphrase in the Key Passphrase text box.
Important: The encryption key passphrase must consist only of ASCII letters (A–Z, a–z), ASCII numerals (0–9), and the special characters listed in Allowed ASCII Special Characters.
Also, the maximum length of the encryption key passphrase is 200 characters.
Note: If an uploaded encryption key has an associated passphrase, that passphrase is removed from the encryption key when it is uploaded. The Edge Appliance does not need the passphrase in order to use the encryption key. However, if you do not escrow this encryption key, if you ever perform a recovery procedure on the Edge Appliance, you must provide that passphrase when you upload that encryption key during the recovery procedure.
Click Import Key. The encryption key is imported to the selected Nasuni Edge Appliances. Alternatively, to exit this screen without importing any encryption keys, click Close.
Sending encryption keys to Nasuni Edge Appliances
You can send existing encryption keys from the Nasuni Management Console to Nasuni Edge Appliances.
Tip: To use an encryption key from one Edge Appliance on other Edge Appliances, first obtain a file containing the desired encryption key. If the key was generated internally by the Edge Appliance, download the encryption key from the original Edge Appliance to a file, using the "Download Generated Keys" button on the Encryption Keys page. After obtaining a file containing the encryption key, upload the encryption key to the NMC, using the procedure in “Uploading (importing or adding) encryption keys to the NMC”. Then you can send the uploaded encryption key to other Edge Appliances.
Important: Encryption keys are not automatically escrowed. You MUST SAVE all encryption keys to another location outside the Nasuni Edge Appliance, so that they are available if needed for disaster recovery. All encryption keys associated with a volume must be recovered as part of the disaster recovery process. To escrow encryption keys with Nasuni, see “Escrowing Encryption Keys with Nasuni”.
To send encryption keys to Nasuni Edge Appliances, follow these steps:
On the Filer Encryption Keys page, click Send NMC Keys. The Send NMC Key(s) dialog box appears.
.png?sv=2026-02-06&spr=https&st=2026-08-01T14%3A42%3A53Z&se=2026-08-01T16%3A53%3A53Z&sr=c&sp=r&sig=tK%2BrHKWGxphG9lWQnZlXuuxqOk%2FqRG34LTIjawcLOcU%3D)
Figure 8-28: Send NMC Key(s) dialog box.
Select the managed Nasuni Edge Appliances to which you want to send the encryption keys.
Select the encryption keys that you want to send to the selected Nasuni Edge Appliances.
Click Send Key(s). The selected encryption keys are sent to the selected Nasuni Edge Appliances.
Alternatively, to exit this screen without sending any encryption keys, click Close.
Escrowing Encryption Keys with Nasuni
Note: For details of encryption key management, see Encryption Key Best Practices.
You can escrow your encryption keys with Nasuni.
Escrowing an encryption key with Nasuni means that you can, at any time, request the encryption key during a disaster recovery from Nasuni. Your key is protected on Nasuni servers using the same security practices that we use for all keys escrowed with Nasuni.
Note: You can specify that you do not want Nasuni to escrow encryption keys. If you specify this, you must manage your own encryption keys, because Nasuni does not manage them. If you specify this, you can still have Nasuni generate encryption keys, and those generated encryption keys are still automatically escrowed, because all generated encryption keys are automatically escrowed. If you want to specify to not escrow encryption keys, contact Nasuni Support.
Important: Before you can escrow your encryption keys with Nasuni, you must create an escrow passphrase, in case you need these escrowed encryption keys when you perform a recovery procedure. See “Escrow Passphrase”.
To escrow encryption keys with Nasuni, follow these steps:
For the encryption key that you want to escrow with Nasuni, on the Filer Encryption Keys page, click Escrow Key with Nasuni
.png?sv=2026-02-06&spr=https&st=2026-08-01T14%3A42%3A53Z&se=2026-08-01T16%3A53%3A53Z&sr=c&sp=r&sig=tK%2BrHKWGxphG9lWQnZlXuuxqOk%2FqRG34LTIjawcLOcU%3D) . The Escrow Encryption Key dialog box appears.
. The Escrow Encryption Key dialog box appears..png?sv=2026-02-06&spr=https&st=2026-08-01T14%3A42%3A53Z&se=2026-08-01T16%3A53%3A53Z&sr=c&sp=r&sig=tK%2BrHKWGxphG9lWQnZlXuuxqOk%2FqRG34LTIjawcLOcU%3D)
Figure 8-29: Escrow Encryption Key dialog box.
Escrow Encryption Keyin the Confirmation Phrase text field.Caution: You are about to permanently escrow your encryption key with the Nasuni Corporation. This process is irreversible.
Click Escrow Key. Your encryption key is escrowed with Nasuni. The information on the Filer Encryption Keys page updates to reflect this change.
Alternatively, to exit this screen without escrowing any encryption keys, click Close.
Deleting Encryption Keys
You can delete encryption keys, as long as the encryption key is not currently assigned to a volume and never has been assigned to a volume. Encryption keys that were once assigned to a volume, but are now disabled, might be needed for disaster recovery procedures and so cannot be deleted.
To delete an encryption key, follow these steps:
For the encryption key that you want to delete, on the Filer Encryption Keys page, click Delete Key
 . The Delete Encryption Key dialog box appears.
.png?sv=2026-02-06&spr=https&st=2026-08-01T14%3A42%3A53Z&se=2026-08-01T16%3A53%3A53Z&sr=c&sp=r&sig=tK%2BrHKWGxphG9lWQnZlXuuxqOk%2FqRG34LTIjawcLOcU%3D)
Figure 8-30: Delete Encryption Key dialog box.
Delete Encryption Keyin the Confirmation Phrase text field.Caution: You are about to permanently delete this encryption key. This process is irreversible.
Click Delete Key. Your encryption key is deleted. The Filer Encryption Keys page updates to reflect this change.
Alternatively, to exit this screen without deleting any encryption keys, click Close.
Backup Keys
A backup key is a type of encryption key that is used to ensure that it is possible to recover a Nasuni Edge Appliance that has no owned volumes. Without a backup key, it is not possible to recover a Nasuni Edge that has no owned volumes.
If a Nasuni Edge has no owned volumes and no backup key, after 2 days, the following notification is sent: “Because this Edge Appliance has no volumes or backup keys, you cannot currently perform a disaster recovery on this Edge Appliance. On the Encryption Keys page, you can generate a backup key to enable disaster recovery.”
If the backup key is the only encryption key for the Nasuni Edge, you cannot delete the backup key.
When recovering the Nasuni Edge using a backup key, indicate whether or not you need Nasuni to provide an escrowed backup key on the second “Perform Disaster Recovery on existing Edge Appliance” page. Then obtain your backup key, either from Nasuni or from your own safekeeping, and upload your backup key on the “Upload Encryption Keys” page.
To set backup key, follow these steps:
On the Filer Encryption Keys page, a list of encryption keys appears.
.png?sv=2026-02-06&spr=https&st=2026-08-01T14%3A42%3A53Z&se=2026-08-01T16%3A53%3A53Z&sr=c&sp=r&sig=tK%2BrHKWGxphG9lWQnZlXuuxqOk%2FqRG34LTIjawcLOcU%3D)
Figure 8-31: Filer Encryption Keys page.
For the encryption key that you want to designate as the backup key, click Set Backup Key
 .
.
The selected encryption key becomes the backup key.
Escrow Passphrase
To perform a recovery procedure on an Edge Appliance, you MUST have all of the encryption keys for ALL volumes owned by that Edge Appliance in order to successfully regain access to your data. This means that, if Nasuni is escrowing any of your encryption keys, one of the following must occur:
You must have created an escrow passphrase.
You must have all of your encryption keys available, including the encryption keys escrowed with Nasuni.
You must contact Nasuni and verify your identity so that Nasuni can issue a special one-time- use recovery key.
The escrow passphrase must satisfy these constraints:
Contain only ASCII letters (A–Z, a–z), ASCII numerals (0–9), and the special characters listed in Allowed ASCII Special Characters.
Contain no Unicode.
Cannot exceed 511 characters.
You can create an escrow passphrase on the Nasuni Edge Appliance, on the NMC, or using the NMC API.
To create an escrow passphrase on the NMC, follow these steps:
Click Filers, then select Escrow Passphrase from the list. The Filer Escrow Passphrase page appears.

Figure 8-32: Filer Escrow Passphrase page.
Select the Nasuni Edge Appliances to set the escrow passphrase for, then click Edit Filers. The Set Escrow Passphrase dialog box appears.
.png?sv=2026-02-06&spr=https&st=2026-08-01T14%3A42%3A53Z&se=2026-08-01T16%3A53%3A53Z&sr=c&sp=r&sig=tK%2BrHKWGxphG9lWQnZlXuuxqOk%2FqRG34LTIjawcLOcU%3D)
Figure 8-33: Set Escrow Passphrase dialog box.
Enter the Escrow Passphrase. The escrow passphrase must satisfy these constraints:
Contain only ASCII letters (A–Z, a–z), ASCII numerals (0–9), and the special characters listed in Allowed ASCII Special Characters.
Contain no Unicode.
Cannot exceed 511 characters.
An indication of the strength of the passphrase is displayed.
Confirm the escrow passphrase by entering it again.
Click Set Passphrase.
The escrow passphrase is created.
Important: Keep this escrow passphrase in a secure place. You use the escrow passphrase when performing a recovery procedure for the Nasuni Edge Appliance.
Tip: If the escrow passphrase is lost, contact Nasuni Support and complete a lost passphrase form. Nasuni provides a one-time-use recovery key. The recovery key is not the escrow passphrase: Nasuni does not know your escrow passphrase and cannot provide it.
Global Locking
This page enables you to configure certain aspects of Global File Lock. For details about Global File Lock, see “Global File Lock”.
Tip: For Nasuni recommendations for volume configuration, see “Volume Configuration”.
Note: You can enable and disable Global File Lock using the NMC API. For details, see Nasuni Labs.
Tip: Use caution when making changes to Global File Lock, and discuss the possible implications of changes beforehand with Nasuni Technical Support.
Tip: To use Global File Lock, Global Locking must be enabled in the customer license.
Note: You can view the Health Status of the Nasuni Orchestration Center (NOC), Global File Acceleration (GFA), and Global File Lock (GFL) at portal.nasuni.com, under System Health.
Tip: A specific lock server can be assigned to a specific volume. Consult Nasuni Support.
Caution: Nasuni recommends that you enable, disable, or modify Global File Lock settings only when snapshots are not running for the volume involved.
If Global File Acceleration is Active, you can specify a Global File Acceleration Enablement Window during which you can perform Global File Lock tasks.
Caution: Disabling Global File Lock does not take effect immediately for files that still have outstanding locks by one or more clients.
Caution: It is not recommended to move files between directories protected by Global File Lock and directories not protected by Global File Lock. Data loss is possible.
Note: When Global Locking is enabled, support for SMB durable handles (allowing clients to survive temporary connection loss) is disabled.
Caution: If you move a directory from a parent directory that does not have Global File Lock enabled, to another parent directory that does have Global File Lock enabled, the new directory is created in the destination parent directory, the data is moved to the new directory, and the original directory is deleted from the source parent directory.
Snapshots of the moved directory from before the move are retained in the source parent directory.
Global File Lock is automatically enabled for the new directory. This default behavior can be changed so that Global File Lock is not automatically enabled for the moved directory. Nasuni Support can configure this setting.
Tip: If Global File Lock is enabled for a volume that uses multiple protocols where hardlinks might be present, it is highly recommended that the parent directory where Global File Lock is enabled be exported as an “NFS Export” to applications that use multiple protocols. Note that hardlinks can span multiple hierarchies where Global File Lock is enabled.
.png?sv=2026-02-06&spr=https&st=2026-08-01T14%3A42%3A53Z&se=2026-08-01T16%3A53%3A53Z&sr=c&sp=r&sig=tK%2BrHKWGxphG9lWQnZlXuuxqOk%2FqRG34LTIjawcLOcU%3D)
Figure 8-34: Export GFL parent directory as NFS Export.
Caution: Allowing NFS hardlinks to span hierarchies outside where Global File Lock is enabled might result in data inconsistencies during file synchronization. This does not apply to soft links such as symlinks.
.png?sv=2026-02-06&spr=https&st=2026-08-01T14%3A42%3A53Z&se=2026-08-01T16%3A53%3A53Z&sr=c&sp=r&sig=tK%2BrHKWGxphG9lWQnZlXuuxqOk%2FqRG34LTIjawcLOcU%3D)
Figure 8-35: Avoid NFS hardlinks outside GFL.
Important: If an open file has Global File Lock enabled, and if that file is saved, then that file is protected in the cloud outside of the regular snapshot, even if that file is still open. However, if Antivirus Service is enabled for that file, then that open file is not immediately protected in the cloud. This is because Antivirus Service must check that file before that file can be moved to cloud object storage. In this case, after Antivirus Service checks that file, and that file has no infections, then that file is protected in the cloud.
If a file does have antivirus infections, and those infections are marked “Ignore”, then the file experiences the usual Global File Lock processing.
For details of Global File Lock processing, see Global File Lock. For details of Antivirus Service processing, see Antivirus Service.
If Global File Lock is enabled, and Internet connectivity issues prevent a Nasuni Edge Appliance from releasing locks on certain files, local users can still read any files that are present in the local cache by degrading the type of lock to a read lock.
If a user is trying to access a file that is not present in the local cache, and if the Nasuni Edge Appliance does have Internet access, you can also attempt to restore access to the file by degrading the type of lock to a read lock. Enabling this feature causes all locks that are not read locks to be denied. This effectively makes any directories that have global locks enabled into read-only directories.
To continue working on a file, the user should copy the file to their local client. After connectivity is restored, set “Degrade to read locks” back to “disabled”.
After connectivity is restored and “Degrade to read locks” has been set back to “disabled”, the user should copy the file back to the Edge Appliance.
Tip: Only enable this feature if file access is affected for an extended period of time.
You can perform this procedure using either the Nasuni Edge Appliance user interface or the Nasuni Management Console (NMC).
Degrading Global File Lock to read locks
To degrade Global File Lock to read locks, follow these steps:
Click Filers, then select Global Locking. The Filer Global Locking Settings page appears.
.png?sv=2026-02-06&spr=https&st=2026-08-01T14%3A42%3A53Z&se=2026-08-01T16%3A53%3A53Z&sr=c&sp=r&sig=tK%2BrHKWGxphG9lWQnZlXuuxqOk%2FqRG34LTIjawcLOcU%3D)
Figure 8-36: Filer Global Locking Settings page.
Select the Nasuni Edge Appliances to degrade to read locks, then click Edit Filers. The Global Locking Settings dialog box appears.
.png?sv=2026-02-06&spr=https&st=2026-08-01T14%3A42%3A53Z&se=2026-08-01T16%3A53%3A53Z&sr=c&sp=r&sig=tK%2BrHKWGxphG9lWQnZlXuuxqOk%2FqRG34LTIjawcLOcU%3D)
Figure 8-37: Global Locking Settings dialog box.
To copy the settings from a Nasuni Edge Appliance, select the Nasuni Edge Appliance from the Copy Settings drop-down list. The settings of the selected Nasuni Edge Appliance appear in the dialog box.
To degrade Global File Lock to read locks, select enabled from the Degrade to read locks drop-down list.
To accept your selections, click Save Global Locking Settings. The Global File Lock configuration is changed.
After connectivity is restored, set “Degrade to read locks” back to “disabled”.
Disabling Global Locking on customer license
If Global File Locking is not necessary, you can disable Global Locking on the customer license.
Tip: If any directories currently have Global File Lock enabled, then, before disabling Global Locking in the customer license, you must disable Global File Lock on these directories.
To disable Global Locking on the customer license, contact Nasuni Support.
Quality of Service (Bandwidth) Settings
Quality of Service (QoS) settings specify the inbound and outbound bandwidth configuration for moving data to and from the Nasuni Edge Appliance, such as moving snapshots to cloud object storage. The default inbound Quality of Service is unlimited. The default outbound Quality of Service is 10 megabits per second. However, Nasuni does not recommend keeping those bandwidths. The IT administrator or person responsible for managing Nasuni Edge Appliances can change the bandwidth of inbound and outbound data as needed.
Tip: Nasuni recommends setting the Quality of Service to the limit of the total bandwidth, or slightly higher (so that bandwidth is not being limited). If the Quality of Service is too low, it can cause delays in propagation and snapshots.
Nasuni does not recommend setting the Quality of Service to Unlimited, because a setting of Unlimited disables traffic shaping, which prioritizes and allocates bandwidth to different types of traffic (such as user activity, snapshots, and merges), so that no traffic is denied bandwidth.
Note: When you create one or more Quality of Service rules, the default Quality of Service bandwidth becomes unlimited during any time that is not defined by a rule.
Note: If the inbound Quality of Service is too low, and data must be obtained from cloud object storage, data access might be affected.
Note: If the outbound Quality of Service is large or unlimited, and the inbound Quality of Service is small, the limited inbound bandwidth for return packets (such as acknowledgements) might affect the outbound bandwidth.
You can also create additional Quality of Service (QoS) rules. A Nasuni Edge Appliance can have a maximum of 12 rules. You can set the bandwidth of inbound and outbound data for specific days and between specific hours. For example, if you specify 10 megabits per second outbound for Monday through Friday from 8:00 AM to 3:00 PM, then the Nasuni Edge Appliance configures the outbound bandwidth to a maximum of 10 megabits per second during that period, but does not limit the bandwidth used outside that period. Snapshots are slower during the limited bandwidth period. Local user read/write operations are not affected.
Limiting the bandwidth of inbound and outbound data between specific hours can help decrease network congestion. For instance, if you configure snapshots to occur every hour and limit the outbound bandwidth to 2 megabits per second, a large snapshot completes at a slower rate, but with no impact on your network speeds.
Note: When you create one or more Quality of Service rules, the default Quality of Service bandwidth becomes unlimited during any time that is not defined by a rule.
See Worksheet for a worksheet for planning configurations.
Viewing Quality of Service settings
To view the Quality of Service settings, follow these steps:
Click Quality of Service. The Filer Quality of Service page displays a list of managed Nasuni Edge Appliances.
.png?sv=2026-02-06&spr=https&st=2026-08-01T14%3A42%3A53Z&se=2026-08-01T16%3A53%3A53Z&sr=c&sp=r&sig=tK%2BrHKWGxphG9lWQnZlXuuxqOk%2FqRG34LTIjawcLOcU%3D)
Figure 8-38: Filer Quality of Service page.
The following information appears for each Nasuni Edge Appliance in the list:
Days: The days of the week for which Quality of Service rules are scheduled. If no rules have been enabled, the label “--” appears.
Time: The time span during which Quality of Service rules are scheduled. If no rules have been enabled, the label “--” appears.
Outbound Limit: The limit on outbound bandwidth during specified times on specified days.
Tip: Nasuni recommends setting the Quality of Service to the limit of the total bandwidth, or slightly higher (so that bandwidth is not being limited). If the Quality of Service is too low, it can cause delays in propagation and snapshots.
Nasuni does not recommend setting the Quality of Service to Unlimited, because a setting of Unlimited disables traffic shaping, which prioritizes and allocates bandwidth to different types of traffic (such as user activity, snapshots, and merges), so that no traffic is denied bandwidth.
Inbound Limit: The limit on inbound bandwidth during specified times on specified days.
Adding Quality of Service rules
To edit Quality of Service rules, follow these steps:
On the Filer Quality of Service page, select the Nasuni Edge Appliances in the list to which you want to add Quality of Service rules.
Click Edit Filers. The Quality of Service Settings dialog box appears.
.png?sv=2026-02-06&spr=https&st=2026-08-01T14%3A42%3A53Z&se=2026-08-01T16%3A53%3A53Z&sr=c&sp=r&sig=tK%2BrHKWGxphG9lWQnZlXuuxqOk%2FqRG34LTIjawcLOcU%3D)
Figure 8-39: Quality of Service Settings dialog box.
Warning: WHEN YOU EDIT THE QUALITY OF SERVICE RULES OF MULTIPLE NASUNI EDGE APPLIANCES, ANY EXISTING RULES ARE REMOVED AND REPLACED WITH THE RULES SAVED HERE. TO RETAIN THE CURRENT RULES OF ONE OF THE NASUNI EDGE APPLIANCES, SELECT THAT NASUNI EDGE APPLIANCE FROM THE COPY SETTINGS DROP-DOWN LIST.
To copy the Quality of Service settings from a Nasuni Edge Appliance, select the Nasuni Edge Appliance from the Copy Settings drop-down list. The Quality of Service settings of the selected Nasuni Edge Appliance appear in the Quality of Service Settings dialog box.
Click Add Rule. The Add Rule dialog box appears.
.png?sv=2026-02-06&spr=https&st=2026-08-01T14%3A42%3A53Z&se=2026-08-01T16%3A53%3A53Z&sr=c&sp=r&sig=tK%2BrHKWGxphG9lWQnZlXuuxqOk%2FqRG34LTIjawcLOcU%3D)
Figure 8-40: Add Rule dialog box.
Note: You cannot have a rule that applies to the same day and hour as another rule.
Select the days to limit the bandwidth (for example, Sunday, Tuesday, and Thursday).
To specify limiting the bandwidth 24 hours a day, select the All Day check box. Otherwise, select the hour to start limiting the bandwidth from the Start drop-down list. Select the hour to stop limiting the bandwidth from the Stop drop-down list.
Enter the Outbound Limit value, and select the units from the drop-down list. Use 0 (zero) to specify no limit.
Tip: Nasuni recommends setting the Quality of Service to the limit of the total bandwidth, or slightly higher (so that bandwidth is not being limited). If the Quality of Service is too low, it can cause delays in propagation and snapshots.
Nasuni does not recommend setting the Quality of Service to Unlimited, because a setting of Unlimited disables traffic shaping, which prioritizes and allocates bandwidth to different types of traffic (such as user activity, snapshots, and merges), so that no traffic is denied bandwidth.
Enter the Inbound Limit value, and select the units from the drop-down list. Use 0 (zero) to specify no limit.
Click Add Rule. The new rule is added to the Quality of Service. Alternatively, to exit the dialog box without adding the new rule, click Close.
Click Save Rules. The Quality of Service rules are changed. The Nasuni Edge Appliance appears in the list on the Quality of Service page.
Alternatively, to exit the dialog box without changing the Quality of Service rules, click Close.
Editing Quality of Service rules
To edit Quality of Service rules, follow these steps:
On the Filer Quality of Service page, select the Nasuni Edge Appliances in the list whose Quality of Service rules you want to edit.
Click Edit Filers. The Quality of Service Settings dialog box appears.
.png?sv=2026-02-06&spr=https&st=2026-08-01T14%3A42%3A53Z&se=2026-08-01T16%3A53%3A53Z&sr=c&sp=r&sig=tK%2BrHKWGxphG9lWQnZlXuuxqOk%2FqRG34LTIjawcLOcU%3D)
Figure 8-41: Quality of Service Settings dialog box.
To copy the Quality of Service settings from a Nasuni Edge Appliance, select the Nasuni Edge Appliance from the Copy Settings drop-down list. The Quality of Service settings of the selected Nasuni Edge Appliance appear in the Quality of Service Settings dialog box.
To edit an existing rule, click Edit
.png?sv=2026-02-06&spr=https&st=2026-08-01T14%3A42%3A53Z&se=2026-08-01T16%3A53%3A53Z&sr=c&sp=r&sig=tK%2BrHKWGxphG9lWQnZlXuuxqOk%2FqRG34LTIjawcLOcU%3D) . The Edit Rule dialog box appears.
. The Edit Rule dialog box appears..png?sv=2026-02-06&spr=https&st=2026-08-01T14%3A42%3A53Z&se=2026-08-01T16%3A53%3A53Z&sr=c&sp=r&sig=tK%2BrHKWGxphG9lWQnZlXuuxqOk%2FqRG34LTIjawcLOcU%3D)
Figure 8-42: Edit Rule dialog box.
Note: You cannot have a rule that applies to the same day and hour as another rule.
Select the days to limit the bandwidth (for example, Sunday, Tuesday, and Thursday).
To specify limiting the bandwidth 24 hours a day, select the All Day check box. Otherwise, select the hour to start limiting the bandwidth from the Start drop-down list. Select the hour to stop limiting the bandwidth from the Stop drop-down list.
Enter the Outbound Limit value, and select the units from the drop-down list. Use 0 (zero) to specify no limit.
Tip: Nasuni recommends setting the Quality of Service to the limit of the total bandwidth, or slightly higher (so that bandwidth is not being limited). If the Quality of Service is too low, it can cause delays in propagation and snapshots.
Nasuni does not recommend setting the Quality of Service to Unlimited, because a setting of Unlimited disables traffic shaping, which prioritizes and allocates bandwidth to different types of traffic (such as user activity, snapshots, and merges), so that no traffic is denied bandwidth.
Enter the Inbound Limit value, and select the units from the drop-down list. Use 0 (zero) to specify no limit.
Click Update Rule. The rule is changed.
Alternatively, to exit the dialog box without changing the rule, click Close.
Click Save Rules. The Quality of Service rules are changed. The Nasuni Edge Appliance appears in the list on the Quality of Service page.
Alternatively, to exit the dialog box without changing the Quality of Service rules, click Close.
Deleting Quality of Service rules
To delete Quality of Service rules, follow these steps:
On the Filer Quality of Service page, select the Nasuni Edge Appliances in the list whose Quality of Service rules you want to delete.
Click Edit Filers. The Quality of Service Settings dialog box appears.
.png?sv=2026-02-06&spr=https&st=2026-08-01T14%3A42%3A53Z&se=2026-08-01T16%3A53%3A53Z&sr=c&sp=r&sig=tK%2BrHKWGxphG9lWQnZlXuuxqOk%2FqRG34LTIjawcLOcU%3D)
Figure 8-43: Quality of Service Settings dialog box.
To delete an existing rule, click Delete
 . The rule is deleted.
Click Save Rules. The Quality of Service rules are changed. The Nasuni Edge Appliance appears in the list on the Quality of Service page.
Alternatively, to exit the dialog box without changing the Quality of Service rules, click Close.
Quota Reports
You can view and configure the schedule of when to send quota reports. You can also manually initiate sending a quota report.
Using the Nasuni Edge Appliance user interface, you can set a quota on the contents of a directory and the subdirectories of a directory. You can configure an email address to receive reports when the selected directory is near or over its limit. You can also set the quota limit. The email reports can go to administrators or to users or both. To send quota email reports, you must also enable email (see “Email Settings”) and Capacity Alerts (see “Adding Permission Groups”).
A typical personal quota report looks like the following:
You are receiving this automated Storage Usage Report because at least one directory is near or over its storage quota threshold of 90%. Your storage administrator has associated this email address with the directories listed below. If this is incorrect, please contact your storage administrator.
This Storage Usage Report is for the storage controller: "filer-x"
This Storage Usage Report includes directories that are in the volume: volume-1
|
|
|
|
|
|
|
|
|
|
|
|
|
|
|
Please consult with your storage administrator to either reduce the amount of data stored in the directories listed above, or increase the storage limit for those directories.
A typical Directory Quota Violation Report looks like the following:
You are receiving this Directory Quota Violation Report because one or more directories is near or over its Directory quota threshold of 90%. This email address is designated to receive Capacity Alerts. If this is incorrect, you can change the Email Settings for this Nasuni Edge Appliance.
This Storage Usage Report is for the storage controller: "filer-x"
This Storage Usage Report includes directories that are in the volume: volume-1
|
|
|
|
|
|
|
|
|
|
|
|
|
|
|
Viewing quota report schedules
To view the quota report schedules, follow these steps:
Click Quota Reports. The Quota Report Schedule page displays a list of managed Nasuni Edge Appliances.
.png?sv=2026-02-06&spr=https&st=2026-08-01T14%3A42%3A53Z&se=2026-08-01T16%3A53%3A53Z&sr=c&sp=r&sig=tK%2BrHKWGxphG9lWQnZlXuuxqOk%2FqRG34LTIjawcLOcU%3D)
Figure 8-44: Quota Report Schedule page.
The following information appears for each Nasuni Edge Appliance in the list:
Sending a quota report manually
You can send a quota report immediately, even if the quota report threshold is not exceeded. To send quota email reports, you must also enable email and Capacity Alerts. See “Email Settings” and “Adding Permission Groups”.
To manually send a quota report, follow these steps:
On the Quota Report Schedule page, select the Nasuni Edge Appliances in the list for which you want to manually send a quota report.
Click Send Quota Report. The Send Quota Report dialog box appears.
.png?sv=2026-02-06&spr=https&st=2026-08-01T14%3A42%3A53Z&se=2026-08-01T16%3A53%3A53Z&sr=c&sp=r&sig=tK%2BrHKWGxphG9lWQnZlXuuxqOk%2FqRG34LTIjawcLOcU%3D)
Figure 8-45: Send Quota Report dialog box.
To send administrative reports, set Administrative Report to On. Administrative reports are sent regardless of whether any directories are near or over their quota.
To send user reports, set User Report to On. User reports are sent regardless of whether any directories are near or over their quota.
In the Report Threshold text box, enter the percentage of the limit at which to send the report. Quota reports are sent regardless of whether any directories are near or over their quota.
Click Send Quota Report. The quota report is sent.
Alternatively, to exit the dialog box without sending a quota report, click Close.
Adding quota report schedules
To edit quota report schedules, follow these steps:
On the Quota Report Schedule page, select the Nasuni Edge Appliances in the list for which you want to add a quota report schedule.
Click Edit Filers. The Volume Quota Report Settings dialog box appears.
.png?sv=2026-02-06&spr=https&st=2026-08-01T14%3A42%3A53Z&se=2026-08-01T16%3A53%3A53Z&sr=c&sp=r&sig=tK%2BrHKWGxphG9lWQnZlXuuxqOk%2FqRG34LTIjawcLOcU%3D)
Figure 8-46: Volume Quota Report Settings dialog box.
The Days, Activation Time, Reports setting, and Threshold appear for each quota report in the list.
To copy the quota report settings from a Nasuni Edge Appliance, select the Nasuni Edge Appliance from the Copy Settings drop-down list. The quota report settings of the selected Nasuni Edge Appliance appear in the dialog box.
To add a schedule, click Add Schedule. The Add Schedule Quota Report dialog box appears.
.png?sv=2026-02-06&spr=https&st=2026-08-01T14%3A42%3A53Z&se=2026-08-01T16%3A53%3A53Z&sr=c&sp=r&sig=tK%2BrHKWGxphG9lWQnZlXuuxqOk%2FqRG34LTIjawcLOcU%3D)
Figure 8-47: Add Schedule Quota Report dialog box.
Select the days to send quota reports (for example, Sunday, Tuesday, and Thursday). To select or deselect all days, click Select/Deselect All.
Select the hour to start sending quota reports from the Activation Time drop-down list.
To send administrative reports, select Administrative Report. Administrative reports include all Directory Quota Violations for all directories near or over their quota.
To send user reports, select User Report. User reports include individual Directory Quota Violations sent to the owner of the directory for the user’s directories near or over their quota.
In the Report Threshold text box, enter the percentage of the limit at which to send the report. For example, if you enter 95, a report is sent when the data exceeds 95 percent of the limit.
Click Add Report. The new quota report schedule is added.
Alternatively, to exit the dialog box without adding the quota report schedule, click Close.
On the Volume Quota Report Settings dialog box, click Save Schedules. The quota report schedules are saved. The Nasuni Edge Appliance appears in the list on the Quota Report Schedule page.
Alternatively, to exit the dialog box without saving the quota report schedules, click Close.
Editing quota report schedules
To edit quota report schedules, follow these steps:
On the Quota Report Schedule page, select the Nasuni Edge Appliances in the list whose quota report schedule you want to edit.
Click Edit Filers. The Volume Quota Report Settings dialog box appears.
.png?sv=2026-02-06&spr=https&st=2026-08-01T14%3A42%3A53Z&se=2026-08-01T16%3A53%3A53Z&sr=c&sp=r&sig=tK%2BrHKWGxphG9lWQnZlXuuxqOk%2FqRG34LTIjawcLOcU%3D)
Figure 8-48: Volume Quota Report Settings dialog box.
The Days, Activation Time, Reports setting, and Threshold appear for each quota report in the list.
To copy the quota report settings from a Nasuni Edge Appliance, select the Nasuni Edge Appliance from the Copy Settings drop-down list. The quota report settings of the selected Nasuni Edge Appliance appear in the dialog box.
To edit a schedule, click Edit
 for the schedule. The Edit Schedule Quota Report dialog box appears.
.png?sv=2026-02-06&spr=https&st=2026-08-01T14%3A42%3A53Z&se=2026-08-01T16%3A53%3A53Z&sr=c&sp=r&sig=tK%2BrHKWGxphG9lWQnZlXuuxqOk%2FqRG34LTIjawcLOcU%3D)
Figure 8-49: Edit Schedule Quota Report dialog box.
Select the days to send quota reports (for example, Sunday, Tuesday, and Thursday). To select or deselect all days, click Select/Deselect All.
Select the hour to start sending quota reports from the Activation Time drop-down list.
To send administrative reports, select Administrative Report. Administrative reports include all Directory Quota Violations for all directories near or over their quota.
To send user reports, select User Report. User reports include individual Directory Quota Violations sent to the owner of the directory for the user’s directories near or over their quota.
In the Report Threshold text box, enter the percentage of the limit at which to send the report. For example, if you enter 95, a report is sent when the data exceeds 95 percent of the limit.
Click Update Schedule. The quota report schedule is updated.
Alternatively, to exit the dialog box without updating the quota report schedule, click Close.
On the Volume Quota Report Settings dialog box, click Save Schedules. The quota report schedules are saved. The Nasuni Edge Appliance appears in the list on the Quota Report Schedule page.
Alternatively, to exit the dialog box without saving the quota report schedules, click Close.
SNMP Settings
You can configure SNMP monitoring of Nasuni Edge Appliances, for network monitoring, and with third-party products that collect and report log data, such as Splunk.
Nasuni provides two ways to configure SNMP monitoring:
You can enable SNMP traps, which send information to destinations that you provide.
You can use apps that can pull SNMP information, using the definitions in the NASUNI-FILER-MIB.
You can configure either or both.
The Nasuni Edge Appliance supports monitoring via the Simple Network Management Protocol (SNMP) v1, v2c, and v3. The Nasuni Edge Appliance exposes the standard SNMPv1 MIB (management information base), as well as the NASUNI-FILER-MIB, SNMPv2-MIB, HOST-RESOURCES-MIB, UCD- SNMP-MIB, UCD-DISKIO-MIB, and IF-MIB. Both 32-bit and 64-bit SNMP network counters are supported.
Each of the displayed MIBs is a link. If you click a link, a page with that MIB information appears.
As the SNMP agent, Nasuni receives requests on UDP port 161 from the third-party SNMP manager that is used for system monitoring. Nasuni sends agent responses back to the source port on the third- party SNMP manager. The third-party SNMP manager receives notifications (including Traps and InformRequests) on SNMP destination port 162. You cannot change port 161 or port 162.
For details about ports and firewalls, see Firewall and Port Requirements.
Data is updated at most once per minute. Some values, such as filerTotalUnprotectedData, might take 20 minutes or longer to be updated.
Tip: You can also monitor hardware conditions using iDRAC. See iDRAC Configuration.
Data available in SNMP updates includes the following:
Network information, such as:
Inbound and outbound traffic by type and by port
Volume information, such as:
Size
TIme of last snapshot
Local cache information, such as:
Total space, used space, and free space
Unprotected data
Cache hit/miss rate
CPU performance information, such as:
Percent utilization
Load averages
Memory usage information, such as:
Memory utilization
Swap utilization
Disk performance information, such as:
Number of disk reads and writes per disk
Bytes read and written per disk
Client information, such as: Number of connected SMB (CIFS) clients
Snapshot and sync information, such as:
Number of Merge Conflicts
Snapshot success (version) count per volume
Times for Snapshots (start, end, delta) per volume
Traps information for anything that would generate an email alert
The following are some useful SNMP metrics:
From UCD-SNMP-MIB:
memAvailReal: The amount of real/physical memory currently unused or available.memTotalFree: The total amount of memory free or available for use on this host. This value typically covers both real memory and swap space or virtual memory.ssCpuRawIdle: The number of 'ticks' (typically .01 seconds) spent idle.
From HOST-RESOURCES-MIB:
hrSWRunPerfCPU: The number of centi-seconds of the total system's CPU resources consumed by this process. Note that, on a multi-processor system, this value may increment by more than one centi-second in one centi-second of real (wall clock) time.
Viewing SNMP settings
To view SNMP settings, follow these steps:
Click Filers, then click SNMP Settings in the left-hand column. The Filer SNMP Settings page displays a list of managed Nasuni Edge Appliances.
.png?sv=2026-02-06&spr=https&st=2026-08-01T14%3A42%3A53Z&se=2026-08-01T16%3A53%3A53Z&sr=c&sp=r&sig=tK%2BrHKWGxphG9lWQnZlXuuxqOk%2FqRG34LTIjawcLOcU%3D)
Figure 8-50: Filer SNMP Settings page.
The following information appears for each Nasuni Edge Appliance in the list:
Description: The description of the Nasuni Edge Appliance. You can change the description, as detailed in “Nasuni Edge Appliance Description”.
SNMP V1, V2C: Indication of whether SNMP v1,v2c is enabled for this Nasuni Edge Appliance: Enabled or Disabled.
Community Name: If SNMP v1,v2c is enabled, the Community Name parameter from the SNMP settings.
SNMP V3: Indication of whether SNMP v3 is enabled for this Nasuni Edge Appliance: Enabled or Disabled.
Trap Addresses: If SNMP is enabled, a list of IP addresses or hostnames listening for SNMP traps. The SNMP Engine IDs are located in the Trap Addresses column.
Note: Trap Addresses are visible only if using SNMP v3.
Important: The Engine ID is derived from the Edge Appliance serial number. For example, if the serial number were “52d1e618bb1a4de9”, then the Engine ID would be “0x52d1e618bb1a4de9”.
System Info: If SNMP is enabled, additional information appears.
Location: The System Location parameter from the SNMP settings. If SNMP monitoring is disabled, the label “--” appears.
Contact: The System Contact parameter from the SNMP settings. If SNMP monitoring is disabled, the label “--” appears.
Editing SNMP settings
To edit SNMP settings, follow these steps:
On the Filer SNMP Settings page, select the Nasuni Edge Appliances in the list whose SNMP settings you want to edit.
Click Edit Filers. The SNMP Settings dialog box appears.
.png?sv=2026-02-06&spr=https&st=2026-08-01T14%3A42%3A53Z&se=2026-08-01T16%3A53%3A53Z&sr=c&sp=r&sig=tK%2BrHKWGxphG9lWQnZlXuuxqOk%2FqRG34LTIjawcLOcU%3D)
Figure 8-51: SNMP Settings dialog box.
To copy the SNMP settings from a Nasuni Edge Appliance, select the Nasuni Edge Appliance from the Copy Settings drop-down list. The SNMP settings of the selected Nasuni Edge Appliance appear in the SNMP Settings dialog box.
To enable SNMP v1,v2c monitoring, click Enable v1,v2c Support. Selecting On enables SNMP v1,v2c monitoring. Selecting Off disables SNMP monitoring.
If you enable SNMP v1,v2c monitoring, in the Community Name text box, enter the SNMP community name for the Nasuni Edge Appliance. The default community name is
public. Changing the community name from the default improves security.To enable SNMP v3 monitoring, click Enable v3 Support. Selecting On enables SNMP v3 monitoring. Selecting Off disables SNMP monitoring.
If you enable SNMP v3 monitoring, enter a Username and Password for SNMP v3 authorization.
If you enable SNMP monitoring, in the System Location text box, enter the physical location of the Nasuni Edge Appliance.
If you enable SNMP monitoring, in the System Contact text box, enter the contact information of the person responsible for SNMP monitoring for the Nasuni Edge Appliance.
If you enable SNMP monitoring, in the Trap Addresses text box, enter a list of IP addresses or hostnames listening for SNMP traps, separated by commas. With SNMP traps, Nasuni sends the information to the provided destinations.
If you do not want to listen for SNMP traps, leave this blank. For example, if you use apps that can pull SNMP information, you do not use traps, but you can use the definitions in the NASUNI-FILER-MIB with your app.
If you enter any trap addresses, you can send a test trap by clicking Send Test Trap.
Click Save SNMP Settings. The SNMP settings are changed. The Nasuni Edge Appliances appear in the list on the Filer SNMP Settings page.
Alternatively, to exit the dialog box without changing the SNMP settings, click Close.
Syslog Export
Syslog Export enables you to direct Nasuni notifications and file auditing messages to your syslog servers. Tools that work with syslog, such as Splunk, can then process, store, and report on these messages. The syslog protocol is used to convey event notification messages. It also provides a message format that allows vendor-specific extensions to be provided in a structured way. Syslog Export supports UDP protocol.
You can also direct NMC console notifications to your syslog servers. See “Syslog Export”.
Tip: Because each Edge Appliance sends syslog messages directly to the specified syslog servers, ensure that the appropriate port is open between each Edge Appliance and the syslog servers. This is usually UDP port 514.
For details about ports and firewalls, see Firewall and Port Requirements.
A standard syslog message (based on the RFC 5424 specification) uses the following format:
<PRIORITY>VERSION TIMESTAMP HOSTNAME APPLICATION PROCID MESSAGEID [STRUCTURED_DATA] MESSAGE
where:
Segment | Data Type | Expected values |
|---|---|---|
Priority | Numerical | Priority is a combination of the numerical Facility value and the numerical Severity value, such that: Priority = 8 * Facility + Severity The Facility value is a numerical logging component associated with the message: 16 (Local0) through 23 (Local7). Severity values are one of the following:
|
Version | Numerical | Version of syslog messaging. |
Timestamp | String timestamp | Timestamp, in ISO 8601 format. |
Hostname | String | FQDN hostname or IP address. |
Application | String | Device or Application that triggered the message. Default of “Edge Appliance” or “NMC”. |
Process ID | Arbitrary | String or ID to improve log aggregation grouping. |
Message ID | String | Message IDs allow aggregators to filter messages and typically indicate messages of the same semantics/format. |
Structured Data | Structured Data Elements | (Not currently used. A ‘-’ appears instead.) Unique data elements consisting of well-known key-value pairs within a set of brackets. |
Message | Unicode UTF-8 String | Message data. |
Viewing syslog export settings
To view syslog export settings, follow these steps:
Click Filers, then click Syslog Export Settings in the left-hand column. The Filer Syslog Export Settings page displays a list of managed Nasuni Edge Appliances.
.png?sv=2026-02-06&spr=https&st=2026-08-01T14%3A42%3A53Z&se=2026-08-01T16%3A53%3A53Z&sr=c&sp=r&sig=tK%2BrHKWGxphG9lWQnZlXuuxqOk%2FqRG34LTIjawcLOcU%3D)
Figure 8-52: Filer Syslog Export Settings page.
The following information appears for each Nasuni Edge Appliance in the list:
Description: The description of the Nasuni Edge Appliance. You can change the description, as detailed in “Nasuni Edge Appliance Description”.
Auditing: Whether it is Enabled or Disabled to send auditing events to syslog servers.
Audit Facility: If it is Enabled to send auditing events to syslog servers, the facility to use for the auditing messages.
Notifications: Whether it is Enabled or Disabled to send Notification messages to syslog servers.
Notification Facility: If it is Enabled to send Notification messages to syslog servers, the facility to use for the Notification messages.
Editing syslog export settings
To edit syslog export settings, follow these steps:
On the Filer Syslog Export Settings page, select the Nasuni Edge Appliances in the list whose syslog export settings you want to edit.
Click Edit Filers. The Filer Syslog Export Settings dialog box appears.
.png?sv=2026-02-06&spr=https&st=2026-08-01T14%3A42%3A53Z&se=2026-08-01T16%3A53%3A53Z&sr=c&sp=r&sig=tK%2BrHKWGxphG9lWQnZlXuuxqOk%2FqRG34LTIjawcLOcU%3D)
Figure 8-53: Filer Syslog Export Settings dialog box.
To copy the syslog export settings from a Nasuni Edge Appliance, select the Nasuni Edge Appliance from the Copy Settings drop-down list. The syslog export settings of the selected Nasuni Edge Appliance appear in the dialog box.
In the Servers text box, enter a comma-separated list of hosts (and, optionally, ports) to receive syslog events, in
host[:port]format. You can specify the hosts as either host names or IP addresses: both are valid.If you intend using a different port than the default port 514, specify that port here. For details about ports and firewalls, see Firewall and Port Requirements.
To send auditing events to syslog Servers, set “Send Auditing messages” to On.
From the Logging Facility drop-down list, select the facility to use for the auditing messages. You can select any facility. Facilities are similar to tags that you can use to group events. For example, you might send all audit messages to “local1” and all system messages to “local2”.
From the “Log level for Audit messages” drop-down list, select the log level to use for auditing messages. For example, if 'Info' is selected, all audit messages will be sent at level 'Info.'
To send Notification messages to syslog Servers, set “Send Notification messages” to On.
From the Logging Facility drop-down list, select the facility to use for Notification messages. You can select any facility. Facilities are similar to tags that you can use to group events. For example, you might send all audit messages to “local1” and all system messages to “local2”.
From the “Lowest Log Level” drop-down list, select the lowest Notification level to send. Each Notification level includes all the Notifications in the levels above it in the drop-down list. For example, the ‘Info’ level includes all the other levels, but the ‘Alert’ level includes only alerts.
To send test messages to the currently listed Servers for all selected Nasuni Edge Appliances, click “Send Test Messages”. A test message is sent to all listed Servers. If Notifications are on, the messages use the selected Notification level and facility. If Audit is on, but Notifications are off, the messages use the ‘Audit’ level and facility. If neither is on, the messages are sent with the selected Notification facility at ‘Info’ level. Sending test messages does not save the configuration.
Click Save Settings. Your settings are saved. The Nasuni Edge Appliances appear in the list on the Filer Syslog Export Settings page.
Alternatively, to exit the dialog box without changing the syslog export settings, click Close.
Time Configuration
Important: Edge Appliances and the NMC must be configured with operational DNS servers and a time server (internal or external) within your environment.
You can set the time zone and time server for the Nasuni Edge Appliance, which are necessary for notifications and file sharing purposes. The time zone setting you select should be for the region where the Nasuni Edge Appliance is located. For example, use “US/Eastern” if you are located in the eastern part of the United States.
See Worksheet for a worksheet for planning configurations.
Viewing time zone and time source settings
To view time zone and time source settings, follow these steps:
Click Filers, then click Time Configuration in the left-hand column. The Filer Time Configuration page displays a list of managed Nasuni Edge Appliances.
.png?sv=2026-02-06&spr=https&st=2026-08-01T14%3A42%3A53Z&se=2026-08-01T16%3A53%3A53Z&sr=c&sp=r&sig=tK%2BrHKWGxphG9lWQnZlXuuxqOk%2FqRG34LTIjawcLOcU%3D)
Figure 8-54: Filer Time Configuration page.
The following information appears for each Nasuni Edge Appliance in the list:
Description: The description of the Nasuni Edge Appliance. You can change the description, as detailed in “Nasuni Edge Appliance Description”.
Time Zone: The major world time zone where the Nasuni Edge Appliance is located.
NTP Servers: The NTP time servers from which the Nasuni Edge Appliance obtains time information.
Current Time: The current date and time of the Nasuni Edge Appliance.
Since it can take a while to update the current date and time for every Nasuni Edge Appliance, this does not happen automatically. An indication appears of the last time the current time was updated.
To refresh the current time for one or more Nasuni Edge Appliances, see “Refreshing currenttimes”.
Current Time (
timezone): The current date and time of the Nasuni Edge Appliance in the current time zone.
Refreshing current times
Since it can take a while to update the current date and time for every Nasuni Edge Appliance, this does not happen automatically. An indication appears of the last time the current time was updated.
To refresh the current time for one or more Nasuni Edge Appliances, follow these steps:
On the Filer Time Configuration page, select the Nasuni Edge Appliances in the list whose current time you want to refresh.
Click Refresh Current Time. The current time of the selected Nasuni Edge Appliances is refreshed.
Synchronizing Edge Appliances with NTP server
You can synchronize one or many Edge Appliances with their specific NTP servers.
To synchronize one or many Edge Appliances with their specific NTP server, follow these steps:
On the Filer Time Configuration page, select the Nasuni Edge Appliances in the list that you want to synchronize with NTP servers.
Click Sync Filer Times. The Update Time dialog box appears.
Click Update.
Each selected Edge Appliance is synchronized with its respective NTP server.
Editing time zone and time source settings
Caution: Editing the Edge Appliance time configuration (time zone or time servers) disconnects and resets all currently connected SMB clients for the selected Edge Appliance, and can restart the Edge Appliance. This restart helps to ensure proper authentication.
To edit time zone and time source settings, follow these steps:
On the Filer Time Configuration page, select the Nasuni Edge Appliances in the list whose time zone and time source settings you want to edit.
Click Edit Filers. The Timezone Settings dialog box appears.
.png?sv=2026-02-06&spr=https&st=2026-08-01T14%3A42%3A53Z&se=2026-08-01T16%3A53%3A53Z&sr=c&sp=r&sig=tK%2BrHKWGxphG9lWQnZlXuuxqOk%2FqRG34LTIjawcLOcU%3D)
Figure 8-55: Timezone Settings dialog box.
To copy the time zone and time source settings from a Nasuni Edge Appliance, select the Nasuni Edge Appliance from the Copy Settings drop-down list. The time zone and time source settings of the selected Nasuni Edge Appliance appear in the dialog box.
From the Time Zone drop-down list, select a time zone.
In the Time Server text box, enter the names of one or more valid Network Time Protocol (NTP) servers, separated by commas. By default, all Nasuni Edge Appliances are set to use Nasuni's NTP server, time.nasuni.com, to set the time daily. If you cannot open port 123 in your firewall to access time.nasuni.com, you should change to an internal NTP server.
For details about ports and firewalls, see Firewall and Port Requirements.
You can also specify using NTP services from Active Directory domain controllers, and from other domain controllers.
Click Save Timezone. The time zone and time source settings are changed. The Nasuni Edge Appliances appear in the list on the Filer Time Configuration page.
Alternatively, to exit the dialog box without changing the time zone and time source settings, click Close.
Web Access Branding
You can use the Web Access feature to access SMB (CIFS) share data or NFS export data stored in the Nasuni Edge Appliance using a Web browser. You can configure the Web Access display to include elements of your organization’s branding, including logo and colors. To enable Web Access for a volume, see step 19.
To configure Web Access branding, follow these steps:
Click Filers, then select Web Access Branding from the list on the left-hand side. The Web Access Branding page displays a list of managed Nasuni Edge Appliances.
.png?sv=2026-02-06&spr=https&st=2026-08-01T14%3A42%3A53Z&se=2026-08-01T16%3A53%3A53Z&sr=c&sp=r&sig=tK%2BrHKWGxphG9lWQnZlXuuxqOk%2FqRG34LTIjawcLOcU%3D)
Figure 8-56: Web Access Branding page.
The following information appears for each Nasuni Edge Appliance in the list:
Logo: The logo on the Web Access display.
Primary Color: The primary color, which is used for items including Shares, Settings, and Logout on the Web Access display.
Secondary Color: The secondary color, which is used for items including Add Folder, Upload File, and Sort on the Web Access display.
On the Web Access Branding page, select the Nasuni Edge Appliances in the list whose Web Access branding you want to edit.
Click Edit Filers. The Web Access Branding dialog box appears.
.png?sv=2026-02-06&spr=https&st=2026-08-01T14%3A42%3A53Z&se=2026-08-01T16%3A53%3A53Z&sr=c&sp=r&sig=tK%2BrHKWGxphG9lWQnZlXuuxqOk%2FqRG34LTIjawcLOcU%3D)
Figure 8-57: Web Access Branding dialog box.
To copy the Web Access branding settings from a Nasuni Edge Appliance, select the Nasuni Edge Appliance from the Copy Settings drop-down list. The Web Access branding settings of the selected Nasuni Edge Appliance appear in the dialog box.
To include a logo on the Web Access display, click the Logo area and navigate to a logo graphics file. The maximum file size is 500 KB.
Caution: The maximum length of a file name is 255 bytes.
In addition, the length of a path, including the file name, must be less than 4,000 bytes.
Since the UTF-8 representation of characters from some character sets can occupy several bytes, the maximum number of characters that a file path or a file name might contain can vary.
If a particular client has other limits, the smaller of the two limits applies.
To change the primary color, which is used for items including Shares, Settings, and Logout on the Web Access display, click the Primary Color area and select a primary color.
To change the secondary color, which is used for items including Add Folder, Upload File, and Sort on the Web Access display, click the Secondary Color area and select a secondary color.
To revert to the default logo, primary color, and secondary color, click Set Defaults.
Click Save Rules. Your settings are saved.
.png?sv=2026-02-06&spr=https&st=2026-08-01T14%3A42%3A53Z&se=2026-08-01T16%3A53%3A53Z&sr=c&sp=r&sig=tK%2BrHKWGxphG9lWQnZlXuuxqOk%2FqRG34LTIjawcLOcU%3D)
Figure 8-58: Web Access Branding dialog box with new logo and colors.
The Web Access page appears with the selected logo and colors.
.png?sv=2026-02-06&spr=https&st=2026-08-01T14%3A42%3A53Z&se=2026-08-01T16%3A53%3A53Z&sr=c&sp=r&sig=tK%2BrHKWGxphG9lWQnZlXuuxqOk%2FqRG34LTIjawcLOcU%3D)
Figure 8-59: Web Access page with branding.
Mobile Settings
Important: The Nasuni Mobile Access app is End-of-Life as of May 1, 2024. The Nasuni Mobile Access app is no longer supported or available from app stores.
Mobile Licenses
Important: The Nasuni Mobile Access app is End-of-Life as of May 1, 2024. The Nasuni Mobile Access app is no longer supported or available from app stores.
Refresh License
You can refresh the subscription license of Nasuni Edge Appliances. This is ordinarily unnecessary, unless the license has changed in some way.
Refreshing license
To refresh the subscription license, follow these steps:
Click Filers, then click Refresh License in the left-hand column. The Refresh Subscription License page displays a list of managed Nasuni Edge Appliances.
.png?sv=2026-02-06&spr=https&st=2026-08-01T14%3A42%3A53Z&se=2026-08-01T16%3A53%3A53Z&sr=c&sp=r&sig=tK%2BrHKWGxphG9lWQnZlXuuxqOk%2FqRG34LTIjawcLOcU%3D)
Figure 8-60: Refresh Subscription License page.
The following information appears for each Nasuni Edge Appliance in the list:
Filer: The name of the Nasuni Edge Appliance.
Select the Nasuni Edge Appliances in the list whose license you want to refresh.
Click Update Filers. The Refresh Subscription License dialog box appears.
.png?sv=2026-02-06&spr=https&st=2026-08-01T14%3A42%3A53Z&se=2026-08-01T16%3A53%3A53Z&sr=c&sp=r&sig=tK%2BrHKWGxphG9lWQnZlXuuxqOk%2FqRG34LTIjawcLOcU%3D)
Figure 8-61: Refresh Subscription License dialog box.
To refresh the license of selected Nasuni Edge Appliances, click Refresh License. Alternatively, to exit the dialog box without refreshing the license, click Close.
Remote Support Service
You can view and edit Remote Support Service settings.
The Remote Support Service allows authorized Nasuni Technical Support personnel to remotely and securely access your Nasuni Edge Appliance. This can help Nasuni Technical Support to diagnose and resolve any issues with your Nasuni Edge Appliance quickly and proactively. No changes to your corporate firewalls are necessary.
This service is disabled by default and is strictly opt-in. You can enable or disable this service at any time. You can also enable this service for a specific period of time. Enabling this service allows Nasuni to offer a higher level of service and support.
Tip: If you need technical assistance, contact Nasuni Technical Support and inform them if you have enabled Remote Support Service.
Note: You receive a notification whenever the Remote Support Service is enabled or disabled.
Note: If the Remote Support Service is enabled, you can change the Timeout value without stopping and restarting the Remote Support Service.
Viewing Remote Support Service settings
To view Remote Support Service settings, follow these steps:
Click Filers, then click Remote Support in the left-hand column. The Remote Support Service page displays a list of managed Nasuni Edge Appliances.
.png?sv=2026-02-06&spr=https&st=2026-08-01T14%3A42%3A53Z&se=2026-08-01T16%3A53%3A53Z&sr=c&sp=r&sig=tK%2BrHKWGxphG9lWQnZlXuuxqOk%2FqRG34LTIjawcLOcU%3D)
Figure 8-62: Remote Support Service page.
The following information appears for each Nasuni Edge Appliance in the list:
Filer: The name of the Nasuni Edge Appliance.
Remote Support Service: Whether the Remote Support Service is enabled for the Nasuni Edge Appliance: Currently Enabled or Currently Disabled.
Timeout: If the Remote Support Service is enabled, the amount of time until the Remote Support Service becomes disabled. If the Remote Support Service is disabled, the label “No timeout, unlimited” appears.
Nasuni Connected: If the Remote Support Service is currently enabled, whether Nasuni Technical Support is connected to the Nasuni Edge Appliance: Yes (is connected) or No (is not connected).
Enabling and disabling Remote Support Service
To enable or disable the Remote Support Service, follow these steps:
On the Remote Support Service page, select the Nasuni Edge Appliances in the list that you want to enable or disable Remote Support Service for.
Click Edit Filers. The Edit Remote Support Service dialog box appears.
.png?sv=2026-02-06&spr=https&st=2026-08-01T14%3A42%3A53Z&se=2026-08-01T16%3A53%3A53Z&sr=c&sp=r&sig=tK%2BrHKWGxphG9lWQnZlXuuxqOk%2FqRG34LTIjawcLOcU%3D)
Figure 8-63: Edit Remote Support Service dialog box.
To enable the Remote Support Service, click Enable Remote Support Service. Selecting On enables the Remote Support Service. Selecting Off disables the Remote Support Service.
If Enable Remote Support is On, the Timeout text box becomes available. Enter the length of time, in minutes, that you want to permit the Remote Support Service access to be enabled. Enter
0(zero) to allow access for an indefinite amount of time.Click Save Settings. The Remote Support Service settings are changed. The Nasuni Edge Appliances appear in the list on the Remote Support Service page. If the Remote Support Service is enabled with a nonzero Timeout time, a countdown begins.
Alternatively, to exit the dialog box without changing the Remote Support Service settings, click Close.
Send Diagnostics
If you experience problems that you cannot resolve, you can send diagnostic information to Nasuni Technical Support for troubleshooting purposes.
Note: Local diagnostic information is automatically sent when needed, so there is typically no need to do this, unless instructed to by Nasuni Technical Support. Using Send Diagnostics includes more information than the automatic diagnostic information.
To send diagnostic information, follow these steps:
Click Filers, then select Send Diagnostics from the menu. The Send Diagnostics page displays a list of managed Nasuni Edge Appliances.
.png?sv=2026-02-06&spr=https&st=2026-08-01T14%3A42%3A53Z&se=2026-08-01T16%3A53%3A53Z&sr=c&sp=r&sig=tK%2BrHKWGxphG9lWQnZlXuuxqOk%2FqRG34LTIjawcLOcU%3D)
Figure 8-64: Send Diagnostics page.
The following information appears for each Nasuni Edge Appliance in the list:
Description: The description of the Nasuni Edge Appliance. You can change the description, as detailed in “Nasuni Edge Appliance Description”.
Actions: Actions available for each Nasuni Edge Appliance.
Click Send Diagnostics. Diagnostic information is sent to Nasuni and the informational notification “Successfully sent alerts to nasuni.com support team” is sent.
Side Load
Nasuni supports a Disaster Recovery (DR) process that enables you to recover the Nasuni Edge Appliance after a true disaster, such as the loss of a data center. However, most of the time, clients perform the Disaster Recovery process in order to upgrade from one piece of hardware to another.
In such a situation, there is a working Nasuni Edge Appliance in their data center that contains active data in the cache. Performing the Disaster Recovery process results in a new Nasuni Edge Appliance that has an empty cache. The client often then re-populates the new cache with data, which can require considerable inbound bandwidth from the cloud, and which can take days, weeks, or even months to complete.
The Side Load feature enables you to transfer cache data directly from the source Nasuni Edge Appliance to the new Nasuni Edge Appliance. The source Nasuni Edge Appliance must already be decommissioned.
Tip: You cannot perform the Side Load procedure apart from performing the Disaster Recovery procedure.
Tip: Only one Side Load process is permitted at a time for each Nasuni Edge Appliance.
Tip: Only the Admin user can perform the Side Load process.
Tip: The source Nasuni Edge Appliance must be:
Running;
Decommissioned;
Using release 7.0 or above.
Tip: Any Quality of Service (QoS) limits to bandwidth do not pertain to the Side Load process.
The Side Load process uses all the available bandwidth to copy data.
You can configure Notifications to notify you by email when the Side Load process completes. To view unprotected files in the cache, see “Unprotected Files”.
Starting the Side Load process
To start the Side Load process from a source Nasuni Edge Appliance to a destination Nasuni Edge Appliance, follow these steps:
Click Filers, then click Side Loads in the left-hand column. The Side Loads page displays a list of Side Load processes for managed Nasuni Edge Appliances.
.png?sv=2026-02-06&spr=https&st=2026-08-01T14%3A42%3A53Z&se=2026-08-01T16%3A53%3A53Z&sr=c&sp=r&sig=tK%2BrHKWGxphG9lWQnZlXuuxqOk%2FqRG34LTIjawcLOcU%3D)
Figure 8-65: Side Loads page.
Click Add Side Load. The Add Side Load dialog box appears.
.png?sv=2026-02-06&spr=https&st=2026-08-01T14%3A42%3A53Z&se=2026-08-01T16%3A53%3A53Z&sr=c&sp=r&sig=tK%2BrHKWGxphG9lWQnZlXuuxqOk%2FqRG34LTIjawcLOcU%3D)
Figure 8-66: Add Side Load page.
From the Destination Filer drop-down box, select the Nasuni Edge Appliance that is the source of the data for the
In the Host Address text box, enter the host address of the source. The source Nasuni Edge Appliance must already be decommissioned.
In the Username text box, enter the username for the specified source Nasuni Edge Appliance. The source Nasuni Edge Appliance must already be decommissioned.
In the Password text box, enter the password for the specified Username for the specified source Nasuni Edge Appliance. The source Nasuni Edge Appliance must already be decommissioned.
Click Connect and Start.
A connection is established with the data of the source Nasuni Edge Appliance. Data begins moving to the destination Nasuni Edge Appliance.
After the data transfer starts, you can view the progress of the Side Load process.
When the Side Load process completes, the Complete label appears.
Tip: Record any information you want to retain from the screen.
Viewing and controlling the Side Load process
To view or control the progress of the Side Load process, follow these steps:
Click Filers, then click Side Loads in the left-hand column. The Side Loads page displays a list of Side Load processes for managed Nasuni Edge Appliances.
.png?sv=2026-02-06&spr=https&st=2026-08-01T14%3A42%3A53Z&se=2026-08-01T16%3A53%3A53Z&sr=c&sp=r&sig=tK%2BrHKWGxphG9lWQnZlXuuxqOk%2FqRG34LTIjawcLOcU%3D)
Figure 8-67: Side Loads page.
The following information appears for each Side Load process in the list:
Destination Filer: The Nasuni Edge Appliance whose cache you want to move data to.
Source Decommissioned Filer: The host address of the source Nasuni Edge Appliance. The source Nasuni Edge Appliance must already be decommissioned.
Progress: A bar graph indicating the progress of the Side Load process. The percentage of the Side Load process that is complete appears. If the Side Load process is running, the Running label appears. If the Side Load process is paused, the Paused label appears. In addition, the following information appears:
Data Processed: The amount of data processed (in KB, MB, GB, or TB) and the total amount of data to process (in KB, MB, GB, or TB).
Note: Nasuni Edge Appliances and the NMC display the size of data in base 10 units (including MB = 1,000,000 bytes, GB = 1,000,000,000 bytes, and TB = 1,000,000,000,000 bytes).
In contrast, some platforms display the size of data in base 2 units (including MB = 1,048,576 bytes, GB = 1,073,741,824 bytes, and TB = 1,099,511,627,776 bytes).
For example, a file that Nasuni displays as 10 MB would be displayed by some platforms as 9.53 MB.
Est. Rate: The estimated rate of data transfer (in KB/S, MB/S, GB/S, or TB/S).
Est. Time Remaining: The estimated time until the Side Load process is complete.
Actions: Actions available for each Side Load process.
To pause a running Side Load process, click Pause. The Side Load process pauses indefinitely. The bar graph label changes to Paused.
To continue with the Side Load process after a pause, click Resume. The Side Load process continues. The bar graph label changes to Running.
To cancel the Side Load process, click Cancel. The Cancel Side Load dialog box appears.
.png?sv=2026-02-06&spr=https&st=2026-08-01T14%3A42%3A53Z&se=2026-08-01T16%3A53%3A53Z&sr=c&sp=r&sig=tK%2BrHKWGxphG9lWQnZlXuuxqOk%2FqRG34LTIjawcLOcU%3D)
Figure 8-68: Cancel Side Load dialog box.
To cancel the Side Load process, click Cancel Side Load. If the Side Load process is canceled, the bar graph label changes to Canceled.
Tip: Record any information you want to retain from the screen.
When the Side Load process completes, the Complete label appears on the bar graph.
Tip: Record any information you want to retain from the screen.
Audit Destinations Status
Nasuni can use an external auditing service, such as Varonis. To complete configuration of the Varonis application to use Nasuni auditing events, you must provide a Nasuni API access key. For details, see “API Keys”.
Tip: The NMC API can be used to configure auditing, including configuring AMQP destinations for audit messages (such as for Varonis or RabbitMQ).
If auditing is being handled by an external service, such as Varonis, the status is available on the Audit Destinations Status page.
To view the Audit Destinations Status, follow these steps:
Click Filers, then click Audit Destinations in the left-hand column. The Audit Destinations Status page displays a list of audit destinations.
.png?sv=2026-02-06&spr=https&st=2026-08-01T14%3A42%3A53Z&se=2026-08-01T16%3A53%3A53Z&sr=c&sp=r&sig=tK%2BrHKWGxphG9lWQnZlXuuxqOk%2FqRG34LTIjawcLOcU%3D)
Figure 8-69: Audit Destinations Status page.
The following information appears for each Nasuni Edge Appliance with an external audit destination:
Filer: The name of the Nasuni Edge Appliance with the external audit destination.
Type: The type of auditing service, including Varonis.
Destination Name: The name of the server of the external auditing service, such as the Varonis server.
Connection: The status of the current connection, such as Connected, Connecting, Re- connecting, or Down.
Details of the current status of the connection include the following:
Host: IP address or hostname of the server of the external auditing service, such as the Varonis server.
Connection established: Date and time (UTC) when the current connection was established.
Connection uptime: Length of time of the current connection.
Latest update at: Date and time (UTC) of the latest update from the current connection.
Note: Version 9.9 and later Edge Appliances terminate dead connections (zero bytes transferred) after 20 seconds and allow slow connections (active data transfer) to persist for up to 600 seconds.
Cache Jobs
You can view the status of jobs that bring data or metadata into the cache, such as Bring into Cache (see “Bringing Data into Cache of the Nasuni Edge Appliance”) and Auto Cache (see “Enabling Auto Cache for Folder). You can also cancel jobs that are unnecessary.
To view unprotected files in the cache, see “Unprotected Files”.
Viewing cache jobs
To view cache jobs, follow these steps:
Click Filers, then click Cache Jobs in the left-hand column. The Filer Cache Jobs page displays a list of cache jobs.
.png?sv=2026-02-06&spr=https&st=2026-08-01T14%3A42%3A53Z&se=2026-08-01T16%3A53%3A53Z&sr=c&sp=r&sig=tK%2BrHKWGxphG9lWQnZlXuuxqOk%2FqRG34LTIjawcLOcU%3D)
Figure 8-70: Filer Cache Jobs page.
The following information appears for each cache job:
Filer: The name of the Nasuni Edge Appliance where this cache job is occurring.
Volume: The name of the volume on which this cache job is occurring.
Path in Volume: The path in the volume to the data moving to the cache.
Type: The type of cache job, such as Manual (for Bring into Cache) or Auto (for Auto Cache).
Data/Metadata: An indication whether data or metadata is moving to the cache.
Number of Items: The number of items to transfer.
Actions: Actions available for this cache job.
Status: The status of this cache job.
To cancel a running cache job in the list, click Cancel. A dialog box appears. Confirm that you want to cancel the job.
The job is canceled.
SMB (CIFS) Clients
You can view the status of Nasuni Edge Appliance SMB (CIFS) clients. You can also disconnect the SMB (CIFS) client, reset SMB (CIFS) clients, and reset the SMB (CIFS) authorization cache.
Viewing SMB (CIFS) clients
Tip: This function can also be performed using the NMC API. For details, see NMC API.
To view SMB (CIFS) clients, follow these steps:
Click Filers, then click CIFS Clients in the left-hand column. The Filer CIFS Clients page appears.
.png?sv=2026-02-06&spr=https&st=2026-08-01T14%3A42%3A53Z&se=2026-08-01T16%3A53%3A53Z&sr=c&sp=r&sig=tK%2BrHKWGxphG9lWQnZlXuuxqOk%2FqRG34LTIjawcLOcU%3D)
Figure 8-71: Filer CIFS Clients page.
The following information appears for each SMB (CIFS) client:
Filer: The name of the Nasuni Edge Appliance.
Share: Name of the SMB (CIFS) share.
User: The name of the connected user.
Client: The hostname or IP address of the client.
Client Name: The name of the client.
Actions: Actions available for each SMB (CIFS) client.
Disconnecting clients from a share
Important: After you change any share setting, the currently connected CIFS/SMB clients do not observe the change until they disconnect and create new sessions. You can disconnect clients individually by clicking Disconnect for each one, or you can disconnect all clients by clicking "Reset All Clients".
You can disconnect an SMB (CIFS) client connected to an SMB (CIFS) share of the Nasuni Edge Appliance.
Note: Some SMB (CIFS) clients automatically re-connect to SMB (CIFS) shares and can then re- appear in the listing even after disconnecting them.
To disconnect an SMB (CIFS) client:
On the Filer CIFS Clients page, click Disconnect
 . The Disconnect Client dialog box appears.
.png?sv=2026-02-06&spr=https&st=2026-08-01T14%3A42%3A53Z&se=2026-08-01T16%3A53%3A53Z&sr=c&sp=r&sig=tK%2BrHKWGxphG9lWQnZlXuuxqOk%2FqRG34LTIjawcLOcU%3D)
Figure 8-72: Disconnect Client dialog box.
Click Disconnect Client to disconnect the SMB (CIFS) client from the share. Alternatively, to exit this screen without disconnecting the client, click Close.
Resetting the SMB (CIFS) Authentication Cache
You can reset the SMB (CIFS) authentication cache to clear all SMB (CIFS) shares for Nasuni Edge Appliance users. You might reset the SMB (CIFS) authentication cache if instructed by Nasuni Support, or if users are not appearing in a group they are assigned to via Active Directory or LDAP Directory Services.
To reset the SMB (CIFS) authentication cache, follow these steps:
On the Filer CIFS Clients page, click Reset CIFS Auth Cache. The Reset CIFS Auth Cache dialog box appears.
Select the Nasuni Edge Appliances whose SMB (CIFS) authentication cache you want to reset. Then click Reset Auth Cache.
This flushes all the cached SMB (CIFS) authentication data. Alternatively, to not reset the SMB (CIFS) authentication cache, click Close.
Resetting All SMB (CIFS) Clients
You can reset all SMB (CIFS) clients connected to the Nasuni Edge Appliance. You might reset all SMB (CIFS) clients if instructed by Nasuni Support, or to remove clients.
Important: After you change any share setting, the currently connected CIFS/SMB clients do not observe the change until they disconnect and create new sessions. You can disconnect clients individually by clicking Disconnect for each one, or you can disconnect all clients by clicking "Reset All Clients".
To reset all SMB (CIFS) clients, follow these steps:
On the Filer CIFS Clients page, click Reset All Clients. The Reset All Clients dialog box appears.
Select the Nasuni Edge Appliances whose SMB (CIFS) clients you want to reset. Then click Reset Clients.
This resets all SMB (CIFS) clients for the selected Nasuni Edge Appliances. Alternatively, to not reset all SMB (CIFS) clients, click Close.
Note: Some SMB (CIFS) clients automatically re-connect to SMB (CIFS) shares and can then re- appear in the listing even after the connection is reset.
SMB (CIFS) File Locks
You can view the status of SMB (CIFS) file locks.
Note: If the Edge Appliance is managed by the NMC, SMB (CIFS) locks are sent from the Edge Appliance to the NMC every 5 minutes. The information sent to the NMC includes the share name, the file path, the read/write type, the locking user, the client IP address, and the hostname.
Viewing file locks
Tip: This function can also be performed using the NMC API. For details, see NMC API.
To view file locks, follow these steps:
Click Filers, then click CIFS File Locks in the left-hand column. The Filer CIFS File Locks page appears.
.png?sv=2026-02-06&spr=https&st=2026-08-01T14%3A42%3A53Z&se=2026-08-01T16%3A53%3A53Z&sr=c&sp=r&sig=tK%2BrHKWGxphG9lWQnZlXuuxqOk%2FqRG34LTIjawcLOcU%3D)
Figure 8-73: Filer CIFS File Locks page.
The following information appears for each SMB (CIFS) client:
Filer: The name of the Nasuni Edge Appliance.
Share: Name of the SMB (CIFS) share.
Path: The path in the share to each file lock.
Type: The type of file lock, such as RDONLY, RDWR, or WRONLY.
User: The name of the connected user.
Client: The hostname or IP address of the client.
Client Name: The name of the client.
Actions: Actions available for each SMB (CIFS) client.
Filtering the Display
Using the Filter text box, you can limit the display to items that match the criteria that you enter. See “Filtering Displays” for details. On this screen, the following field names are available:
client: Matches values in the Client field.
clientname: Matches values in the Client Name field.
share: Matches values in the Share field.
user: Matches values in the User field.
filer: Matches values in the Filer field.
path: Matches values in the Path field.
type: Matches values in the Type field.
Disconnecting file locks
You can disconnect existing SMB (CIFS) file locks.
To disconnect an SMB (CIFS) file lock, click Disconnect for the SMB (CIFS) file lock that you want to disconnect.
FTP clients
You can view the status of FTP/SFTP clients.
Note: Nasuni supports SFTP, the SSH File Transfer Protocol. This is not the same as FTPS, the File Transfer Protocol over SSL.
Tip: You can ensure that the SFTP (SSH File Transfer Protocol) protocol is used, rather than the FTP protocol, with the Firewall page in the Edge Appliance UI. For each Traffic Group, select SFTP and deselect FTP.
Tip: In order to access data using the FTP/SFTP protocol, the following steps are necessary:
Create an SMB (CIFS) or NFS volume. See “Create Volume”.
Enable the FTP protocol on the volume. See “Enabling multiple volume protocols”.
(Optional) Configure FTP/SFTP settings. See “Editing FTP settings”.
Add a new FTP/SFTP directory. See “Creating FTP directories”.
(Optional) Create a permission group that has storage access. See “Adding Permission Groups” in the Nasuni Edge Appliance Administration Guide.
(Optional) Create a user in a permission group that has storage access. See “Adding Users” in the Nasuni Edge Appliance Administration Guide. Active Directory and LDAP users can log in for FTP access just as they do for SMB (CIFS) access. Also, if anonymous access is enabled, you don't need a specific group or user.
Access files using the FTP/SFTP protocol.
Viewing FTP clients
Tip: This function can also be performed using the NMC API. For details, see NMC API.
To view FTP/SFTP clients, follow these steps:
Click Filers, then click FTP in the left-hand column. The Filer FTP Clients page displays a list of managed Nasuni Edge Appliances.
.png?sv=2026-02-06&spr=https&st=2026-08-01T14%3A42%3A53Z&se=2026-08-01T16%3A53%3A53Z&sr=c&sp=r&sig=tK%2BrHKWGxphG9lWQnZlXuuxqOk%2FqRG34LTIjawcLOcU%3D)
Figure 8-74: Filer FTP Clients page.
The following information appears for each managed Nasuni Edge Appliance:
Filtering the Display
Using the Filter text box, you can limit the display to items that match the criteria that you enter. See “Filtering Displays” for details. On this screen, the following field names are available:
filer: Matches values in the Filer field.
protocol: Matches values in the Protocol field.
client: Matches values in the Client field.
user: Matches values in the User field.
Disconnecting FTP clients
To disconnect FTP/SFTP clients, follow these steps:
Click Filers, then click FTP in the left-hand column. The Filer FTP Clients page displays a list of managed Nasuni Edge Appliances.
.png?sv=2026-02-06&spr=https&st=2026-08-01T14%3A42%3A53Z&se=2026-08-01T16%3A53%3A53Z&sr=c&sp=r&sig=tK%2BrHKWGxphG9lWQnZlXuuxqOk%2FqRG34LTIjawcLOcU%3D)
Figure 8-75: Filer FTP Clients page.
For the FTP/SFTP client that you want to disconnect, click Disconnect
 . The Disconnect Client dialog box appears.
To disconnect the client, click Disconnect Client. Otherwise, click Close.
Network
You can view network settings of Nasuni Edge Appliances.
The network address configuration is initially set during installation of the Nasuni Edge Appliance. However, you can change network settings as required, with the Nasuni Edge Appliance user interface.
Important: Edge Appliances and the NMC must be configured with operational DNS servers and a time server (internal or external) within your environment.
Viewing network settings
To view network settings, follow these steps:
Click Filers, then click Network Settings in the left-hand column. The Filer Network Settings page displays a list of managed Nasuni Edge Appliances.
.png?sv=2026-02-06&spr=https&st=2026-08-01T14%3A42%3A53Z&se=2026-08-01T16%3A53%3A53Z&sr=c&sp=r&sig=tK%2BrHKWGxphG9lWQnZlXuuxqOk%2FqRG34LTIjawcLOcU%3D)
Figure 8-76: Filer Network Settings page.
The following information appears for each managed Nasuni Edge Appliance:
IP Addresses: The IP addresses of the Nasuni Edge Appliance. Clicking the link opens a new window with the Nasuni Edge Appliance user interface.
Default Gateway: The IP address of the default gateway of the Nasuni Edge Appliance.
DNS Servers: The IP addresses of the DNS servers of the Nasuni Edge Appliance.
Search Domains: The search domains for the Nasuni Edge Appliance.
Details: Additional information about the network, including the following:
Network: Number of groups and number of NICs (network interface cards). Clicking Group or NIC opens the Network Details box.
Firewall: Link to the Firewall Settings dialog box.
Proxy: Whether an HTTPS proxy server is enabled: Enabled or Disabled.
For the selected Nasuni Edge Appliance, in the Details column, click Group or NIC to open the Network Details dialog box.
.png?sv=2026-02-06&spr=https&st=2026-08-01T14%3A42%3A53Z&se=2026-08-01T16%3A53%3A53Z&sr=c&sp=r&sig=tK%2BrHKWGxphG9lWQnZlXuuxqOk%2FqRG34LTIjawcLOcU%3D)
Figure 8-77: Network Details dialog box.
The following information appears for each traffic group:
IP Address: The IP address in IPv4 (Internet Protocol version 4) dotted decimal format. For Azure-based and EC2-based Nasuni Edge Appliances, this is the Internal IP Address. If you're running other machines on the EC2 or Azure platforms, you can communicate using the Internal IP Address instead of the publicly accessible address.
MTU: The MTU (maximum transmission unit) value indicates the maximum size of each block of information that can be sent without the data becoming fragmented.
The following information appears for each physical port:
MAC Address: Media Access Control address (MAC address) of the port.
Note: MAC addresses might not display as expected. The MAC address of the bonding device is taken from its first secondary device. This MAC address is then passed to all following secondary devices, and persists, even if the first secondary device is removed, until the bonding device is brought down or reconfigured.
Carrier: Indicates whether the network interface card (NIC) senses a carrier signal on the Ethernet cable: yes or no.
Duplex: Type of duplex.
Click Close to close the dialog box.
For the selected Nasuni Edge Appliance, in the Details column, click View Details link to open the Firewall Settings dialog box.
.png?sv=2026-02-06&spr=https&st=2026-08-01T14%3A42%3A53Z&se=2026-08-01T16%3A53%3A53Z&sr=c&sp=r&sig=tK%2BrHKWGxphG9lWQnZlXuuxqOk%2FqRG34LTIjawcLOcU%3D)
Figure 8-78: Firewall Settings dialog box.
The following information appears:
Allowed GUI Hosts: A list of IP addresses or subnet addresses of hosts that you permit to access your Nasuni Edge Appliance user interface. If any host can access your Nasuni Edge Appliance user interface, the label “Any Host” appears.
Allowed SSH Hosts: A list of IP addresses or subnet addresses of hosts that you permit to access your Nasuni Edge Appliance’s Support SSH port. If any host can access your Nasuni Edge Appliance’s Support SSH port, the label “Any Host” appears.
Pending Updates
You can view pending updates to Nasuni Edge Appliances. You can acknowledge warnings about pending updates.
Tip: If there are errors in adding cloud credentials, an error status shows for the “Add New Credentials” item on the “Outstanding Settings Updates to Filers” page. You can acknowledge the error, and try entering the credentials again. See “Adding or editing cloud credentials”.
Viewing pending updates
To view pending updates, follow these steps:
Click Filers, then click Pending Updates in the left-hand column. The Outstanding Settings Updates to Filers page displays a list of pending updates.
.png?sv=2026-02-06&spr=https&st=2026-08-01T14%3A42%3A53Z&se=2026-08-01T16%3A53%3A53Z&sr=c&sp=r&sig=tK%2BrHKWGxphG9lWQnZlXuuxqOk%2FqRG34LTIjawcLOcU%3D)
Figure 8-79: Outstanding Settings Updates to Filers page.
The following information appears for each pending update:
Setting Change: The setting whose change is pending.
Filer: The name of the Nasuni Edge Appliance where this change is pending.
Initiated By: The user who initiated this pending change.
Sent Time: The date and time when the change was initiated.
Status: The status of the pending update. If there is a problem with the attempted action, a caution symbol
 appears. Hover the mouse over the symbol for more information.
Acknowledging pending updates
To acknowledge pending updates, follow these steps:
On the Outstanding Settings Updates Filers page, for the pending update you want to acknowledge, hover the mouse over the Status symbol. A message appears.
.png?sv=2026-02-06&spr=https&st=2026-08-01T14%3A42%3A53Z&se=2026-08-01T16%3A53%3A53Z&sr=c&sp=r&sig=tK%2BrHKWGxphG9lWQnZlXuuxqOk%2FqRG34LTIjawcLOcU%3D)
Figure 8-80: Sample message.
To acknowledge the message and remove the pending update from the list, click Acknowledge. The pending update is removed from the list.
Alternatively, to exit the message without acknowledging the message or removing the pending update, move the mouse away from the Status symbol. The message no longer appears.
Platform Settings
You can view the status and settings of Nasuni Edge Appliances running on virtual machines as well as Nasuni Edge Appliance hardware appliance.
Tip: Nasuni monitors platform-specific limits on the number of supported concurrent connections. When the number of concurrent connections reaches the “soft limit” for an Edge Appliance, you receive a notification of how many connections remain, and a suggestion to reduce the number of connections for that Edge Appliance, if possible. When the number of concurrent connections reaches the “hard limit” for an Edge Appliance, you receive a notification, and all new connections are denied for that Edge Appliance until the number of connections decreases below the “hard limit” again.
Platform | Soft Limit | Hard Limit |
|---|---|---|
N1040 | 3000 connections | 4000 connections |
N1050 | 3000 connections | 4000 connections |
N2040 | 5000 connections | 6000 connections |
N2050 | 5000 connections | 6000 connections |
N4040 | 8000 connections | 10000 connections |
N4050 | 8000 connections | 10000 connections |
Viewing hardware and virtual machine information
To view hardware and platform information, follow these steps:
Click Filers, then click Platform in the left-hand column. The Filer Platform Details page displays a list of managed Nasuni Edge Appliances.
.png?sv=2026-02-06&spr=https&st=2026-08-01T14%3A42%3A53Z&se=2026-08-01T16%3A53%3A53Z&sr=c&sp=r&sig=tK%2BrHKWGxphG9lWQnZlXuuxqOk%2FqRG34LTIjawcLOcU%3D)
Figure 8-81: Filer Platform Details page.
The following information appears for each managed Nasuni Edge Appliance on a virtual platform:
Platform: The virtual or hardware platform of the Nasuni Edge Appliance, such as Nutanix AHV, Microsoft Hyper-V, VMware, or NF-200.
CPU Model: The specific model of CPU.
HW Serial (for Nasuni Edge Appliance hardware appliances only): The serial number of the hardware appliance.
BIOS Firmware (for Nasuni Edge Appliance hardware appliances only): The version number of the BIOS firmware.
Tip: You can update the firmware of Nasuni Edge Appliance hardware appliances using commands from the Service menu of the console for the Nasuni Edge Appliance.
BMC Firmware (for Nasuni Edge Appliance hardware appliances only): The version number of the hardware appliance’s BMC (baseboard management controller) firmware.
Tip: You can update the firmware of Nasuni Edge Appliance hardware appliances using commands from the Service menu of the console for the Nasuni Edge Appliance.
Note: When you update the iDRAC (BMC) firmware, the old iDRAC (BMC) version might still be displayed on the Nasuni Console, on the Edge Appliance UI, and on the NMC. It is possible, but not necessary, to force the correct version to display by rebooting the Edge Appliance. The iDRAC UI always shows the correct version.
Note: Nasuni Edge Appliances and the NMC display the size of data in base 10 units (including MB = 1,000,000 bytes, GB = 1,000,000,000 bytes, and TB = 1,000,000,000,000 bytes).
In contrast, some platforms display the size of data in base 2 units (including MB = 1,048,576 bytes, GB = 1,073,741,824 bytes, and TB = 1,099,511,627,776 bytes).
For example, a file that Nasuni displays as 10 MB would be displayed by some platforms as 9.53 MB.
Cache: The size of the local cache.
Note: Nasuni’s display of size might differ from other indications of size, such as Windows Explorer and other utilities. Typically, such utilities display only the size of the data currently present in the local cache, while Nasuni displays the full size, regardless of where the data is.
Sensors (for Nasuni Edge Appliance hardware appliances only): Sensor information for the platform.
Power Supplies: The status of the power supplies. If the status is Alert, you should investigate the situation.
Ambient Temp (for Nasuni Edge Appliance hardware appliances only): The ambient temperature in Celsius and Fahrenheit.
Exhaust Temp (for Nasuni Edge Appliance hardware appliances only): The exhaust temperature in Celsius and Fahrenheit.
Inlet Temp (for Nasuni Edge Appliance hardware appliances only): The inlet temperature in Celsius and Fahrenheit.
RAID (for Nasuni Edge Appliance hardware appliances only): RAID information for Nasuni Edge Appliance hardware appliances only.
Battery: Status of the battery for the RAID array. If the status is Alert, you should investigate the situation.
Arrays: Number of RAID arrays and status of the RAID arrays. If the status is Alert, you should investigate the situation.
Disks: Number of disks and status of the disks. If the status is Alert, you should investigate the situation.
If you click the Disks display, the Raid Disks dialog box displays all the disks in the RAID array, with the status of each disk.
.png?sv=2026-02-06&spr=https&st=2026-08-01T14%3A42%3A53Z&se=2026-08-01T16%3A53%3A53Z&sr=c&sp=r&sig=tK%2BrHKWGxphG9lWQnZlXuuxqOk%2FqRG34LTIjawcLOcU%3D)
Figure 8-82: Raid Disks dialog box.
Firmware: The version number of the hardware appliance’s RAID firmware.
Tip: You can update the firmware of Nasuni Edge Appliance hardware appliances using commands from the Service menu of the console for the Nasuni Edge Appliance.
FDE: If Full Disk Encryption is enabled in the client license for a Nasuni Edge Appliance, the status of Full Disk Encryption appears: Enabled or Not Enabled.
Security Settings
You can view security settings for Nasuni Edge Appliances.
The Security mode controls who can access SMB (CIFS) files and folders that the Nasuni Edge Appliance is managing.
The following security modes are available:
Publicly Available: (Default) The Publicly Available mode gives access to SMB (CIFS) shares to all network users. You can configure write access and specific client access.
Active Directory: Active Directory provides a connection to an existing Windows Active Directory server, so you can control SMB (CIFS) share access based on the users and groups that an Active Directory server manages.
Important: It is not supported for users in the Active Directory Protected Users security group to log in to the NMC.
Important: You cannot use Active Directory passwords longer than 127 characters to log in to the NMC.
Note: Limits on domains, groups, users, objects, and other items are the same as the limits of Active Directory. See Active Directory Maximum Limits - Scalability for details.
LDAP Directory Services: LDAP Directory Services provides authentication using LDAP domains and Kerberos security.
Important: You cannot enable both Active Directory and LDAP Directory Services for a Nasuni Edge Appliance.
Tip: For detailed procedures for LDAP with Apple OpenDirectory, Oracle Enterprise Directory Server (Oracle DS), and FreeIPA, see the LDAP Best Practices Guide.
See Worksheet for a worksheet for planning configurations.
Viewing security settings
To view security settings, follow these steps:
Click Filers, then click Security Settings in the left-hand column. The Filer Security Settings page displays a list of managed Nasuni Edge Appliances.
.png?sv=2026-02-06&spr=https&st=2026-08-01T14%3A42%3A53Z&se=2026-08-01T16%3A53%3A53Z&sr=c&sp=r&sig=tK%2BrHKWGxphG9lWQnZlXuuxqOk%2FqRG34LTIjawcLOcU%3D)
Figure 8-83: Filer Security Settings page.
The following information appears for each managed Nasuni Edge Appliance:
Description: The description of the Nasuni Edge Appliance. You can change the description, as detailed in “Nasuni Edge Appliance Description”.
Security Mode: The security mode of the Nasuni Edge Appliance: Active Directory, LDAP Directory Services, Publicly Available, or Unknown.
Source Domains (Active Directory or LDAP Directory Services only): The source domains for Active Directory or LDAP Directory Services.
NT Name (Active Directory only): The NT Name of the Active Directory domain.
Enabled (Active Directory only): Whether the Active Directory domain is enabled: Yes (is enabled) or No (is not enabled).
Provider (LDAP Directory Services only): The Directory Services Provider that matches your LDAP and Kerberos servers, such as FreeIPA, Generic LDAP/Kerberos, or Apple OpenDirectory.
LDAP Servers (LDAP Directory Services only): The IP addresses or hostnames of the LDAP servers for the Nasuni Edge Appliance to connect to.
KDCs (LDAP Directory Services only): The IP addresses or hostnames of the Kerberos Key Distribution Center (KDC) servers for the Nasuni Edge Appliance to connect to.
Currently joined: Whether the Nasuni Edge Appliance is currently joined to the Active Directory or LDAP Directory Services primary domain: Yes (is joined) or No (is not joined).
Shared Link Status
You can view the status of shared links.
A shared link is a secure, signed URL that points to a specific file or folder within Web Access. This can be useful for providing a trusted partner or contractor with secure access to a folder or file that they do not have credentials to access directly. For more details on shared links, see “Shared Links”.
You can control how long until the shared link expires, whether a password is required, and who is allowed to create shared links. To enable and configure shared links within Web Access, see “Web Access Settings”.
Tip: If the creator of a shared link no longer has access to the file or directory that is the object of the shared link, then that shared link is no longer displayed in Web Access for that creator. The shared link is still visible on the Edge Appliance (on the Shared Links page, if you log in with appropriate privileges) and on the NMC (on the Filer Shared Links page, if you log in with appropriate privileges).
Important: Existing shared links are not affected by changes to the shared link settings, or by changes to the permissions of the user who created the link. In particular, if a user creates a shared link, and later that user’s permissions change so that they can no longer create shared links, the shared link they created is not affected.
Viewing shared links
To view shared links, follow these steps:
Click Filers, then click Shared Links in the left-hand column. The Filer Shared Links page displays a list of shared links for managed Nasuni Edge Appliances.
.png?sv=2026-02-06&spr=https&st=2026-08-01T14%3A42%3A53Z&se=2026-08-01T16%3A53%3A53Z&sr=c&sp=r&sig=tK%2BrHKWGxphG9lWQnZlXuuxqOk%2FqRG34LTIjawcLOcU%3D)
Figure 8-84: Filer Shared Links page.
The following information appears for each shared link:
Filer: The name of the Nasuni Edge Appliance.
Path: The path that the shared link refers to on the volume on the Nasuni Edge Appliance.
Key: The key that signs the URL of the shared link.
Share: The SMB (CIFS) share that the shared link refers to.
Type: The type of item that the shared link refers to, such as File or Directory.
Create Time: The date and time that the shared link was created.
Expires: The date and time that the shared link expires on. You can change this using Web Access.
Writable: For a directory, indicates whether the shared link permits writing data to the directory: Yes or No. You can change this by editing the SMB (CIFS) share.
Password Protected: Indicates whether a password must be entered to use the shared link: Yes or No. You can change this by editing the SMB (CIFS) share.
Links: If Shared Link Global User is enabled, a link to the shared link is available.
Deleting shared links
Deleting a shared link ends access using that shared link immediately. You can delete a shared link at any time.
To delete shared links, follow these steps:
On the Filer Shared Links page, select the shared links that you want to delete.
Click Delete
 . The Delete Shared Links dialog box appears.
Click Delete Shared Links. The selected shared links are deleted. The list of shared links changes on the Filer Shared Links page.
Alternatively, to exit the dialog box without deleting shared links, click Close.
State Management
You can shut down and reboot Nasuni Edge Appliances.
When you shut down the Nasuni Edge Appliance, all users are disconnected from the system, and data is not accessible during the shutdown process. You can choose to shut down the Nasuni Edge Appliance immediately, or to perform a snapshot before shutting down.
Caution: If running the Nasuni Edge Appliance on a virtual machine, always shut down the Nasuni Edge Appliance before shutting down the virtual machine.
Tip: Consider performing a snapshot before shutting down the Nasuni Edge Appliance.
Note: When a reboot is requested, a notification is logged that the reboot was requested and by whom the reboot was requested.
Shutdown or Reboot
To shut down or reboot a Nasuni Edge Appliance, follow these steps:
Click Filers, then select State Management from the menu. The State Management page displays a list of managed Nasuni Edge Appliances.
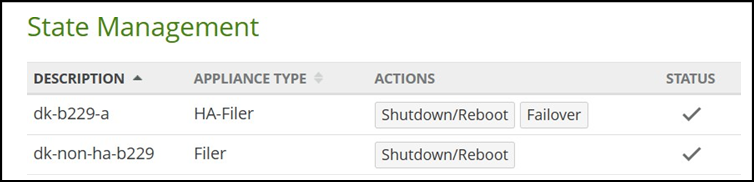
Figure 8-89: State Management page.
The following information appears for each Nasuni Edge Appliance in the list:
Description: The description of the Nasuni Edge Appliance. You can change the description, as detailed in “Nasuni Edge Appliance Description”.
Actions: Actions available for each Nasuni Edge Appliance, including Shutdown and Reboot.
Click Shutdown/Reboot. The Initiate Shutdown/Reboot dialog box appears.
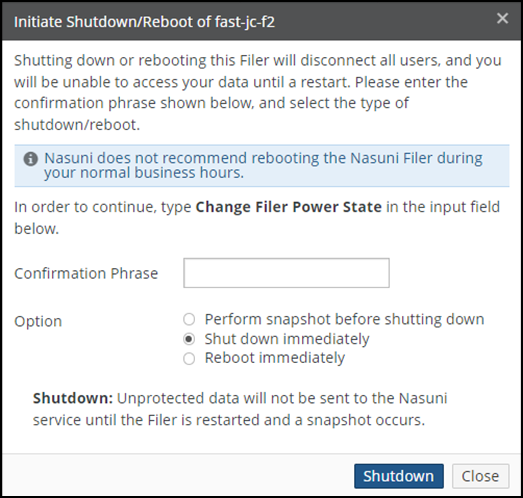
Figure 8-90: Initiate Shutdown/Reboot dialog box.
In the Confirmation Phrase text box, type ‘Change Filer Power State’.
Select one of the following options:
Perform snapshot before shutting down: Performs a snapshot before shutting down. This ensures that data is fully protected in cloud object storage before shutting down. However, this process can take considerable time, depending on the size of the cache and the amount of changed and new data in the cache.
Note: With each Nasuni snapshot, configuration information is included, in case it is necessary to recover the Edge Appliance. The configuration information includes volume name, volume GUID, share type, software version, last pushed version, retention type, and permissions policy. The configuration bundle is encrypted in the same way that all the customer data is encrypted.
If you receive an alert that such backup configurations have failed, this might be due to intermittent network issues, or possibly due to DNS issues. If you see notifications that the Edge Appliance has successfully completed a snapshot after the backup alert, then you can safely ignore the alert.
Tip: On the Microsoft Azure virtual platform, virtual machines that have been shut down continue to incur compute charges. To avoid these charges, use the Azure Management Portal at
https://portal.azure.com/ to stop or delete the virtual machines.
Shut down immediately: (Default) Shuts down the Nasuni Edge Appliance without performing a snapshot. Data that has not already been captured by a snapshot is not protected in cloud object storage. However, data in the cache is not lost. A message notifies you that the system is shutting down. If you change your mind, you have 60 seconds to cancel the shutdown.
Tip: On the Microsoft Azure virtual platform, virtual machines that have been shut down continue to incur compute charges. To avoid these charges, use the Azure Management Portal at https://portal.azure.com/ to stop or delete the virtual machines.
Reboot immediately: Reboots the Nasuni Edge Appliance without performing a snapshot.
Click Shutdown. The selected Nasuni Edge Appliances shut down or reboot, as specified.
Alternatively, to exit the dialog box without shutdown or reboot, click Close.
Software Updates
You can view the currently available Nasuni Edge Appliance software updates, and update the software.
When a newer version of the Nasuni Edge Appliance software is available for installation, you can update the software from the Nasuni Management Console. When you update your software, your Nasuni Edge Appliance is updated to the newer version.
Warning: Do not attempt to restore from a virtual machine snapshot or backup.
Caution: Do not power off or reboot during a software update.
Caution: Do not reboot or power off the appliance during the first boot. After the first boot completes, you may reboot or power off the appliance as needed.
Important: The version of the Nasuni Management Console must support the version of the Nasuni Edge Appliance that the Nasuni Management Console is to manage. If a Nasuni Edge Appliance is joined to a Nasuni Management Console, update the Nasuni Management Console software before updating the Nasuni Edge Appliance software.
For details, see “NMC version.
Caution: Updating the software disconnects all users currently using the Nasuni Edge Appliance. The system can take several minutes to reboot. The time to reboot can be longer if one-time upgrade operations are necessary.
Note: Nasuni does not recommend applying software updates during your normal business hours, because this can disrupt access. Apply software updates at night or on weekends.
Tip: If updating the Edge Appliance software from a version before 9.0 to version 9.0 and later, for NFS volumes and multiple protocol (SMB (CIFS) and NFS) volumes that are using the Advanced mode of Global File Lock, change the mode of Global File Lock before performing the update. NFS volumes and multiple protocol (SMB (CIFS) and NFS) volumes do not support the Advanced mode of Global File Lock for version 9.0 and later.
Tip: Review the release notes of all releases between your current release and the most recent release. See “Viewing the Nasuni Management Console Release Notes” for details.
You can also view Release Notes in Release Notes Guide.
Tip: You can configure the Nasuni Edge Appliance to apply updates automatically. For details, see “Automatic Software Updates”.
Tip: Updating the Edge Appliance version from 9.9.5 or 9.10.2 or earlier to 9.12 includes automatically migrating to a new and more efficient volume schema. For this reason, expect the reboot of the Edge Appliance after the 9.12 update to take longer than usual. The duration depends on the number of volumes and the size of the volume databases. The splash screen on the appliance console displays a message indicating that the update is in progress and that you should avoid rebooting or removing power.
Tip: As part of the 9.12 release, a pre-update check has been added to verify enough free available cache space to initiate the update successfully. Therefore, you might receive a warning message when trying to update to 9.12.
Viewing Nasuni Edge Appliance software updates
To view Nasuni Edge Appliance software updates, follow these steps:
Click Filers, then click Software Updates in the left-hand column. The Filer Software Updates page displays a list of managed Nasuni Edge Appliances.

The following information appears for each Nasuni Edge Appliance in the list:
Description: The description of the Nasuni Edge Appliance. You can change the description, as detailed in “Nasuni Edge Appliance Description”.
Current Version: The current version of the software running on the Nasuni Edge Appliance. If an update is available, the label “Update Available” appears.
Available Version: The highest currently available version of the Nasuni Edge Appliance software. If the highest currently available version of the Nasuni Edge Appliance software is already running on the Nasuni Edge Appliance, the label “No updates available” appears.
Non-Disruptive: Indicates whether the update would be non-disruptive to client traffic. Possible values include the following:
Yes: Indicates that the update would be non-disruptive to client traffic.
No: Indicates that the update would not be non-disruptive to client traffic. That is, the update would be disruptive to client traffic.
To force a check for available software updates, click Check for Updates. A check for updates is done for all Nasuni Edge Appliances in the list.
Updating Nasuni Edge Appliance software
Warning: Do not attempt to restore from a virtual machine snapshot or backup.
Important: The version of the Nasuni Management Console must support the version of the Nasuni Edge Appliance that the Nasuni Management Console is to manage. If a Nasuni Edge Appliance is joined to a Nasuni Management Console, update the Nasuni Management Console software before updating the Nasuni Edge Appliance software.
For details, see “NMC version”.
Tip: If updating the Edge Appliance software from a version before 9.0 to version 9.0 and later, for NFS volumes and multiple protocol (SMB (CIFS) and NFS) volumes that are using the Advanced mode of Global File Lock, change the mode of Global File Lock before performing the update. NFS volumes and multiple protocol (SMB (CIFS) and NFS) volumes do not support the Advanced mode of Global File Lock for version 9.0 and later.
To update the Nasuni Edge Appliance software, follow these steps:
On the Filer Software Updates page, select the Nasuni Edge Appliances in the list whose software you want to update.
Click Update Filers. The Update Filer dialog box appears.
.png?sv=2026-02-06&spr=https&st=2026-08-01T14%3A42%3A53Z&se=2026-08-01T16%3A53%3A53Z&sr=c&sp=r&sig=tK%2BrHKWGxphG9lWQnZlXuuxqOk%2FqRG34LTIjawcLOcU%3D)
Figure 8-88: Update Filer dialog box.
Update Filerin the Confirmation Phrase text field.Click Update Filer.
Caution: Do not power off or reboot during a software update.
The software on the selected Nasuni Edge Appliances is updated. The Nasuni Edge Appliances appear in the list on the Filer Software Updates page.
Alternatively, to exit the dialog box without updating the software, click Close.
System Alerts
You can configure Nasuni Edge Appliances to issue alerts for the following conditions:
For Edge Appliances before version 8.8: CPU usage exceeds a specified threshold for more than a specified time.
Note: For Edge Appliances at version 8.8 or later, CPU status is part of “Health Monitor”.
For Edge Appliances before version 8.8: Memory usage exceeds a specified threshold for more than a specified time.
Note: For Edge Appliances at version 8.8 or later, memory status is part of “Health Monitor” <>.
To view charts of CPU activity and memory usage, see “CPU Activity” and “Memory Usage”.
To configure alerts, follow these steps:
Click Filers, then select System Alerts from the list on the left-hand side. The Filer System Alerts page displays a list of managed Nasuni Edge Appliances.
.png?sv=2026-02-06&spr=https&st=2026-08-01T14%3A42%3A53Z&se=2026-08-01T16%3A53%3A53Z&sr=c&sp=r&sig=tK%2BrHKWGxphG9lWQnZlXuuxqOk%2FqRG34LTIjawcLOcU%3D)
Figure 8-89: Filer System Alerts page.
The following information appears for each Nasuni Edge Appliance in the list:
On the Filer System Alerts page, select the Nasuni Edge Appliances in the list whose alerts you want to configure.
Click Edit Items. The System Alerts dialog box appears.
.png?sv=2026-02-06&spr=https&st=2026-08-01T14%3A42%3A53Z&se=2026-08-01T16%3A53%3A53Z&sr=c&sp=r&sig=tK%2BrHKWGxphG9lWQnZlXuuxqOk%2FqRG34LTIjawcLOcU%3D)
Figure 8-90: System Alerts dialog box.
To copy the System Alerts settings from a Nasuni Edge Appliance, select the Nasuni Edge Appliance from the Copy Settings drop-down list. The System Alerts settings of the selected Nasuni Edge Appliance appear in the dialog box.
To set a snapshot alert, set the Enabled switch to On. Enter a Duration, in days. The alarm is issued if the volume has no snapshots for the specified Duration.
Click Save Alerts.
SSL Certificates
You can view information about SSL certificates.
By default, the Nasuni Edge Appliance is preloaded with a self-signed SSL certificate that is unique to the Nasuni Edge Appliance.
You can also use other SSL certificates to manage the Nasuni Edge Appliance.
Caution: Because all connections are authenticated, SSL inspection or decryption is not supported.
Tip: For managing SSL certificates for Nasuni Edge Appliances, you must use the Nasuni Edge Appliance UI. For details, see the “SSL Server and Client Certificates” section of the Configuration Page chapter of the Edge Appliance Administration Guide for instructions on how to perform these tasks:
View SSL CA-signed server certificates or self-signed server certificates.
Generate SSL CA-signed server certificates and self-signed server certificates.
Copy existing SSL server certificates.
Upload SSL server certificates.
Replace SSL server certificates and SSL server certificate chains.
Set SSL server certificates.
Download or save an SSL server certificate.
Delete SSL server certificates or certificate requests.
Reset an SSL certificate.
View SSL client certificates.
Upload SSL client certificates.
Delete SSL client certificates.
Note: If something ever goes wrong with the certificates and you are unable to access the Nasuni Edge Appliance user interface, use the service menu console on your hardware appliance or virtual machine to enter the
resetguicertcommand to reset the certificate to the default self-signed certificate.
Viewing SSL certificate information
To view SSL certificate information, follow these steps:
Click Filers, then click SSL Certificates in the left-hand column. The SSL Certificates page displays a list of managed Nasuni Edge Appliances.
.png?sv=2026-02-06&spr=https&st=2026-08-01T14%3A42%3A53Z&se=2026-08-01T16%3A53%3A53Z&sr=c&sp=r&sig=tK%2BrHKWGxphG9lWQnZlXuuxqOk%2FqRG34LTIjawcLOcU%3D)
Figure 8-91: SSL Certificates page.
The following information appears for each managed Nasuni Edge Appliance:
Description: The description of the Nasuni Edge Appliance. You can change the description, as detailed in “Nasuni Edge Appliance Description”.
SSL Certificates: A list of the SSL certificates of the Nasuni Edge Appliance. Each SSL certificate is labeled either “Currently in use by the Filer web-based user interface.” or “Can be enabled for use by the Filer web-based user interface.”.